• The move to the new server is done. There are some software and database maintenance updates in process. This has us passing the hat around to help out. We appreciate any donations. Seriously, even a dollar helps. The payment page may be found here - https://www.audiokarma.org/support.html

The Advent Loudspeaker project

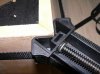
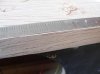
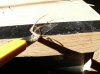
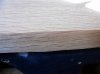
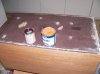
After reglueing all the corners and using clamps to hold them togather and then with wood filly putty and some sanding I am now ready to start putting some wood veneer on the speakers in place of the original plastic verneer. Here a "before and after picture of the worst corner" wich turned out pretty good, the first side (bottom), that I will be putting verneer on. (being that I have never done this before the bottom sounds like a good place to practice) I will do here in the comming hour.
 

Attachments

  • corner10.jpg
    corner10.jpg
    26.7 KB · Views: 89
  • cornerclamp.jpg
    cornerclamp.jpg
    42.1 KB · Views: 93
  • corner11.jpg
    corner11.jpg
    33.2 KB · Views: 97
Wow, you're doing some very interesting work there Visiman. I'm getting some good ideas from you. Please keep this restoration thread going.
 
Thanks Isotonic ;-)

@ Sir.Byrd, Yea I thought of that too. And yes it would look nice. I am to have to get the sides and fronts finished first and then see. The veneering is a real painstaking process :tears: I'm just glad that the weather is not good! gives me more time in the workroom!
 
Light at the end of the tunnel!!!!!!!!!!!!!!!

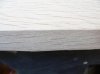
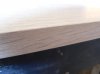
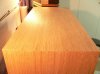
After a week of rainy days, and a lot of "hurry up and waite" I must say that I am really, really (almost enough to cry) with the results of the new wood veneer that I have been putting on the advents.

After filling in a few splits in the veneer with a "wood kit" and put some fine sandpaper on the "Festo", I must say that I fell in love! .......................
I just looked over my shoulder at them. :-) Pretty things that they have become! Unreal! Oh man,Oh man.. (****, I keep looking at them!) The hard work has reall paid for itself. And my wife (believe it or not, Likes em!) Ha, Ha Ha! And for those who have followed this thread from the beginning, These are going to be great when they are finished! It is too bad that I will be giving them to my best friend (previous posts) because I really like the outcome.
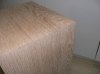
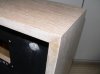
The fronts will be the hardest and cost even more time.

Here are a few of the latest pictures!!!!!!
 

Attachments

  • adventveneer.jpg
    adventveneer.jpg
    28.4 KB · Views: 104
  • topside.jpg
    topside.jpg
    34.5 KB · Views: 67
  • cornerveneer.jpg
    cornerveneer.jpg
    30.8 KB · Views: 78
  • Leftveneer.jpg
    Leftveneer.jpg
    50.4 KB · Views: 80
finished veneer

@shacky Thanks! I never thought that they would turn out so good.

Well it's now with ten hours of work on the fronts the veneer is finished :D
Now I ca start on the finish, the front insides, and the backs. First I cut oversized strips cut the 45° angles and started with the glueing. Like the sides, after everything was dry I ironed them on. While I was waiting for the first to cool down I cut the strips for the second speaker. Then you can see what I had to work with! After a lot of cutting using a metal linial and ran over it with 80 grit paper the rough part was done, and then did the inner side. This Eight times! The pictures show it step for step. This whole project has been like an addictive drug and I haven't been able to slow down.

Tonight I am going to apply clear liquid wax on the inner sides of the fronts so I can start on the front sides.
 

Attachments

  • Fronts5.jpg
    Fronts5.jpg
    28 KB · Views: 63
  • Fronts4.jpg
    Fronts4.jpg
    30.6 KB · Views: 69
  • Fronts3.jpg
    Fronts3.jpg
    38.8 KB · Views: 94
  • Fronts2.jpg
    Fronts2.jpg
    31.3 KB · Views: 68
  • Fronts1.jpg
    Fronts1.jpg
    57.2 KB · Views: 96
finished veneer 2

Hereare the last two pictures!
 

Attachments

  • Fronts6.jpg
    Fronts6.jpg
    18 KB · Views: 71
  • Fronts7.jpg
    Fronts7.jpg
    38.9 KB · Views: 107
Jeff, that looks really great. I will be following in your footsteps soon with my own Advents. Thanks for the tutorial with pictures.

Are you going to rebuild the crossovers? the reason I ask is that it looks like one of them is beginning to fall apart. I see something hanging down in one of the boxes.
 
@petromalt

You noticed the "dingleberry" hanging in the speaker :D

Yes I was going to change the crossover too! Just haven't gotten that far yet. I also read that the original foam inside the speakers should come out and a different filling would also make them sound better. (not that they sound bad) The old foam blocks smell like an old house. The inside of the cabinet did too! Before I did the veneer work I let an inscence burn inside and that coveres up the smell.

Yesterday I got a Sansui G-3500 and a B&O turntable for 150$ :banana:

Now I have something to work on this winter!!
 
Last edited:
Those look awesome! Maybe with the nice stainless steel surrounds and the nice new veneer finish you should consider going a step further and do a ....WAVEGUIDE! :yes:
 
Wax

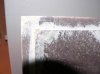
Today I waxed the speakers two times with the water resistant breathable liquid wax from "Pigrol,( Edel wachs)" Sanded between the two coats and still have to sand again and another coat etc.. (It all depends on the finish I want.) With every coat and every sanding the surface just gets better.

This is the first time that I did a veneering prject like this (In fact I never veneered anything) but, Have worked with wood an find that this wax is really super! The gloss shine will go away when it is completely dryafter a week or two) to a semi-gloss and is really nice to the touch. Static-free, and natural. The best thing about the wax is that it dries fast, leaves no fingerprints, and is water resistant. (But I would not recomend placing plants on the speakers :butt1: )

I am now just waiting between coats, and sanding. (actually the sanding is just to take the wax off of the higher elevations and will slowly fill in the lower cavities. If I did not sand the surface would not end up being so smooth. Well, here is the latest pictures.

It is going to be hard parting with these, When my wife checks the progress out and runs her hand across the smooth surface I can tell that she likes them too!!

*** The white balance on the second picture shows more of an orange tone. the WB is correct on the first pic!!
 

Attachments

  • wax2.jpg
    wax2.jpg
    33.1 KB · Views: 99
  • Wax1.jpg
    Wax1.jpg
    48.6 KB · Views: 76
Last edited:
The first front is finished and it is time to paint the backs. I wanted to keep the dark brown but after deciding to leave the cabinets natural oak I am going with a "Muskat" color. (The color in the picture is not really the same) If I don't like it I can always go darker.

Well, Lets see!!
 

Attachments

  • black1.jpg
    black1.jpg
    34.7 KB · Views: 46
  • black2.jpg
    black2.jpg
    29.4 KB · Views: 38
  • muskat.jpg
    muskat.jpg
    38.4 KB · Views: 60
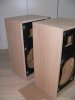
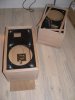
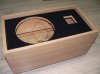
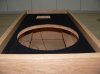
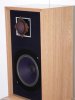
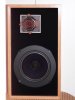
While waiting for the paint on the back to dry I couldn't help myself and had to put the speakers in just to see how they will look :D

Hmmm, should I leave the white foam behind the "fried egg"??

And I decided to color the rings flat black.

Now I have to get some new filling for the cabinets, look into a new crossover, and make some new front grills. And this time they won't be made out of aluminum! :D

So far, 30$ for the veneer, 26$ for the Re-foam kit, and about another 25$ for glue, paint, etc.. About an 85 buck make-over (so far)
 

Attachments

  • advent1.jpg
    advent1.jpg
    50.5 KB · Views: 88
  • advent2.jpg
    advent2.jpg
    44 KB · Views: 105
Totally fantastic work!

I have to agree with Mark and say the next step is e-waving them and you'll have true lifetime speakers both looks and sound wise.
 
I checked out the waveguide thread and have to say after everything I have been through I will have to waite on the waveguide upgrade. (sorry) After all I am going to give the speakers to the friend that given me the speakers over 15 years ago :no: (If he wants them) I am sure they would fit just fine in his office. So, if the tweeters go out then they will be waveguided!!

I'tll be a while untill I get the rest of the stuff together to finish the fronts and the "stuffing" so, Thanks so far for everyone's support at AK. :thmbsp:
 
Those Advents are drop dead gorgeous! This is your first! Can't wait to see how good your next project looks :D
 
While waiting for the paint on the back to dry I couldn't help myself and had to put the speakers in just to see how they will look :D

Hmmm, should I leave the white foam behind the "fried egg"??

And I decided to color the rings flat black.

Now I have to get some new filling for the cabinets, look into a new crossover, and make some new front grills. And this time they won't be made out of aluminum! :D

So far, 30$ for the veneer, 26$ for the Re-foam kit, and about another 25$ for glue, paint, etc.. About an 85 buck make-over (so far)

Very clean looking! I am impressed. I spent almost 10x as much for veneer on my project and I think yours looks just a good as mine. Kind of makes me regret spending so much.

Truly a NICE restore of the original. A+!
 
Back
Top Bottom