• The move to the new server is done. There are some software and database maintenance updates in process. This has us passing the hat around to help out. We appreciate any donations. Seriously, even a dollar helps. The payment page may be found here - https://www.audiokarma.org/support.html

the good, the bad, and the ugly (Yet another Dahlquist DQ-10 restoration thread)

Cornholio

New favorite google query "site:audiokarma.org"
Hello to the fine folks of AK!

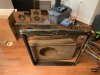
We all have our personal battles, angel on one shoulder, devil on the other, and as a man of many interests many of my own battles have been fought over whether or not I should dive into a new hobby. Today, after many years of fierce battle over whether or not to get into audiophile "stuff", the angel slept in a bit too late and the devil won, and here I find myself with a pair of well-loved, but probably also neglected, Dahlquist DQ-10s.

I am creating this thread to document what will probably be a long, and definitely expensive restoration project, and to hopefully incite the feedback, comments, encouragement, opinions, and discouragement of the wizards that roam the halls of AK. (I have spent a decent amount of time reading here, and you guys/gals actually seem really awesome, which warms my heart, hard thing to find on a very specialized internet forum these days).

Now I will start off by saying that this is my debut into the world of audiophile gear, however I am no stranger to advanced technical projects and restoration projects. I am an engineer, but I am also a maker. That, and buying these lites the fuse, of course I need to see how big of a boom it makes.

(note: I had a far more witty intro written but then accidentally clicked something and lost it all. Having said that, here are the photos, err, the good, the bad, and the ugly)

(UPDATE: scroll down a few posts to see the photos)

The good:
  • sequential serial numbers 33307/33308
  • factory mirrored
The bad:
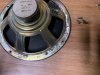
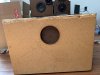
  • the woofer on the left looks a little funny, dontcha think?
  • really, really dirty
The ugly:
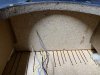
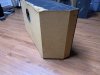
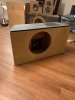
  • significant water damage to the base of the left speaker, particle board crumbling


The current plan:
  • the cabinets:
    • full teardown leaving empty cabinets
    • remove vinyl veneer from both cabinets
    • stabilize the particle board on the left and fill
    • repair any imperfections
    • ensure integrity/air tight
    • re-wrap in vinyl, possibly switch to a wood veneer?
  • replace both woofers with a matched pair
  • clean/test all other speakers/hardware
  • overhaul electronics
  • the surround:
    • full teardown
    • minor wire mesh repair/reform
    • refinish all visible wood
    • rewrap all vinyl
    • basically a full rebuild
    • replace cloth/badges
  • the back cages:
    • put on my hammering hat and reshape to spec
    • remove small rust spots
    • repaint

The system: (I know, I am missing some parts currently)
  • Turntable:
    • Technics SL-Q350
  • Speakers:
    • These DQ-10s

The photos from the bay:
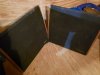
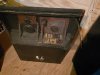
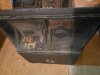
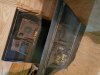
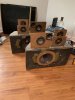
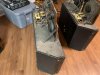
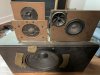
001_front.jpg 002_knob_inputs.jpg 003_back_left.jpg 004_right_back.jpg 005_both_back.jpg
PKR1HorRhf1UNy6K7
 
Last edited:
Register to hide this ad
Welcome to the forum.
Should be a fun project with a great payoff.


Speaking of losing it all...
There are many worthy threads here that had great info to pass on but are now worth little because the pics were stored off site. Now that that site is gone, the poster is no longer a member, or for some other reason the pics are no longer available to the thread.
So while there's no rule against it, offsite photos tend to disappear, to the detriment of future generations.
Just a thought.
 
i dont use the back cages
more stuff to rattle, imo

the front grille i cut openings for each driver to fire through

ductseal/mortite every inch of the hardboard baffles
that helps

you can do the same for each individual driver on the rears..esp the piezo
 
Wow...wish we could have a beer and talk about this. Why do you want make this your new hobbie? Have you been fighting off the urge your whole life and you can no longer control it? As far as I know this is not a hobbie btw, it’s a disease. Most people would rather not catch one- ask most of our wives. So before you start nurturing something make sure you know what you’re doing. If you don’t have the full blown disease this project could run out of momentum.
How did you come up with the DQ-10s? Why did you chose them to start this endeavor? Are you expecting them to be a step up from your current speakers? Which are what? What amplifier do you plan to drive them with?

Glad to have you here- want another beer?
 
Welcome to the forum.
Should be a fun project with a great payoff.


Speaking of losing it all...
There are many worthy threads here that had great info to pass on but are now worth little because the pics were stored off site. Now that that site is gone, the poster is no longer a member, or for some other reason the pics are no longer available to the thread.
So while there's no rule against it, offsite photos tend to disappear, to the detriment of future generations.
Just a thought.
Ahh, I would more than prefer to use on-site photos, I will investigate how to do this!
 
(I promise to reply to the other responses, I wanted to get these up first though)
Okay folks, in an effort to keep this thing sustainable, here are the photos of what I started with:

001_both_covers_off_before.jpeg 002_left_before.jpeg 003_covers_before.jpeg 004_cover_before.jpeg 005_side_profile_both_before.jpeg 006_right_before.jpeg 007_inside_cover_before.jpeg 008_left_up_baffs_before.jpeg 009_left_above_view_before.jpeg 010_left_fuse.jpeg

Edit: re-uploaded photos to make things neater
 
Last edited:
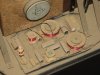
The rest of the first photos:

011_left_cross_before.jpeg 012_right_back_before.jpeg 013_left_back_before.jpeg 014_right_water_damage.jpeg

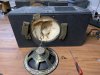
Here I disassembled the left speaker:
001_disassembled.jpeg 002_woofer_insul_removed.jpeg 003_bottom.jpeg 004_inside_cab.jpeg 005_inside_cab_panel.jpeg 006_that_other_woofer.jpeg
 
Last edited:
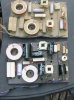
Quick update (I am currently late for a "virtual date"!) and I will be back on a bit later to respond to the other replies...

So after disassembling the left speaker (the one in the worst shape/water damaged one) I have good news!

Despite the crumbling particle board bottom, it would appear that the worst of it has not penetrated as deeply into the particle board as I had feared, and the cabinet feels, quite convincingly, like it has retained most if not all of its structural integrity. That said, I can't speak to it being airtight, as in a few spots where it is crumbly, there are protruding screw ends, with rusty tips, and I do not know where the heads of these screws are.

The inside of the cabinet also appears to have been unharmed (despite the frame of that odd woofer I pulled out showing significant corrosion). No smells, no signs of the fiberglass insulation having soaked up any significant amount of water, nothing.
 
They definitely look salvageable to me, and are quite worth the effort.

2D pics don't always show depth, but if the water damage is limited to the surface, perhaps some putty / filler material would seal it up? Others with more wood working experience will hopefully chime in with an appropriate product to do the trick.

They are one heck of a speaker when working correctly, so best of luck restoring these, and keep us posted.
 
Wow! Kudos to you to take this on. Just fyi, I have owned DQ-10's 2x in my life. The first ime was about 1980 or so and the last ime was about 5-8 years ago. The last time they were actually a stacked pair which originally came from the factory that way. It was like having 2 refrigerators in the room. My point being I know these speakers and I will most likely get critized for what I am about to say. If you have a lot of time and just enjoy a big project and challenge go for it. However if it were me I'd be looking for a different DQ-10 pair to enjoy. A whole bunch of time and maybe $200 to invest, who knows what is ahead of you? Do all the drivers actually work? And yes the one woofer is wrong. These are the roughest ones I've seen. Personally I'd rather find a really really nice pair for $350-450 and enjoy them and you'd probably get the stands for that too. Yes they either came with 4" high feet or stands about 12" high which were much preferred.

I'm sure I'll get beat up for this post but in my opinion these have been really really abused. But hey - it's just me. Sorry to throw shade on your project, you'll learn alot...
 
If you can't get the grill cloth smoothed/clean, Joann Fabrics sells a good replacement. Google Utility Fabric Black Speaker Cloth.
 
All this shade. No big deal. OP can decide what to do. I thought his plan was a bit aggressive but manageable.
If the drivers work getting woofers is easier than any other driver in the unit I expect.
For particle board, I would let it absorb very low viscosity super glue used to bond chipboard. I learned about it when a cabinet has a broken piece, still attached. Since your speakers don't have parts needing replacement the glue will just stabilize the box then the bondo thing will make them the right shape.

Those are not dirty. This is dirty:
DQ-10 dirty crossover.jpg

Dust pan and brush before more detailed cleaning. Note the original electrolytic caps throughout. Before and after:

DQ Crossover B4 and After.jpg

I like changing the grille cloth as the thinner options out there allow the light to shine through from the back showing the superstructure of the drivers on top of the box. Looks cool to me.

You can wrap the boxes with whatever you want. Feet give you the sound of an orchestra pit, stock stands and you are looking down just a bit for the performance. I had stand a bit less than 18" made and they are 'Listening Height" as a friend says. Adjustable by replacing the 3 uprights in the stand.

As to getting a different pair. The DQ-10 provides so much more sound quality than many speakers that sell for way more money either because of collectibility or rarity (there were 50,000 DQ-10s made) and this makes them a true bargain when found right. Mine aren't going anywhere, but I might drop back to one pair. They are magical with 50 watts of tube power and sound pretty good a couple dB louder with 200 watts from a sand amp.

Good Luck with the project. Keep us posted and ask if you have any questions.
 
Wow...wish we could have a beer and talk about this. Why do you want make this your new hobbie? Have you been fighting off the urge your whole life and you can no longer control it? As far as I know this is not a hobbie btw, it’s a disease. Most people would rather not catch one- ask most of our wives. So before you start nurturing something make sure you know what you’re doing. If you don’t have the full blown disease this project could run out of momentum.
How did you come up with the DQ-10s? Why did you chose them to start this endeavor? Are you expecting them to be a step up from your current speakers? Which are what? What amplifier do you plan to drive them with?

Glad to have you here- want another beer?

Well, I'm going to keep silent on the first group of questions for the most part, but I was bored and curious as to what would happen if I threw my minimalism in a cage with some gnarly old speakers and let them fight to the death...

As for the others...

I started collecting vinyl when I was 11, but have never had anything really good at all to listen on...

Are you expecting them to be a step up from your current speakers? Which are what?
I would sure hope so. My turntable is a classic technics (I'll find the model later) that has spent most of its time with me connected to a home theater surround sound system via a $20 preamp from amazon. I moved recently, and something snapped inside me, I don't have it in me to hook everything back up to that surround sound system (it's not a particularly nice system either, maybe spent $200 at best buy, it's yamaha), I know it's wrong, I've known that for a long time.

How did you come up with the DQ-10s?/Why did you chose them to start this endeavor?
Well, my first thought was I am going to need some speakers. Inspired by a nice thrift store find I had last year of some old Technics 3-ways that I gifted to a friend, and knowing that I can't buy new (because I have a problem where I have to over research every little thing, and that would have resulted in either: multiple thousands of dollars on the speakers alone OR learning how to roll my own) I decided to look for locally available used speakers. I stumbled upon a set of DQ-8s on the local CL and was immediately fascinated by their, well, weirdness. Researching the quality/pricing of the DQ-8s led me to determine that if I wanted weird old Dahlquists, the ones to have were really the DQ-10s. Further reading showed the 10s popping up on many a top X greatest/most influential speaker lists and further piqued my interest. Even further reading told me that for the used price point, even with some restoration work needed, the DQ-10s deliver some of the best value possible in terms of bang for your buck in vintage speaker world (ignoring investment/resale type things).

What amplifier do you plan to drive them with?
Well, I didn't mention this in the original post, figuring that there are hundreds of threads on this topic already, but suffice to say my system currently consists of my turntable and these speakers. The rest I need to figure out. Before someone has to ask, the answer is yes, I am aware that in order to get the most out of these inefficient beasts I almost certainly just doomed my wallet to at least a grand worth of supporting hardware, I'm more or less okay with that.

(on that note, an angry shoutout to the individual who bid-sniped that DQ-LP1 on the bay from me earlier today, I know you're on here!)
 
Updates!
So I took a stab at the water-damaged sections of particle board in the left side cabinet... I will admit the worse of the two back corners had me scared because of how deep I had to go before I hit the solid particle board underneath, but the integrity remains and I have finished clearing the chips for the left box!

My plan moving forward is:
1. sand the entire cabinet down and remove any imperfections
2. I have purchased supplies to build back up the missing areas (after some research I settled on products from https://www.abatron.com/) and plan on first impregnating the damaged area with the repair epoxy, then following with a filler epoxy, until I have something I can sculpt/sand down to original dimensions
3. refinish the entire outside of the cabinet

I have yet to decide how I want to refinish the cabinet, the obvious choice would be to repaint the painted parts and re-vinyl the vinyl parts, all in black, but I am also contemplating other, less conventional colors/coverings, and possibly just veneer over everything. In past projects I have tended to lean more towards the purist side of things, but let's be honest here: bone stock in perfect condition they do look weird/different (a good thing in my book) but they sure are ugly, so I am considering trying to change that while staying true to the parts that really count.

011_init_water.jpeg 012_init_water.jpeg 013_init_water.jpeg 014_init_water.jpeg 015_init_water.jpeg
 
Last edited:
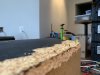
Those don’t look too much worse than the pair I have, when I first got them. To me (and I’m admittedly weird that way) half the fun is restoring a really beat pair to like new condition. Performance-wise it doesn’t really matter, and you get the satisfaction of a job well done.
 
Those don’t look too much worse than the pair I have, when I first got them. To me (and I’m admittedly weird that way) half the fun is restoring a really beat pair to like new condition. Performance-wise it doesn’t really matter, and you get the satisfaction of a job well done.

I'm the same way, except that now that I have financially committed to building this into a "proper" system (stay tuned for Cornholio's next thread: "Ampzilla Terrorizes DC, a restoration thread") I can't help but care about performance as well.
 
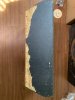
Update for the day: first I took off her clothes, now I want to see what she looks like without her makeup on!

On a side note... as this is turning into a full-on system build/restoration...
After some power-research I reached the conclusion that the perfect amp to power these monsters is, well, another monster: AMPZILLA!
After some negotiation with a seller on the bay, they were willing to give me a fair deal on an Ampzilla that is in need of some love, so as I mentioned in the reply above: stay tuned for Cornholio's next thread: "Ampzilla Terrorizes DC, a restoration thread"


IMG_3168.jpg
 
Last edited:
Cool - I have the Son if Ampzilla. Had it since about 1980 and still in daily use. Recapped it a few years ago. Just can’t sell something called Ampzilla!
 
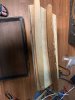
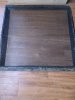
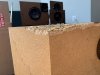
Daily update time! Disassembled one of the covers and began stripping it down for refinishing. In case you are wondering why did I completely take them apart, well, the covers have taken quite the beating and all of the joints were loose and wobbly, so break them down I did. When I use the wood hardener on the cabinets, some of the pieces for the covers will get a little extra treatment as well before I reassemble and finish.

001_inside_right_before.jpeg 002_inside_right_cloth_removed.jpeg 003_decor_pieces.jpeg 004_outside_right_cloth_removed.jpeg 005_removing_staples_right_mesh.jpeg 006_mesh_removed.jpeg 007_disassembled.jpeg
 
Last edited:
Back
Top Bottom