• Please note that Audiokarma will be offline briefly for updates early on Monday morning, September 28th.

the good, the bad, and the ugly (Yet another Dahlquist DQ-10 restoration thread)

And... that leads me to my first new question for y'all:
The expanded metal grills... is there any acoustic-property significance to these?

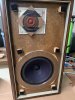
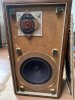
As far as I can tell they are made of simply steel expanded sheets, I don't know the exact measurements offhand but that's just a few micrometer measurements. I ask because the front grilles aren't in the greatest of shape, this one had a pretty significant hole in it, and both have some rust showing, and don't even get me started on how rough the back covers are. What I am getting at here is that I could very easily source some brand new expanded metal, cut it to size, bend it, etc to replace both fronts and both rears. Heck I could almost certainly get expanded metal to the exact same specs as the originals. Or I could be fancy and change materials, perhaps opting for expanded stainless, or expanded aluminum, or even another form of perforated metal sheet. What I am most concerned about though, in doing any of this, is affecting the acoustics of the speaker, or worse, putting the wrong type of metal in proximity to those big a** coils on the crossovers.

Can anyone shed any light on why certain grille materials were used for speakers?

(also open to opinions on changing it up a bit, think stainless instead of black painted rear covers)
 
The material was chosen for cost, workability, function and looks. I doubt the coils in the crossover were part of the discusdion. The Quad ESL was the desired look and a very open metal plate was chosen to allow all the music to come out. It is easy to massage the metal back in place but the hole in one might not cooperate, depends on how well it matches up and if it fills the hole completely needing just a quick braze to make whole.

Some have put cloth or something else on the back grilles to keep the parts shelf clean. I have not put the rear covers back onto my DQs, yet.

Material of construction shouldn't be a problem but I would maintain the openness of the mesh.
 
Hum- I think I’d just cover the old mesh with black speaker cloth, use 3M spray adhesive.
I just put the new fabric on the grille frame and stapled it in place there is no glue on the metal. Wouldn't want to do that as it will attract the music and grab it!!

Since the cloth can be attached on all for sides no reason to spray the metal.
 
I guess I should have been more specific - it’s the non-music attracting glue. It costs more but it avoids having to tweak the crossover to compensate. But since it ain’t glued to begin with save your money and skip the glue.
 
I used spray adhesive on the top and bottom wood parts, none on the mesh, and then just captured the sides with the nice wood panels. I think that's what I did.
 
Mine have boxes painted black, no vinyl, direct from the dealer in 1977. I have yet to recap (soon) and mirror image. Hope yours goes well.
 
Just wanted to give a quick update (in case you thought I lost interest or caught the 'rona), nothing really new in terms of progress, I have continued to strip down the cabinet/front frame, but you've already seen photos of that, and I spent some time over the weekend beginning to look at that Ampzilla (thread coming!) and finding a halfway decent preamp (done, Bryston 1b), more updates to come!
 
Even at 30+ plus years old your new to you Bryston 1b preamp is way more than ‘halfway decent ‘.
The phono stage is its claim to fame. I’ve owned a chrome handle, curly cord 3b amp from new.
It’s been in service without issue for thousands of hours.
Wishing you the same happy listening.
 
Updates updates updates!

I found a pair of woofers for the DQ-10s, and boy do I already feel bad about it. Bad, because they are currently attached to a pair of Advent Large speakers (I know, I know, supposedly there are differences, but I intend on finding them if they exist), a beautiful pair of Advents, a pair that, in my search for a matched pair of replacement woofers, I now have a real appreciation for... bad because I am going to butcher this beautiful pair of Advents. Now I haven't yet pulled them from the cabinets, but the woofers appear to be in nearly pristine condition.
Well, anyway, hopefully I will be able to find a home for the carcasses...

I suppose that I could simply fill in the void with the other (newer?) style of Advent woofer that seems to be more easily obtainable, but even then I would probably seek out a new home as I (brace yourselves, about to commit sacrilege) really only want to have one system, based off of the Dahlquists, and have little interest in collecting more (or at least that's what I'm telling myself right now), even though these are quite iconic themselves.

IMG_3854.jpeg IMG_3787.jpeg IMG_3942.jpeg IMG_8746.jpeg IMG_9526.jpeg

EDIT: Corrected, as Blue Shadow points out to me below the proper orientation is concave.
 
Last edited:
So the foams are installed with the roll high on the outside (convex)? I never can tell in pictures.

The correct orientation is concave.

Well I'll be a monkey's uncle, I take that back, I suppose these are perfect then!

Thanks for setting that straight for me Blue Shadow!

(I can't believe that out of the hundreds of photos of these I have looked at in the past few weeks I never realized that, it's as though my eyes were lying to me, but now as I go back and look...)

Well, knowing that, as-is, these are themselves an often highly regarded speaker... to butcher them is feeling more like something I am not so certain that I can do without incredible guilt... I may be quite new to this community, this world, but over the past month or so I have spent countless hours reading AK (and a few others that I have found good information at, I simply found myself early on with a strong preference for AK, nothing against the others, but as forums go, I have seen no other that comes anywhere near how cool and friendly the folks here are) I have realized that many of the folks here very clearly love HIFI (ever so slightly less than their spouses, in some cases) and have genuine appreciation for this stuff, and I am almost certainly sliding down a slippery slope here in how much of my budget has shifted towards vintage HIFI... I digress...

TL/DR: what do you guys/gals think I should do? Butcher the Advents, or restart my search for a matched set of DQ-10 woofers?
 
Last edited:
Well I'll be a monkey's uncle, I take that back, I suppose these are perfect then!

Thanks for setting that straight for me Blue Shadow!

(I can't believe that out of the hundreds of photos of these I have looked at in the past few weeks I never realized that, it's as though my eyes were lying to me, but now as I go back and look...)
Photos don't show it well enough unless the surround has a marble in it when the pic is taken.

I just wanted to get you back to moving forward and not waiting for the soft foam surrounds used on the A/D woofers.
 
Updates updates updates! Might even have more later on!

The main update:
While I await for things to ship (along with my next paycheck!) I took a look at the so-far-ignored Philips driver only to discover (gasp) that the surround is cracked (on both speakers). I went ahead and removed both drivers and the felt from the masonite panel for further inspection/repair/restoration and now am tasked with finding a suitable replacement surround. I am aware of the foam replacement, but rumor has it there might just be a compatible rubber replacement out there that better matches what is currently on the drivers. Otherwise, it would appear on the outside that the drivers are in good shape (test equipment is on its way, so we'll see).

The philosophical update:
I'm beginning to lean toward a willingness to do a few more cosmetic updates while trying to keep the remaining functional bits as close to original as possible. Some thoughts/initial plans are to veneer the cabinets (I'm thinking maple, love the color of maple) perhaps change the color of the cloth (that has to be replaced anyways), and using different materials for the back and front grills, both of which need to be replaced anyway (more on this later, unless you have a compelling reason for why I should stick with the original style when I replace).

The questions:
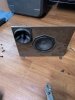
On the same note as the ideas for cosmetic changes above... those masonite baffles for the mids/highs are perhaps the ugliest part about the DQs (IMHO, though I would also argue that the ugliness is offset by the uniqueness), now I understand the importance of the placement of those baffles, but what remains to be understood are:
Was the thickness of the masonite chosen for a particular reason?
and
If I were considering say, maybe not painting, but perhaps vinyl-wrapping the masonite, would this potentially affect the sound to a degree that could be discerned?

This is a repeat of post #32 above, do you guys think I should butcher the advents?

Anyway... here are the photos:

IMG_2648.jpeg IMG_3025.jpeg IMG_4115.jpeg IMG_7449.jpeg IMG_7764.jpeg
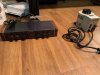
And here are a few bonus photos of new toys for use in restoring the Ampzilla, and the beautifully restored DQ-LP1 I might have snagged off the bay (may end up being the only thing I buy for this system that doesn't require restoration!):
IMG_0066.jpg IMG_9199.jpg
 
I'd go ahead and use the Advent woofers in the DQ-10s, but hold on to those nice Walnut cabinets and keep you eyes out for a set of Advent woofers in trashed utiity cabinets to refoam and replace them. Those cabinets are too nice to trash.
 
Updates updates updates!

I know it's been several days, but I can assure you all that they've been HIFI filled days! (read: my wallet will sing of these days many a fortnight to come)

Among other things:

1. I managed to get my hands on another pair of woofers, this time they came out of DQ-10s, which is cool, though I probably paid a bit too much for them. The listing said that they were only refoamed, with original spiders/cones, but I am starting to think that might not be the case... actually, upon looking closer, it most certainly is not the case, unless, of course someone used a time machine in 2006 (the datestamp on one of the cones) to go back in time and switch out some cones at the factory... looks like I have an angrygram to send later...

2. Cables. DIYing it. That's all I'm saying. I researched thoroughly, bought only for quality, annoyed by how much I still spent on them (attributing it to the pretty colored insulation). As a bona fide engineer, who among other things has been working with cabling for use with sensors so delicate and precise that they really, honestly do need just a little bit of shielding, for years now, you may not be surprised to hear that it is my opinion, as an engineer, that... I don't plan on bringing up the topic anywhere/anytime soon.

3. Began work on the Bryston 1B restoration, this will become another thread at some point, I have nudes to share. It's in pretty good shape by the looks of it, starting off by replacing all connectors, which of course had to be ordered from the UK, but while I've got your attention... any ideas on where I can find the specs needed for re-capping her?

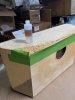
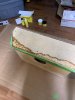
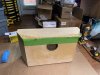
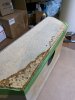
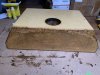
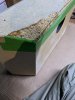
That all said, here's what I really came here to post... DQ updates! Today, I took the plunge and applied the wood-hardener "liquid wood" first to the damaged section until I couldn't get it to absorb any more, and then upon realizing that I mixed way more than I needed, to all of the seams, then a quick layer over all of the surfaces except the front of the cabinet. Overkill, almost certainly, but once this all cures sometime in the next millennia I have little doubt that it will be well sealed, and I should have a much better surface for the wood epoxy and bondo mix that I will be applying (not literally mixing the two, I just have a much larger container of bondo) due to the damage, and, well, the fact that somewhere along the way in the manufacturing process there was some "eyeballin'" where there should have been measuring and clamping, it's all part of the charm though. I have all but settled on a plan to wrap her in some nicer clothes that the ones she came here wearing (veneer).

Finally, photos!
033_liqwood.jpeg 036_liqwood.jpeg 040_liqwood.jpeg 042_liqwood.jpeg 043_liqwood.jpeg 044_liqwood.jpeg 039_liqwood.jpeg 032_liqwood.jpeg 035_liqwood.jpeg
 
Updates updates updates!

I know it's been several days, but I can assure you all that they've been HIFI filled days! (read: my wallet will sing of these days many a fortnight to come)

Among other things:

1. I managed to get my hands on another pair of woofers, this time they came out of DQ-10s, which is cool, though I probably paid a bit too much for them. The listing said that they were only refoamed, with original spiders/cones, but I am starting to think that might not be the case... actually, upon looking closer, it most certainly is not the case, unless, of course someone used a time machine in 2006 (the datestamp on one of the cones) to go back in time and switch out some cones at the factory... looks like I have an angrygram to send later...

2. Cables. DIYing it. That's all I'm saying. I researched thoroughly, bought only for quality, annoyed by how much I still spent on them (attributing it to the pretty colored insulation). As a bona fide engineer, who among other things has been working with cabling for use with sensors so delicate and precise that they really, honestly do need just a little bit of shielding, for years now, you may not be surprised to hear that it is my opinion, as an engineer, that... I don't plan on bringing up the topic anywhere/anytime soon.

3. Began work on the Bryston 1B restoration, this will become another thread at some point, I have nudes to share. It's in pretty good shape by the looks of it, starting off by replacing all connectors, which of course had to be ordered from the UK, but while I've got your attention... any ideas on where I can find the specs needed for re-capping her?

That all said, here's what I really came here to post... DQ updates! Today, I took the plunge and applied the wood-hardener "liquid wood" first to the damaged section until I couldn't get it to absorb any more, and then upon realizing that I mixed way more than I needed, to all of the seams, then a quick layer over all of the surfaces except the front of the cabinet. Overkill, almost certainly, but once this all cures sometime in the next millennia I have little doubt that it will be well sealed, and I should have a much better surface for the wood epoxy and bondo mix that I will be applying (not literally mixing the two, I just have a much larger container of bondo) due to the damage, and, well, the fact that somewhere along the way in the manufacturing process there was some "eyeballin'" where there should have been measuring and clamping, it's all part of the charm though. I have all but settled on a plan to wrap her in some nicer clothes that the ones she came here wearing (veneer).

Finally, photos!
View attachment 1856864 View attachment 1856865 View attachment 1856866 View attachment 1856867 View attachment 1856868 View attachment 1856869 View attachment 1856871 View attachment 1856872 View attachment 1856873
This is a terrific thread! My favorite kind to follow along and add any helpful tips where possible. You're doing this right. In the end, you'll look back and feel really great about your accomplishment, and sitting back, sipping a cold one and enjoying the sweet sound.
Glenn
 
Updates, updates, updates!

Over the past week I have, along with passing so far not one, but two kidney stones (which explains why it took me a week to give an update), made some significant progress on the restoration.

In the spirit of this thread I would like to title this update: the bark was worse than the bite

Due to the amount of work done, the photos will come as separate posts.

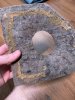
So I took on what might end up being the most challenging part of restoring the first, and most water damaged cabinet -- the conspicuous gaps where there is no longer any particleboard left.

You have seen in my last post, where I soaked the cabinet in a product called Liquid Wood (hehe) by Abatron, this post covers the use of its counterpart product, Abatron's WoodEpox, along with everyone's classic favorite: Bondo (specifically their "all purpose" putty).

Let me start by saying that I am in no way affiliated with either the makers of Bondo, or Abatron, more importantly Abatron, because I am about to sing some praise. I scoured the web looking to find the best possible products to take on the water damaged section of the box, but as at least the wiser folks know, and especially relevant here in the hifi world, there's no such thing as the "best", so instead I settled for reading countless project write-ups and reviews and settled on the Abatron products as my first choice to try, and I must say I am not disappointed. That said, it isn't cheap. Last summer, working on fixing some wood window frames in my brother's 115 year old house in Rochester, NY we considered using the very same product as I have used here, but after doing some really basic math it quickly became apparent that it would cost significantly less to get my brother setup with a router, wood, and the bits required to simply make new pieces, so we went that route, but then again that was a far greater amount of damaged wood than these cabinets have, and there was no particular value to any one piece, but I digress, the starter kit that comes with enough of both of the Abatron products in smaller sizes ran me somewhere around $50, and for this project, where I have already spent 3x that in bulk multi-conductor (if I am making cables, then you best believe that I am also making cables for a few friends too, think about it, they can't claim snake oil if they're using them too!), that seemed fair. Anyway, enough rambling, let's get to the good stuff! (next page!)
 
Last edited:
Back
Top Bottom