• The move to the new server is done. There are some software and database maintenance updates in process. This has us passing the hat around to help out. We appreciate any donations. Seriously, even a dollar helps. The payment page may be found here - https://www.audiokarma.org/support.html

the good, the bad, and the ugly (Yet another Dahlquist DQ-10 restoration thread)

Hey Cornholio, any success with finding rubber replacement surrounds for the midrange cone driver? I have only been able to find foam: https://www.simplyspeakers.com/dahlquist-speaker-foam-edge-repair-kit-fsk-5.html

So I haven't looked in a while, but back when I started searching I did manage to find two sources, one in Belgium that will ship to the US, and another being, of all places, Amazon... I will have to dig through my notes to see if I can find the links. Note: the Amazon one was not particularly easy to find, pretty much a needle in a haystack, it was mislabeled on the title but the measurements in the listing were just close enough that I would have to assume that it would provide at least functional results.
 
Updates... I know it's been a while, but I have been busy!

The other cabinet:
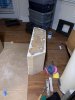
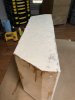
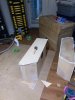
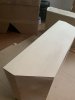
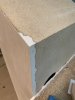
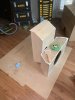
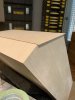
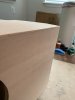
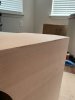
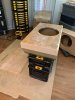
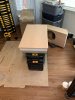
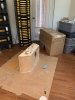
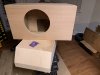
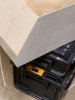
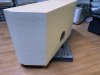
I began working on the other cabinet. At first (and second, and third, to be honest) inspection it would have appeared to have been spared the water damage that the first cabinet suffered, but oh boy was I wrong. I had it roughly 2/3 of the way complete when I started using both cabinets lined up together for sanding reference and made a startling discovery, the other cabinet was roughly 3mm taller than the first. My initial thought was, and I had thought this originally when I started working on the bottom of the second cabinet, that it looked like whoever assembled it was a little sloppy in lining things up, and the bottom panel protruded out a bit as a result. While I still could make the argument that the builder wasn't at their best when putting either cabinet together (IMHO it seems to speak to the design of the speaker itself, I would speculate than Dahlquist himself would have nixed the woofer if he could have gotten away with it... the cabinets are under-designed IMO, and almost seem like they were more of an after thought, but anyways enough of my opinions, I wasn't there, I'll never know for sure) what I discovered is that the second cabinet had received just as much, if not more, water damage than the first, however it was less apparent. Being a perfectionist, I just couldn't stand for the height difference being so great, so I gathered my tools and went to see what I could do about it. I started by playing with some coarse sanding, knowing that if that was the solution it would be a lot of work to level it down, but as I started digging into some spots it became apparent that the bottom wasn't protruding just because of how it was assembled, it was protruding also because the entirety of it had been water damaged and had swollen. At this point, I made the quick decision to remove that bottom, grabbed some chisels, and committed to that decision. The surface of the bottom was stable due to having used wood hardener over it, but using the first cabinet as a guide and digging in, with little force of the chisel the entire bottom layer began to come off quite easily, underneath it was a layer quite reminiscent of the damaged edge of the first cabinet. After several hours I had removed quite a bit off particle board, but had gotten it down to an acceptable level. Next, I mixed up another batch of Liquid Wood (I really do love those Abatron products) and had it soaked. After curing it all with heat I was left with a stable, however quite rough, base from which to rebuild. It took several applications of the companion product, WoodEpox, to lay down enough filler to where it could be sanded level, but I think I got it close enough to work. Right now I still have some serious sanding left to do on cabinet number two, but have been distracted by learning how to veneer while veneering the first cabinet.

The first cabinet:
I don't want to get too excited yet, especially considering I just had my first major veneering issue (let's just say that applying the veneer is easy, trimming it is where the real danger comes in) that required me to replace a panel, but otherwise it looks, well, it looks pretty awesome. I will definitely write up a much longer post on this when I am feeling better (I got to spend the day in the ER earlier this week, don't worry, no covid, but it's had its effect nonetheless), and once I have completed the... okay, let me start over, veneering, as many of you have probably seen claimed, is easy. Choosing to veneer 40 year old, repaired-from-water-damage, no 90 degree angled, Dahlquists is... an absolutely questionable first-time decision, however I am already quite satisfied with how the first cabinet is turning out, even knowing there are imperfections (most of which I will be able to hide when finishing).

Wait, what? No pics..? Sorry folks, I haven't had the time to go through the laborious process of uploading them all from my phone, neatly cataloging each in the correct folder, labeling each by what it is, what's been done, etc that comes before me posting a fraction of them on here. Besides, I want to at least make sure that I can get the first box veneered in a presentable way before posting! Pics coming soon!

 
@Cornholio I admire your fearlessness in taking this on. Chisling off a bottom and veneering is not for the timid, and you are doing all this in your apartment? Can't wait to see pics! Sorry about your health issues.
Inspired by your work, I had torn apart my grills because the fabric was torn, the metal mesh dented, and the wood scuffed. For what it is worth, I decided to branch out away from basic black for the fabric. Here is the result if you are also considering an alternative to black. It came from here: https://www.amplifiedparts.com/products/grill-cloth-black-silver-gray-34-wide and I have some extra scraps if anyone wants a swatch. Still waiting on new nameplates.
upload_2020-5-29_1-22-37.png
 
Last edited:
I like the way the driver array can be seen through those lighter colored grilles. The speakers look good. Did you back the base of the stand about the same size as the ones I have? Love those larger than stock stands.
 
You have been busy so no pics yet is ok. As long as you have taken the pics and will post em, we'll keep coming back for more. A worthy project. The DQ-10 is a special speaker system.
 
Did you back the base of the stand about the same size as the ones I have? Love those larger than stock stands.

No, my stands are smaller and shorter than yours, basically an all-walnut version of the stock monolith stand which was mostly vinyl except for the pillar.. The ones I made for you are jumbo!

Cornholio let us know if you want any advice/dimensions on stands.
 
@Cornholio I admire your fearlessness in taking this on. Chisling off a bottom and veneering is not for the timid, and you are doing all this in your apartment? Can't wait to see pics! Sorry about your health issues.

Inspired by your work, I had torn apart my grills because the fabric was torn, the metal mesh dented, and the wood scuffed. For what it is worth, I decided to branch out away from basic black for the fabric. Here is the result if you are also considering an alternative to black. It came from here: https://www.amplifiedparts.com/products/grill-cloth-black-silver-gray-34-wide and I have some extra scraps if anyone wants a swatch. Still waiting on new nameplates.
View attachment 1881679

Thanks, I need all the encouragement I can get! When I first dug in with that chisel I felt it in the pit of my stomach, I had committed to it. And yes, all of this, unfortunately, is taking place in what should be the living room of my apartment/the half of the should be living room that is my workspace, in a roughly 650sqft apartment in DC, let's just say I will be cleaning up after this project long after it ends! (fortunately, due to covid, and having moved in at the start of March, I don't have much furniture, funny how my priorities were that I needed sound first!)

That said, ooo, especially with that choice in cloth, those are some outright sexy DQ-10s! Love the cloth choice!

I haven't really given too much thought yet myself to cloth choices, or really the covers at all beyond the one that I stripped down to its pieces. For now, in an exercise in "project management" as my boss would call it, I am trying to focus on the target of completed cabinets, baffles, crossovers, etc to get to a functioning product, then I will work on the less necessary parts e.g. the covers, stands simultaneously with starting the next phase of the project, rebuilding Ampzilla (while also doing some light refurb on that Bryston 1B!). (If I wasn't doing this exercise in, as I will call it, self control, I would probably have all sorts of nice new parts lying around in boxes, the sum of which would not be able to complete any one phase!)
 
Alright fine folks of AK, as promised, I have pictures, quite a few in fact, so if you're watching, try and be patient and wait for the finished photos before replying (trying to keep them all together, with the limit on how many photos I can upload per post and all)...

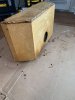
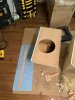
Without further ado, let me start with a brief set of photos from tearing down the second (left) cabinet...
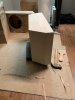
001_left_before.jpg 002_left_woofer_removal.jpg 013_insulation_removed.jpg 016_top_sanded_80pct.jpg 017_bottom_sanded.jpg 018_bottom_sanded.jpg 020_top_edges_cleaned.jpg 021_top_edges_cleaned.jpg 024_top_edges_cleaned.jpg 022_top_edges_cleaned.jpg
 
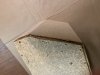
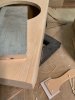
Next we have the left cabinet further removal of water damaged/degraded particle board:

023_top_edges_cleaned.jpg 024_top_edges_cleaned.jpg 025_pre_liquid_wood.jpg

Followed by the first application of Liquid Wood (the second, along with the chiseling off of the bottom not shown, I was in the zone while doing those parts, also it was messy):

026_post_liqwood_baked.jpg 026_post_liqwood_baked.jpg 027_post_liqwood_baked.jpg

Followed by the first pass on filling in the edges around the top for the left cabinet:

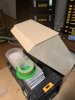
028_top_edges_fill.jpg 032_top_edges_fill.jpg

You may be surprised, you may not be, to see that prior to the veneer I decided to eliminate the edges that normally accommodate the back cage. I had a few reasons, both stylistic and for the sake of making it easier to veneer. I have a few ideas for what I plan to do regarding the back cages, so stay tuned!

Followed next by the application of the filler to smooth out/rebuild the bottom panel (not shown is that this was done in three applications of a layer each):

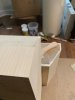
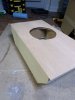
029_bottom_repair_fill.jpg 030_bottom_repair_fill.jpg 031_bottom_repair_fill.jpg
 
Now for the fun, the actual veneering process. This should be broken out into 5-7 more posts due to the number of photos, which, in my opinion simply isn't enough. I admit that throughout the veneering process a combination of some parts being time sensitive (working with the glue, especially if you want to reuse the rollers more than once, had to be done very quickly), messy, and a little bit of laziness. And frustration/being on-edge. There was a lot of that, being my first experience with veneering it was a bit stressful to say the least, and I plan to detail a few mistakes as well. That said, you might notice some gaps in the timeline.

Furthermore, this whole project has been a learning experience, some might say I've bitten off more than I can chew, but others have already made it clear to me in life that I have a big mouth! It feels like it took me a crazy long time to do the first cabinet prep work, and then about a week to do the veneer, but when the second cabinet started, learning from mistakes and tricks picked up on the first, it moved fast, really fast. The second cabinet was stripped/cleaned/repaired/prepped in maybe 3 days as opposed to 3 weeks for the first. The veneer for the second also went on in about a day and a half. If I were to have to start everything over again from where I began, working on it here and there during the day and all evening I could probably redo it all in a little over a week. But I digress, here are more photos:

Oh, and since it was super tough to photograph, the wood is flat cut maple paper backed veneer.

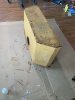
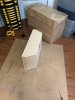
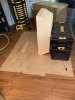
Here is the very first panel I veneered, the bottom of the right cabinet:

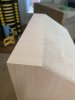
001_right_cab_bot.jpg 002_right_cab_bot.jpg 003_right_cab_bot.jpg 004_right_cab_bot.jpg 009_right_cab_bot.jpg

Which I followed with the two shortest sides of the back:

005_right_cab_back_1.jpg 006_right_cab_back_1.jpg 007_right_cab_back_1.jpg 008_right_cab_back_1.jpg
 
Next I did the two medium panels on the back:

010_right_cab_back_2.jpg 011_right_cab_back_2.jpg

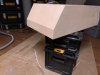
Following that, in part due to my excitement to try a larger panel, I did the front face. It's going to be hard in all of the coming photos to distinguish, but the front face is done in flat cut cherry paper backed veneer:

013_right_cab_front.jpg014_right_cab_front.jpg 015_right_cab_front.jpg 016_right_cab_front_and_bot.jpg 017_right_cab_front_and_bot_with_left.jpg 018_right_cab_side_and_bot_with_left.jpg
 
Next I decided to tackle the big panel on the back, but first I had to deal with the inputs cutout (there's a caveat to this, since I ended up redoing the ring later on):

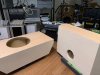
020_right_cab_inputs_ring.jpg 021_right_cab_inputs_ring.jpg

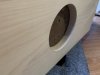
I don't recall if I took any photos of this, I don't think that I did, but I did end up screwing up the ring during trimming and redid it again after finishing the back big panel. Veneering the inside of that ring was a huge pain... I don't plan on getting too into the nitty gritty of the veneering process and all of the caveats learned about, however, suffice to say that although the veneer wood may look quite dead, it is very much so alive in that its dimensions will change based on a number of factors, with the largest being how much of, and what type of, liquid the wood has absorbed, but also how much the veneer can creep once the glue has cured. On my first attempt at the ring, I had carefully cut it to length so that you had to all but force it in. I was so certain that with the amount of effort it took to get it in there that, at worst, I would have to do some tricky trimming once the glue made the veneer swell. Turns out I needed a new definition of a "good deal of force", for after curing it shrunk down even shorter than it was before. On the second attempt I got it much closer to perfect, but there was, and still is, about 0.75mm of a gap that I will have to fill in before finishing. The third attempt, on the left cabinet, I did get it right, but oh boy, let me reiterate, what a huge pain in the a**.

On that same note, this is where I made my first "big" mistake. When trimming and sanding the edges of the big panel on the back, I inadvertently sanded through the veneer a bit for one of the medium panels. Fortunately I stayed as calm as I could, waited until the next day to continue with a clear mind, and remembered that I had some extra veneer, pulled off the damaged panel and replaced it. The edge overlap order is off now, but you would have to know to look for it, anyway, here are some photos of doing that fix:

022_right_cab_back_side_2_redo.jpg 023_right_cab_back_side_2_redo.jpg

The second features the panel I removed to replace.

And after that I was ready to do the top of the cabinet, which I also did in cherry:

024_right_cab_top_cherry.jpg
 
On the same note as the previous post, the subject of this post is also about fixing where I screwed up, except this time I really, really screwed up, and accidentally sanded through the front upper right corner. It was much harder to keep calm for this, but I managed, and on my third-ish attempt at fixing it ended up with something I was happy with (fretting about how it will look once I seal it though!):

025_right_cab_front_repair_attempt_1.jpg 026_right_cab_front_repair_attempt_1.jpg 027_right_cab_front_repair_attempt_1.jpg

After taking a step back, and some time to read up on possible ways to fix this, my first few attempts (collectively, my first attempt) was to take some closely matching thin strips of the cherry, carefully sand off the paper backing until I just had the wood, gluing, and clamping. Now I would like to think I have a bit more patience than most, and that if I had as much as some that this would have worked, but I don't have as much patience as some, and after a few tries at this method, gave up and decided to try the next approach:

028_right_cab_front_repair_attempt_2.jpg

Here I did essentially the same thing, except that i first sanded down a larger section and made a larger patch, but after trying this a few times I was not satisfied. Getting the edges going the long way to match was fairly easy, it was the short ends that I couldn't get right, that's when I took drastic measures and tried the third method, removing an entire strip of veneer going the entire length of the front and replacing:

029_right_cab_front_repair_attempt_3.jpg

Not shown are the photos of the three attempts at this that I made before I got it right "enough". This was by far the most difficult part of the entire project so far. In theory, what I needed to do was pretty simple, and in most other veneering cases would have been simple to do, what complicated it was the fact that I was using a paper backed veneer in which the bulk of the thickness is actually the paper backing. As a result, instead of simply feathering the new edge in, placing a patch over it, and sanding until flush I had to go through the tedious process of trying to cut the existing veneer very, very straight and clean, and then doing the same with the patch strip to get them to match up edge to edge. On my third try of the third method I managed to devise a process that resulted in clean enough edges to make it work, and it turned out alright. I say that because you would probably have to look for it for a second (there are a few small gaps that I will fill before sealing still), but I will always know it's there. I am going to be extremely careful in prepping this section for sealing. It will probably take several months of therapy for me to forgive myself for this particular mistake, but I am sure it will turn out alright.
 
I'm not going to write up as much for veneering the second (left) cabinet as, taking in all of my lessons learned so far, it went overall quite smoothly, and I think there is only one spot that I will need to touch up:

030_left_cab_bot.jpg 032_left_cab_bot.jpg 033_left_cab_bot.jpg 034_left_cab_back_side_1.jpg 035_left_cab_back_side_2.jpg 047_left_cab_front.jpg 048_left_cab_front.jpg 049_left_cab_front.jpg 031_left_cab_bot.jpg
 
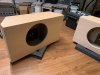
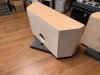
And now, what you have all been anxiously awaiting... the finished (mostly, I have to do more finish sanding on some edges, but I am not going to touch it until it has a few days to equalize for humidity/moisture content/fully cure), or, as I have been calling them in my own internal monologue, the glamour shots.

As I am admittedly partial to the first (right) cabinet, as I probably put 5x the work into it, I am going to display her proudly first, in some photos taken before I finished the second (left, and yes, I know that they're identical and it wouldn't matter if I switched which one goes to which side because I have to drill all new holes anyway, however to answer your burning question, yes, I am keeping track, and they will remain at their original sides). I regret that I, as an engineer who works in tech, can't figure out how to make my phone take a decent photo, but here goes:

(recall that the top/front are cherry and the rest is maple, it's going to look a lot more distinct once sealed)

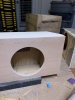
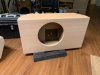
036_glamour_left_unfinished.jpg 037_glamour_left_unfinished.jpg 038_glamour_left_unfinished.jpg 039_glamour_left_unfinished.jpg 040_glamour_left_unfinished.jpg 041_glamour_left_unfinished.jpg 042_glamour_left_unfinished.jpg 043_glamour_left_unfinished.jpg 045_glamour_left_unfinished.jpg 046_glamour_left_unfinished.jpg
 
And finally:

051_veneer_prefinish_glamour.jpg 052_veneer_prefinish_glamour.jpg 053_veneer_prefinish_glamour.jpg 054_veneer_prefinish_glamour_gap.jpg 055_veneer_prefinish_glamour.jpg 056_veneer_prefinish_glamour.jpg 057_veneer_prefinish_glamour.jpg 058_veneer_prefinish_glamour.jpg 059_veneer_prefinish_glamour.jpg 061_veneer_prefinish_glamour.jpg

I wish I could upload a video here, I have a short one that I sent to friends that captures them both a bit better in my opinion.

Also, if you were waiting to reply, go right on ahead, that's all for the night folks!
 
@Aptone
I admire your fearlessness in taking this on. Chiseling off a bottom and veneering is not for the timid, and you are doing all this in your apartment?

Ya know... I was thinking more about this, sure, the project has been a mountain of work so far, but much of that has been because I was self-teaching for most of it. The second cabinet took very little time/effort to do relative to the first. This prompts me to think that we all should observe a moment of silence in remembrance of the countless many amazing speakers out there that have ended their days in dumpsters, that could easily be repaired/restored, heck, if my goal was just to restore to stock I would have been finished weeks ago. So many speaker lives cut short, when they could have easily been salvaged. Probably many were still worth quite a bit still. This is a dangerous line of thinking that I should stop now, because I could easily see this spiraling out of control and turning into... wanting to restore and/or refurbish and/or rebuild more speakers.
 
wanting to restore and/or refurbish and/or rebuild more speakers.

I think you are hooked now! Great work. As a former professional cabinetmaker, I know much of woodworking is leaning how to fix mistakes. No one else will ever notice, but it is hard sometimes when you know.

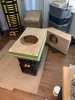
Here is a random thought: instead of replacing the masonite squares on top of those beautiful cabinets, what if you made new panels of maple, cherry, or even other contrasting woods to hold the drivers and dispense with the grill altogether? The stock DQ-10 is pretty homely without the grill, but with the nice wood veneer on the body, and maybe even different shapes of wood ply instead of squares to sit on top, it could be some funky sculpture. I can dig through my scrap 1/4" plywood pile if you are interested.
 
Last edited:
Back
Top Bottom