• The move to the new server is done. There are some software and database maintenance updates in process. This has us passing the hat around to help out. We appreciate any donations. Seriously, even a dollar helps. The payment page may be found here - https://www.audiokarma.org/support.html

the good, the bad, and the ugly (Yet another Dahlquist DQ-10 restoration thread)

Here is a random thought: instead of replacing the masonite squares on top of those beautiful cabinets, what if you made new panels of maple, cherry, or even other contrasting woods to hold the drivers and dispensed with the grill altogether? The stock DQ-10 is pretty homely without the grill, but with the nice wood veneer on the body, and maybe even different shapes of wood ply instead of squares to sit on top, it could be some funky sculpture. I can dig through my scrap 1/4" plywood pile if you are interested.

In terms of the actual material used for the cabinet and the baffles my current plan is to reuse all of it, rather than replace (for as tempting an idea as that is, especially since that wood be easier). That said, it's funny that as I read your reply I was addressing just that particular detail. Your idea isn't terribly far off from what I am doing!
 
Wow, best thread I have read on AK. Thank you for taking the time to chronicle your adventure. Great writing, and epic handle.

I picked up some DQ-10s a few weeks ago, and I have done a little restoration and built custom stands, and plan to do more. But nothing to the level you've done. Great work.
 
Updates, updates, updates!

The past week has been quite busy, so nothing too crazy, and a lot of my project time was spent on researching next steps. After a long battle with crippling fear of finish sealing the cabinets, I succumbed to buying an HVLP spray system to apply the finish. I have successfully finished projects before using good old fashioned brushes and rags, some even turning out with an almost professionally-finished look, however the fear that has gripped me has been based on the fact that I have never been able to consistently/repeated end up with an end product that looked that nice, and those projects were different. Most of those projects I can happily afford a few small blemishes, I don't feel that way about the DQs. It's also worth mentioning that the amount of work that went into those projects prior to finishing was a mere drop in the bucket of what I have put into this project so far. Enough of me trying to justify dropping so much money on HVLP, the bottom line is that I know that finishing is a weak point of mine, research has directed me towards HVLP spray as the best way to consistently achieve professional quality, and as been a theme in this project I am going to dive into the unknown with the confidence that I can probably figure it out. That said, I have a lot more research, and a boatload more prep to do before finishing, so this point is to be continued...

Among those prep items on the checklist, in particular one I have focused on over the past week, is the question of reassembling the speakers and mounting everything back onto the cabinets--in particular, drilling holes. Having already spent a great deal of effort achieving veneer results that I am quite pleased with, I am left with clean (beautiful, I might add) veneered faces, which are great to look at but lacking in the function department. This brings me to my second great terror of the week, drilling holes and/or screwing screws into the cabinets to mount everything back to it. The reasoning behind why this is my concern right now is that I have decided that this needs to be done prior to spraying the cabinets, due to the delicate nature of the veneer, if I accidentally lift off a little, or crack, or split something, it will be far easier to fix it now than it will be later, with later requiring not only fixing the veneer, but also the finish. Furthermore, as many of you have probably picked up on, I am a perfectionist, I want everything clean an perfect, and there is just something that drives me insane about the idea of brutalizing these cabinets with wood screws, even with pilot holes drilled first. I could write an entire essay on the details for why, but what's important is that I simply won't have it, which leaves me with a few options, but mostly just two: drill through holes and use machine screws, or threaded inserts. The through holes idea I scrapped almost instantly, mostly due to the lack of access within the cabinet to several places that would need holes, along with the added effort required to keep everything as well-sealed as possible, so inserts it is. Now if you're not familiar with threaded inserts, let me just say that they can be a troublesome beast to work with, or at least they were when I used them on a maple butcher block workbench top. Although the main issue in that project was the wood being so hard, and I won't have that issue here with the particle board, there is a second great challenge in that it is quite easy to screw up the top surface when you are inserting the threaded insert, and in this case the top surface is that delicate veneer. Without going into to much more detail for now, suffice to say that brass inserts are the route that I have chosen to follow, and the rest is to be continued...

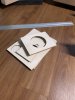
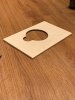
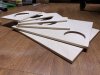
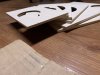
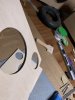
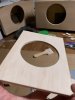
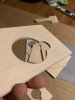
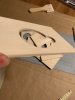
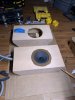
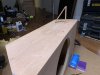
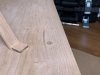
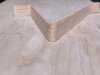
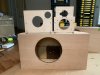
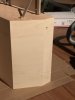
Now if you have been following this thread, you might be wondering when I will bring you resolve and discuss what I ended up doing with the baffles, and here is where I will indulge you. When I said I didn't do anything too crazy, I might have been underselling what I did do over the last week with visible results, that is because what I did do involved wrapping all of the original masonite baffles, along with the masonite board used for the crossovers, in maple veneer. Yes, it would have been so much easier, and probably cheaper too, had I simply built new panels, but that simply does not fit within the theme of this project, so here we are. The photos that will follow are not of completed veneering, as I still have to wait for everything to acclimate prior to finish sanding, and additionally, wrapping everything in veneer is not the end of the baffle story, I am cooking up something else to follow in the future. Without further ado, here are the photos promised, starting with the crossovers, I will let the photos do most of the talking:

001_stripped_xover.jpg 002_xover_long_edge_glued.jpg 003_xover_long_edge_trimmed.jpg 004_xover_short_edge_glued.jpg 005_xover_finished_trimmed.jpg
 
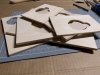
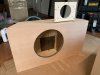
Followed lastly by the finished veneering of the driver holes, all of them with the exception of the Philips midrange hole as no portion of the edges showing after assembly, though I will probably do it anyway today:

010_baffles_veneered_glamour.jpg 011_baffles_veneered_glamour.jpg 012_baffles_veneered_glamour.jpg 013_baffles_veneered_glamour.jpg 014_baffles_veneered_glamour.jpg 015_baffles_veneered_glamour.jpg 016_baffles_veneered_glamour.jpg 017_baffles_veneered_glamour.jpg

That's all for today folks!

Cheers,
Joe
 
WOW Again, I'm sure.

These might have a superstructure that looks nice enough to be shown in prime time.

There are pairs out there that have a sculptured piece holding those visible drivers. Built to be in similar orientation and hopefully maintaining the time alignment but these will be cool, too.

Always nice to see what folks do to make the gear better looking.
 
I want to talk a bit about paper backed veneer, and humidity.

A little back ground about myself. I'm an art director graphic designer, started back in 1976 working for my dad at his ad agency. Through the years when doing presentations, we used contact cement, spray mount, melted wax. I mention this because contact cement is difficult to work with, and once the two surfaces have contacted, your done! You screw up, you start over.

My first reveneer project was a set of KLH Sixs. I went with paper adhesive backed walnut. Once it arrived , I let it acclimate for two weeks before I started cutting the pieces. Like you, I'm a perfectionist! All sides grain matched at the corners and so on. I stained and then finished them with Watcos Danish oil. A couple months later, summer, so humid you could wring out the air! I was dusting the KLHs, and noticed my perfect edges had some hangover! The veneer had expanded due to the humidity! WTF! It also bubbled in a couple small spots. I called the veneer supplier, told them what happened. They said apply heat to the bubbled areas. You need to make some pin pricks to allow the heat to escape after removing the iron. This worked, but the edges were still a problem. The supplier called this "veneer creep", expansion from humidity.

This is more of a problem with paper backed veneer than raw veneer, which is how I reveneer now. I use heat lock glue. Speakers I've done with raw veneer and heat lock glue are still good, no veneer creep.

Being in the DC area, you'll have plenty of humidity, so may I suggest waiting to finish them for a couple weeks and make sure the veneer is set.

Just wanted to share some of my reveneer experiences. You're doing a terrific job and look forward to seeing them finished, and your sonic report!

Cheers, Glenn
 
Wow, these will truly be a one-of-a-kind pair of DQ-10s
Yes, they will. The exposed drivers are getting such nice sound boards the grilles might need to be something fancy that is removable like on some speakers where the top grille comes off. Hate to cover all that nice veneer work...bottom cabinet, too, with the standard grilles the speakers come with that I'm sure will be some kind of makeover.
 
I want to talk a bit about paper backed veneer, and humidity.

A little back ground about myself. I'm an art director graphic designer, started back in 1976 working for my dad at his ad agency. Through the years when doing presentations, we used contact cement, spray mount, melted wax. I mention this because contact cement is difficult to work with, and once the two surfaces have contacted, your done! You screw up, you start over.

My first reveneer project was a set of KLH Sixs. I went with paper adhesive backed walnut. Once it arrived , I let it acclimate for two weeks before I started cutting the pieces. Like you, I'm a perfectionist! All sides grain matched at the corners and so on. I stained and then finished them with Watcos Danish oil. A couple months later, summer, so humid you could wring out the air! I was dusting the KLHs, and noticed my perfect edges had some hangover! The veneer had expanded due to the humidity! WTF! It also bubbled in a couple small spots. I called the veneer supplier, told them what happened. They said apply heat to the bubbled areas. You need to make some pin pricks to allow the heat to escape after removing the iron. This worked, but the edges were still a problem. The supplier called this "veneer creep", expansion from humidity.

This is more of a problem with paper backed veneer than raw veneer, which is how I reveneer now. I use heat lock glue. Speakers I've done with raw veneer and heat lock glue are still good, no veneer creep.

Being in the DC area, you'll have plenty of humidity, so may I suggest waiting to finish them for a couple weeks and make sure the veneer is set.

Just wanted to share some of my reveneer experiences. You're doing a terrific job and look forward to seeing them finished, and your sonic report!

Cheers, Glenn

Oh boy, Glenn, I was hoping that someone would bring this up...

Let me start by saying that with every passing, extremely humid day I am getting better and better at repairing and hiding flaws. Also, this is my first time veneering, therefore first time using paper backed veneer, but I can assure you that this is also the last time I will be using paper backed veneer. Veneer creep is a very, very real problem with this stuff, and this perhaps is most apparent right away after applying the veneer. I am using a water based contact cement, though I would assume that non-water based would still have this issue, maybe to a lesser degree, and after applying the cement to the veneer the paper and wood both soak up a ton of the water and expand quite a bit. Nearly all of this expansion is in the direction perpendicular to the grain, and it isn't just a little bit of expansion, we're talking 1-3mm, or more for wide expanses. (at this point it should go without saying that one should never ever ever ever trim immediately after applying the veneer) Initially this poses a problem for veneering other panels with edges that meet, especially for the impatient (myself included).

A technique that I was using that allowed me to move a bit quicker, after a lot of test pieces to get a feel for the level of expansion, was to force dry the veneer after the cement cures (but not entirely), basically taking the veneer from one extreme of expansion to the other extreme of contraction, using hot dry air. This now "pre-shrunk" veneer I would then do fairly liberal trimming on, knowing approximately how much expansion back in the other direction that I can rely on. To someone reading this about to try veneering for the first time, please don't try what I did, I will be the first person to tell you that it was reckless of me, with practically no experience, to try this, and that even though it did work (well, we'll see about the long term) for 98% of it (yes, I under-approximated in a few spots and am now dealing with that) I only did it in blind confidence of my knowledge of materials.

But back to the paper... back.

I have, so far had results that I am very happy with, however there are just so many other reasons that I have discovered, aside from the creep, for why I wouldn't use it again, among them:
  • where edges meet, there is absolutely no way to avoid a thin line of paper being visible
  • you are pretty much strictly limited to whatever is on the sheet, the way it is on the sheet, you really can't splice different parts of a sheet together
  • probably the biggest reason: repairing and patching is super difficult if not impossible to do without it being obvious. With non-backed veneer if you sand through in a spot you can literally just glue a feathered patch down over it, clamp it to dry, and sand it flat, and if you picked a good piece as a patch it won't be visible to anyone but you, and perhaps the trained eye looking for it. You simply can't do that with the paper backing being there. I suppose that in theory you could patch paper-backed with non-paper backed but chances are that you don't have any of that on hand if you were using backed in the first place, not to mention it won't be a color/grain match like it would be if you used a scrap from the same sheet.
That all said, it's been a few weeks since I finished wrapping the cabinets, and that is why I am just now working on final prep, and hoping not to have to re-trim any more overlapping edges today!

Note: the underlining/bolding is strictly for passersby

Joe
 
Hey Joe,

Good conversation about this. When I reveneered my KLH Sixs, it also my first time, and like you, no one mentioned veneer creep at all including the veneer supplier. The only instructions were to let it acclimate for at least a week, I gave it two. Didn't matter after a couple. On the when the summer humidity hit.

Luckily I didn't have issues with the paper line showing at the edge joints. The Sixs have a front veneer strip, which was the last piece to glue on, and if I remember correctly, I cut the butt joints at 45 degree angles.

Regardless, this is a learning experience, and your DQ-10's will look a hunderd times better then factory.

Cheers, Glenn
 
Last edited:
Happy Sunday folks, today I bring you updates! It's been a busy week or so, and I may have gone off the deep end just a bit with the veneering, but I also have some exciting news, but you'll have to guess what it is...

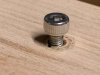
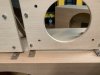
To begin, I'll start with the threaded inserts that I mentioned before, I went ahead and performed the tedious task of installing 38 of them in total for the two boxes--all of the mounting holes on the top, the cover mounting holes on the sides, and the woofer mounting holes on the fronts. I am still debating on whether or not I want to install any inserts on the bottoms for mounting feet (probably not DQ-10 feet though, I am trying to beautify after all) or for securing to a stand (once again probably not going traditional for the stands). I know that in some circles on AK that can trigger some strong opinions, the question of bolting to the stands that is, and I will admit from an energy transfer perspective there is some legitimate science behind some of those opinions, however there is no one who can tell me that there is not a method out there in which you bolt to the stand that cannot be performed without adhering to simple coupling/isolation principles, but I digress, I am still undecided on the matter.

So you may notice in the photos I am about to upload that some of the inserts appear to have a grayish ring around them, that is due to the epoxy that I used to permanently lock in the inserts, and although I would have rather not had that happen, it will be covered in all of the places where it did. Anyway, without further ado, here are some photo updates of the threaded inserts.

001_gulp_first_hole.jpg
It was a nervous moment for me drilling the first hole...

002_first_insert.jpg 003_first_insert.jpg 004_first_insert_group.jpg 005_top_inserts_done.jpg 006_woofer_inserts_holes.jpg 007_woofer_inserts_filler.jpg 009_woofer_inserts.jpg
These show the progress as I went along...

010_woofer_inserts_test_fit.jpg 011_woofer_inserts_test_fit.jpg
As a sanity check I did drop in a woofer a couple of times to ensure that the holes lined up...
 
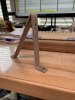
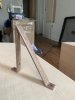
After finishing installing the inserts is when I started to go off the deep end a bit... perhaps it was the fumes from the epoxy, but I kept looking at the stack of those ugly metal brackets and cringing, they simply would not match the rest of the speaker. During one of the orders I made for supplies I picked up an inexpensive roll of cherry 3M PSA adhesive backed edge banding, and I started to get some funny ideas. Those funny ideas turned into the decision to try and see if I could possibly wrap the brackets in veneer. The photos below show the results of the best of my initial first few attempts at this. The photos make it look a little better than it actually was. I was able to successfully wrap one well enough to satisfy myself, however there were a few issues.

First and foremost, the cherry was extra brittle, and there are hordes of woodworkers out there that will tell you point blank that it is impossible to veneer around radii that small, and although they are absolutely wrong, I succeeded in doing it without the use of any "special sauce". That said, it was incredibly, ridiculously tedious work, and failed with just the slightest bit of force beyond what the veneer could take causing you to have to start over, causing me to quickly burn through the roll of edge banding to the point where I would have had to order more to do all of the brackets, and each one still would take several hours.

The second main issue was with the 3M PSA peel and stick adhesive (PSA = pressure sensitive adhesive). Don't get me wrong, I am not speaking poorly about 3M PSA in general, in fact it far exceeded my expectations, however for this particular use case there were some downsides. While the 3M PSA edge banding did adhere well to the metal, the "pressure sensitive" part of PSA is not something to be ignored, and in order for the PSA to really adhere well you really do need to apply quite a bit of pressure, which was extremely challenging to do for, say, the edges of the brackets. With their surface area being so small, and their tendency to be somewhat rounded due to how the metal was stamped, it was nearly impossible to apply enough pressure to the edges without slipping and screwing them or another part up. Furthermore there just wasn't enough surface area on the edges to really make a good bond. So after much experimenting, I decided that I needed to make some significant changes before trying again (next post).

Third, and lastly, I just plain did not like cherry as the choice for the brackets, too much weird blending with the cherry already on the top surface, for my next attempt I decided to pick another wood species.

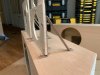
Anyway, here are the photos of the best of my first few attempts, including one of a mini mockup of installing it with a baffle on the cabinet:

001_first_attempt_cherry.jpg 002_first_attempt_cherry.jpg 003_first_attempt_cherry.jpg 004_first_attempt_cherry.jpg 005_first_attempt_cherry.jpg 006_first_attempt_cherry.jpg 007_first_attempt_cherry_mini_mockup.jpg 008_first_attempt_cherry_mini_mockup.jpg 009_first_attempt_cherry_mini_mockup.jpg
 
Now, on to my second attempt at wrapping the metal brackets in veneer (at this point let me just say that if you have ever met, or ever meet, a jeweler, not the guy/gal at the counter but rather the one who actually makes the jewelry, take a look at their hands/fingers, they are probably discolored and covered in cut callouses, mine are approaching that right now from these brackets, but I think it was worth it).

Per @GD70 Glenn's feedback mentioning how he does it now, the first change I made was to give heat lock glue a chance (I bought more edge banding that had it pre-applied, however this is absolutely what I will use in the future until I can justify buying vacuum press equipment). I have to admit that I was extremely skeptical. In my experience, any time there is an "iron on" version of something made, it is typically not as good as other methods of attachment, and simply doesn't look as good or work as well since it is usually designed with the non-tool-friendly in mind (think iron on lettering, patches, etc). My expectations were that the results would be akin to using hot glue as opposed to the correct adhesive for something. When it comes to heat lock, I could not be any more wrong about that. Holy crap I could not be any more wrong about that. Suffice to say that this stuff truly inspires confidence, and at a far greater magnitude than the contact cement I had been using. When heated thoroughly and properly (very, very important, as if it is not heated hot enough it will still stick to things, and seem like it is working, but then later pop right off) this stuff will stick to practically anything, and form an incredibly strong bond, that is to say that the substrates on which the glue is applied will likely fail (with the exception of metal, but even in that case, which is something I did test, the glue split rather than ripping clean off of the metal) before the glue does, this includes ripping off the top layer of skin on your fingers, needless to say I give heat lock my stamp of approval, and will be switching to that for the next veneering project I do. That is all without mentioning probably the best part, which is that it allows you to do "real veneering" with raw wood as Glenn mentioned. In addition I found it to be far easier to repair mistakes as well. Yes, I am pretty excited about heat lock, but I should definitely mention that, like the other methods I have used so far, it absolutely has its caveats, and really getting good results took some serious practice.

The second change that I made was in prepping the brackets. The stock brackets are coated (not sure what they used) and pretty smooth and well protected, so my first attempts were done while trying to maintain the integrity of that coating. Due to the previously-mentioned difficulties with the edges, and inconsistencies from one bracket to another, I decided to grind them all down to a more or less uniform flatness. This was done first all by hand with files and sandpaper, then for the rest I very carefully used an angle grinder to do the bulk of the work then finished with files and sandpaper. As the angle grinder left some significant edge burring I also ground flat the wide faces as well. Doing all of this made veneering the narrow edges so much easier.

The third major change was in the species of wood that I used. I wanted something that would contrast better, but not look too out of place, I ended up going for a wood that I have deliberately ignored thus far since it is so commonly used on vintage gear: walnut.

The fourth, and final big change I made for this second attempt was in the tools and techniques that I used for manipulating the wood. I needed a better solution to bending the wood around those super tight radii. I will start by saying that I don't like what most veneer softeners are made of (a lot of glue in there) so I ruled those out as an option immediately. The second method I tried (actually used this a bit on my first attempt) that had a degree of success was using saliva. Yes, you read that correctly, saliva, spit, right from my mouth. I had a hypothesis about this potentially working, especially due to the myriad of enzymes contained in saliva that begin breaking down and digesting food before you swallow it. Now I am no chemist or biologist, so I cannot say for sure if those enzymes are the reason why this worked, but I will say that I did have success with this method. It was for other obvious reasons that I decided against it e.g. I shouldn't be licking this stuff it will probably give me cancer, tongue splinters, and so forth. The third, final, and most successful way that I settled on is one that was in the back of my head the whole time: steam. I have used steam on past restoration projects, one in particular where it really stood out was in de-warping maple runners of an old toboggan. For that project I makeshift set up a rig using a lot of towels, a wallpaper steamer, and a ton of metal weights, and it actually produced great results. The "official" or "proper" way to do this with steam is to use a steam chamber that you place the wood in and apply the steam under pressure, but I don't have access to one of those. Actually I don't currently own a wallpaper steamer either, but what I do own is a fancy high end Ladybug steam cleaner capable of putting out a jet of steam at around 300 degrees F at around 70psi. This just so happened to work incredibly well, the photos will speak to this.

Anyway, speaking of photos, here they are:
010_walnut.jpg 014_walnut.jpg 015_walnut.jpg 016_walnut.jpg 017_walnut.jpg 018_walnut.jpg 019_walnut.jpg 020_walnut.jpg 021_walnut.jpg 022_walnut.jpg
 
Last edited:
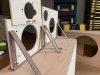
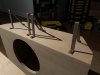
And here are some shots of mocking everything up with the baffles, I took some of these with different lighting that better showed the contrast of the maple/cherry/walnut:

002_mockup.jpg 001_mockup.jpg 003_mockup.jpg 004_mockup.jpg 005_mockup.jpg 006_mockup_glamor.jpg 007_mockup_glamor.jpg 008_mockup_glamor.jpg 009_mockup_glamor.jpg 010_mockup_glamor.jpg
 
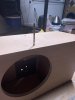
And lastly, at least for today, here are some more of mocked up photos, pay close attention to these and you might just spot a surprise that I referred to in the first post of today!

011_mockup_glamor.jpg 012_mockup_glamor.jpg 013_mockup_glamor.jpg 014_mockup_glamor.jpg 015_mockup_glamor.jpg 016_mockup_glamor.jpg 017_mockup_glamor.jpg 018_mockup_glamor_SPECIAL.jpg
 
pay close attention to these and you might just spot a surprise that I referred to in the first post of today!

Did you score some Dahlquist subs? There is a pair of something in your last pic.

Beautiful work on the brackets. I would not have thought to wrap them in wood veneer. You are definitely thinking outside the box. Can't wait until you get to hear them!

About a week or two ago I hooked up a pair of 12" powered subs for my DQ-10s and have been enjoying the extra bass. It does make a significant difference.
 
Back
Top Bottom