• The move to the new server is done. There are some software and database maintenance updates in process. This has us passing the hat around to help out. We appreciate any donations. Seriously, even a dollar helps. The payment page may be found here - https://www.audiokarma.org/support.html

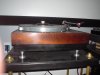
Thorens TD-150 Project

I have had a 150 for over a year and it has sat unused. It badly needs a new armboard as someone made one out of chipboard for it and it looks like crap. Mine has an SME 3009 fixed headshell arm. I got a call 3 days ago and was told that a new armboard was being fixed for me and that I would receive it before the 1st of the year. I am excited. I will be following this thread with eyes wide open to see what all is done to this TD150.

Hey Sam, you remember seeing my 150 when you were down? It was sitting on top of the Altec to the left of my rack.
 
I love that arm. I'd love to find someone swapping over to a fancier arm, that crazy design would look great on my Rek-O-Kut.

Keep your eye out Sam, the long term plan for this table is a SME or a Rega at some point, I still need to run through the stock arm as the bearings still aren't quite right.
 
I have had a 150 for over a year and it has sat unused. It badly needs a new armboard as someone made one out of chipboard for it and it looks like crap. Mine has an SME 3009 fixed headshell arm. I got a call 3 days ago and was told that a new armboard was being fixed for me and that I would receive it before the 1st of the year. I am excited. I will be following this thread with eyes wide open to see what all is done to this TD150.

Hey Sam, you remember seeing my 150 when you were down? It was sitting on top of the Altec to the left of my rack.

Yep, I remember that table. The SME 3009 on it is a beauty. I don't know why someone started with a lovely table like a Thorens, bought that great arm, then cheaped out on the board. Can't wait to see the new board! :thmbsp:

Keep your eye out Sam, the long term plan for this table is a SME or a Rega at some point, I still need to run through the stock arm as the bearings still aren't quite right.

I'll keep my eyes peeled! Good luck getting the bearings set right.
 
Last edited:
Removing the armboard assembly

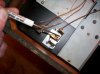
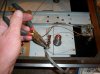
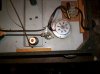
We start by removing the lift cable, pinch the lift assembly over to the lift position, and the cable will slide right out.


attachment.php
 

Attachments

  • TD-150 017.jpg
    TD-150 017.jpg
    108.8 KB · Views: 819
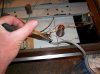
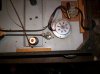
Gently pry the fork holding the cable in with a small screwdriver and the cable housing slips out.


attachment.php
 

Attachments

  • TD-150 019.jpg
    TD-150 019.jpg
    95.7 KB · Views: 795
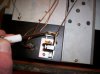
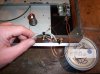
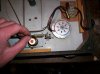
These are the screws that hold the small board that the tonearm wiring is soldered to, be careful the one that doesn’t have the ground wire attached to it has a small spacer on the screw under the table and it will go rolling across the shop floor! :D

attachment.php


attachment.php
 

Attachments

  • TD-150 020.jpg
    TD-150 020.jpg
    98.1 KB · Views: 803
  • TD-150 021.jpg
    TD-150 021.jpg
    112.4 KB · Views: 800
The second screw, has a ground wire attached to it, there is a second nut holding the small clamp on.

attachment.php
 

Attachments

  • TD-150 022.jpg
    TD-150 022.jpg
    123.6 KB · Views: 783
All of the hardware placed back on the board in hopes of not losing it!

attachment.php
 

Attachments

  • TD-150 024.jpg
    TD-150 024.jpg
    86.3 KB · Views: 784
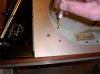
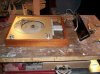
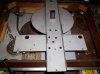
Now just remove the remaining three screws from the underside of the armboard and lift the whole assembly off.


All removed and ready for the next step.


attachment.php
 

Attachments

  • TD-150 025.jpg
    TD-150 025.jpg
    103.3 KB · Views: 745
Mel, I like your pictures but I see you downgraded your work stand. That "Stonewashed Interior Satin" isn't going to go down nearly as well at the end of the job. :D
 
Removing the speed selector arm

Here you will see a small white plastic piece.

attachment.php


Rotate it 45 degrees as shown.

attachment.php


The tabs now align with the square hole in the speed selector lever, and the arm can be pulled free, unhook the other end from the speed selector switch, and remove the arm.

attachment.php
 

Attachments

  • TD-150 026.jpg
    TD-150 026.jpg
    108 KB · Views: 732
  • TD-150 027.jpg
    TD-150 027.jpg
    108.6 KB · Views: 725
  • TD-150 028.jpg
    TD-150 028.jpg
    110.8 KB · Views: 725
Now we are free to remove the springs and subchassis for clean up and inspection.

attachment.php


attachment.php
 

Attachments

  • TD-150 029.jpg
    TD-150 029.jpg
    119.2 KB · Views: 714
  • TD-150 030.jpg
    TD-150 030.jpg
    115.4 KB · Views: 709
Superb thread, Mel. It will debated till the end of time as to which came 1st, the 150 or the AR/XA (chicken or the egg thing). Being a past owner of a 150, which I HIGHLY modified, I can only say "DO NOT" count out the TP-13A tonearm. I replaced the TA on mine w/a RB300 just because of the cool factor. I learned later that the original TA is a contender, when the table is setup correctly and the right cartridge is used.

I will be watching this thread with interest sir, just to learn from others knowledge. Plus it gives me a chance to show off "baby" once more. :D

DKeeper6.jpg
 
That looks great ZB! I will spend some time with the TP-13, I don’t like to modify without spending some time with the table in original shape, I would think that this arm would need some work to get up to an RB300 level though.
 
Thanks for documenting this table as you have done others Mel. These image by image tutorials will help many future Thorens owners.

I can see it helps you also in having an image log for reassembly. For all of us that embark on a new TT restoration an image log can help us, and if it helps us uploading it to AK like you have it may help thousands of new owners with all kinds of TTs.

Audio Karma Tripple Plus!
 
Back
Top Bottom