

You are using an out of date browser. It may not display this or other websites correctly.
You should upgrade or use an alternative browser.
You should upgrade or use an alternative browser.
Thorens TD-150 Project
- Thread starter Divotdog
- Start date

dean man jim
Active Member
That looks great ZB! I will spend some time with the TP-13, I don’t like to modify without spending some time with the table in original shape, I would think that this arm would need some work to get up to an RB300 level though.
The RB300 is a famously good arm but in some quarters the TP13A is actually considered at least equal to the RB300, on the TD150. The MkI TP13 is another matter, though, as apparently are the earliest TP13A examples. The crux of the matter I think is that the TP13A came with at least three iterations of arm bearings; the later ones are muy bueno. I don't know where the serial no's cut off, but if yours is above 120,000 or so you may likely have the best versions of the bearings. Mine is 126,XXX and it's a wonderful arm with a DL103, or a SS modified one, or any number of vintage MM "supercarts" I've used with it that aren't super high compliance.
Looking forward to seeing the continuation of your project!
Jim
Last edited:

Divotdog
"I can fix it Grampa"
Good information Jim, thank you, I will take a good look at the arm at some point and check the serial numbers and do some research, if it turns out that it is as good as a RB-300, I guess I will just have to up the TA budget  , the ultimate goal of this table is to build a giant killer at some point.
, the ultimate goal of this table is to build a giant killer at some point.
dean man jim
Active Member
Good information Jim, thank you, I will take a good look at the arm at some point and check the serial numbers and do some research, if it turns out that it is as good as a RB-300, I guess I will just have to up the TA budget
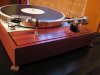
You're welcome. The table's serial number is on a metallic tag, located on the top plate under the platter. Giant killer---well, tastes and preferences certainly differ among folks but I prefer my stock-plinth but tweaked/slightly modified (and well set up) TD150 to any number of new tables I've heard up to about $3K (w/ cart) and I got mine for free (image below)! A nice solid plinth for the TD might raise the bar even more. If you're curious and haven't seen it yet, over at the analog dept there is a fairly radical TD150 project nearing completion (cld plinth, springs substituted with hose, Jelco arm).
Attachments
Last edited:
Divotdog
"I can fix it Grampa"
I’ve been watching that one very closely, the R7 plinth probably the one I will use on this table, the hose in place of the springs intrigues me also, this is something we will try on this table at some point, I am no engineer all I can do is try to implement wiser folks ideas. :yes:
Divotdog
"I can fix it Grampa"
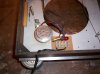
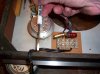
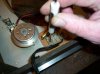
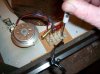
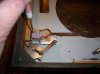
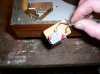
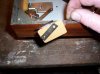
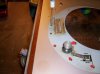
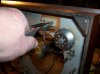
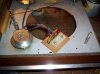
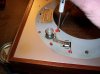
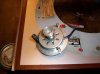
Now we can remove the motor itself, there are three screws on the top plate, the one closest to the platter is the adjustment screw, it has a washer on top of the top plate and a spring underneath, break all three screws loose, remove the two mounting screws, the carefully remove the adjusting screw while holding a finger or two over the spring, as you get to the end of this screw be sure you support the motor so it won’t fall.

Attachments
Divotdog
"I can fix it Grampa"
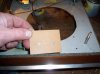
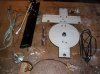
Now we have to deliver the motor to Sparksaflyin for new caps (We have a rule here in Boise, Sparks isn’t allowed to touch the table saw, I am not allowed to solder, and Bsujeep is always the designated driver ). While he is doing that, I will clean, test and lube everything else and prepare the table for reassembly.

). While he is doing that, I will clean, test and lube everything else and prepare the table for reassembly. Attachments

mwr885
Don't Eat The Worm...
We have a rule here in Boise, Sparks isn’t allowed to touch the table saw, I am not allowed to solder, and Bsujeep is always the designated driver
Sounds like a good deal! :thmbsp:

bsujeep
Go Boise State!!!
(We have a rule here in Boise, Sparks isn’t allowed to touch the table saw, I am not allowed to solder, and Bsujeep is always the designated driver
Hey wait a second, WHO came up with that rule? :scratch2:
sparksaflyin
Active Member
That's a laugh, both of you are excellent solderers! Bring that board by & we'll replace those caps. BTW, excellent job on your efforts with this table, and creating a detailed thread; this is a great account for anyone doing work on this model table!
As far as table saws go, my motto is "cut twice and...." what else is it I'm supposed' to do?
As far as table saws go, my motto is "cut twice and...." what else is it I'm supposed' to do?
