• The move to the new server is done. There are some software and database maintenance updates in process. This has us passing the hat around to help out. We appreciate any donations. Seriously, even a dollar helps. The payment page may be found here - https://www.audiokarma.org/support.html

Thorens TD150 MKII / Tone-arm - opinions needed!

Start by sliding the counterweight off. What worries me a bit is that you possibly don't have the correct tools for work on the vertical bearings. Can't really give you any hint on where to get them, since I make most of these tools I use myself. But something like this: https://www.dualfred.de/Tonearm/Gimbal-Part/Tool3-300211-en.html?language=en. I don't know if these are the correct size for Thorens. The "screw" seen at the side of the bearing is the bearing cone, which is adjusted into the correct position with a screwdriver, and then locked into place with the tool for the outer nut (which isn't hexagonal, but slotted).

What you should do now is to loosen the nut a bit, and screw out the cone with its nut. Hopefully the bearing balls are kept in place in a ball ring, but just in case, keep the arm over a plate to catch any falling balls. With the cones and ball rings out, you can take the arm tube assembly apart from the pillar. A nice thing about these arms is the horizontal bearing we discussed earlier: it has no balls to lose.

You may want to google something like "thorens tonearm rewire" to get the overall gist of how this is done before starting.
 
I've seen people modify a flathead screwdriver to create a DIY U shaped tool, I'll carefully do that. Any suggestion on how to place a plate or something to catch the balls? Maybe I'm missing something but if the arm is still attached to the table, how is it possible to place something underneath?
 
Since you are taking the arm apart, take it off the deck to begin with. You'll have to do it sooner or later anyhow to get rid of the rubbers at the mounting screws, and it will make the job much easier.
 
I simply moved the turntable from my work-station to another surface last night and accidentally dropped the un-attached dust cover that was on top from about 1 inch high directly on the arm... from what I see it most likely hit either the anti-skating arm or the back counterweight (which I didn't remove yet). Should I be concerned? Minimal impact but that stressed me out. The arm was securely attached to the arm-rest.
 
Normally it shouldn't be a problem. If it is, you'll find out after opening the vertical bearings. The bearing cones in these arms seem to have been made in two versions. One, ending in a basic conical shape, and one more sophisticated with the cone ending in a needle-like tip. These tips of course aren't very keen on blunt force. So, if you can't see any traces of broken tips on your cones, you should be OK. What you describe shouldn't have been bad enough to cause any major damage to anything else.
 
Normally it shouldn't be a problem. If it is, you'll find out after opening the vertical bearings. The bearing cones in these arms seem to have been made in two versions. One, ending in a basic conical shape, and one more sophisticated with the cone ending in a needle-like tip. These tips of course aren't very keen on blunt force. So, if you can't see any traces of broken tips on your cones, you should be OK. What you describe shouldn't have been bad enough to cause any major damage to anything else.
Ok thanks a lot for the quick reply, of course I was mad at myself, not gonna happen again! I also surprisingly managed to buy all missing parts for the arm at a very good price so I took a chance (without seeing the inside conditions of the arm). I just couldn't skip this deal. Let's hope everything else is in good shape when I open it up!
 
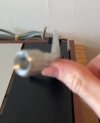
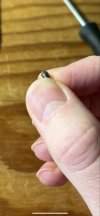
Thought I'd keep documenting the process further more, to help out other people! Ok so regarding the arm, the next step I've taken is to take out one of the outer screw (part number 808-3912, called "slutted nut") to take some accurate measurements. Here's what it looks like (photo below). Also, I'm lucky enough to know a machinist that has access to awesome equipment. He asked for a few dimensions and will make me a custom slutted nut adjustment tool! I'll post photos of it when it's done, but it's basically a modified bolt without threading + a knurled "thumbscrew" surface + an emptied core with space for a tiny screwdriver. Oh and with a machined custom made double tip. (everything will make sense with future pics)

If anyone needs the dimensions of the screw, here they are (the +/- 20mm isn't related to the screw, but to the future tool). It's the clearance required to manipulate the tool). To be continued!

f1edc34e-78e9-41c6-9b2f-36e3ead1d71c.jpg

355724bc-748c-4126-b293-68e1a66615c2.jpg
 
Last edited:
A few points:

- I was advised to NOT take out the inner bearing screws, because the tiny pointy tips are quite fragile and are not 1 piece with the screws (they can easily fall off). With that in mind, I'm a bit confused on how I can verify their state...
- I've adjusted 1 side of the tonearm bearings and it did remove the play. I'm wondering if both sides need to be adjusted the exact same (to perhaps "center" the arm?) or just one side is good?
- When I lift the tonearm, there's no play, but the more up it goes, the more slanted it looks! (see image below). I'd really need some advice on that. Is this normal or there's something wrong? I don't feel any friction, rubbing or anything weird..

EDIT: upon observation, I realized that the bearings aren't actually perpendicular to the arm, but diagonal! This all makes sense, the arm is supposed to tilt when lifted. If you're wondering if this makes sense, just tape a ruler on top of a pen, diagonally and rotate along the axis of the pen. The ruler will tilt!

EDIT 2: The advice I got regarding not removing the inner screws is technically right, but if you're careful you can remove them. (although the tip WAS one piece with the screw). The reinsertion is the tricky part, but with care it's alright.

Capture.JPG
 
Last edited:
How has it gone, did you find it? It could come in handy, you know... I admit I've never come across or even heard of this problem.

Should you find it again, the odd angling of the arm you described is normal. It is due to the geometry of the arm and bearing, and won't be any problem unless you need to play extremely warped records.

And, as you've probably figured out by now, you only need to do the fine adjustment of the vertical bearing on one side.
Not sure I understand, find what ?
If you mean the tiny tip, I sure did! Still inside the arm!
 
Last edited:
But I still wonder about the tip falling off. Was it really so loose it just fell by itself? If its fastening is so loose, that could be an audible problem for the stability of the bearing.
 
Yes, the tip, Good to hear!
These tips breaking clean off the screws is something very very commun. With closer observation, I confirm that the tips were indeed one piece with the screws. The break isn’t clean, I can absolutely see that the metal cracked. Even if I managed to remove the play with the broken piece still inside, of course I’ll replace it.

Anyhow, next step is to find similar M3 needle tip screws that I’ll modify/ machine to the same specs (so grateful I can do that). Thank god I still have a good screw to use has a reference! I’ll then get the custom tool + will keep the thread updated.
 
OK, now I understand what happened - basically what I tried to warn you for before. Do you think you can also get it hardened? I doubt it will be strong enough without it. An alternative could be making the tip a more traditional cone shape - some (possibly later versions?) of these arms had such instead of the needle. That could be easier to get strong enough for practical use, if it can be made to fit into the ball retaining ring.
 
Exactly, by the way, I don't know if this was an assumption but this arm wasn't designed with loose bearings (this was mentioned earlier). No need to be concerned about that when removing the inner screws, this isn't a bicycle wheel after all. However, replacing them will require careful alignment, but nothing too complex.

I'm not an experienced machinist but my father is. I'm sure he already has something in mind with a tougher design, perhaps stainless steel or something. I don't think I'll change the shape too much though since cones were maybe designer to meet slightly modified types of bearing holes (who knows). The design worked, I'll keep it as-is. (but cones would technically work)

I'll be able to get the tool early February
 
Last edited:
Little update, yesterday I've received the 3 missing pieces for the original TP13a tonearm. Everything looks great! can't wait to solve the rest
 
Back
Top Bottom