

You are using an out of date browser. It may not display this or other websites correctly.
You should upgrade or use an alternative browser.
You should upgrade or use an alternative browser.
Timeframe TF350s - Rebuild
- Thread starter OMI
- Start date

digtubeess
Active Member
hey.. two things .. 1.there's two caps that are 47 , 47uf the other is .47OMI said:Called DCM today and they were kind enough to send me the schematics for the X-Over. Now all I have to do is order the correct caps. Is there an issue with replacement caps at a HIGH voltage???? Looks like the ones on the schematic are 50 V and the ones in the PE catalog are much higher???
omi
2. the inductors can really be improved upon use some foil or just bigger gauge like 2.0mH 16 AWG for the woofer and .27 for the vifa tweeter.. talk about improvement ! gr has good prices for them
http://www.gr-research.com/components/foil_inductors_16ga.htm
another interesting thing is they switched tweeter in rev e from a d19 to a d20... with I noticed is because several versions of those tweeters (3/4 inch)
are still made. ones 6 ohm the other is 8 ohm.

OMI
Super Member
O.K.
I am removing the CAPS. Have removed 3 CAPS on each PC board. It is clear which ones are the 6.8 (C2) and 47 (C3) uf ones. The schamtis show 4 CAPS on each PC board (if I have the revised PC board).
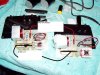
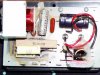
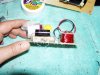
I think I know the CAPS that were shown as 0.47 (C1) upgraded to 1.5 uf, but not sure. The CAPS that I removed had 2 sets of different marking and did not resemble any 0.47 or 1.5 uf (see pic)?
There is one small red element on the board that I have no idea what it is??? Is that C4????
Want to make sure I get it right before I start trying to re-install the CAPS.
Thanks...
........
I think I have answered my own question. I looked at the back of the PC board to see if any of it made an sense and it looks like what I thought was C1 is C4... I think the red thing is C1...
Does that sound right???
I am removing the CAPS. Have removed 3 CAPS on each PC board. It is clear which ones are the 6.8 (C2) and 47 (C3) uf ones. The schamtis show 4 CAPS on each PC board (if I have the revised PC board).
I think I know the CAPS that were shown as 0.47 (C1) upgraded to 1.5 uf, but not sure. The CAPS that I removed had 2 sets of different marking and did not resemble any 0.47 or 1.5 uf (see pic)?
There is one small red element on the board that I have no idea what it is??? Is that C4????
Want to make sure I get it right before I start trying to re-install the CAPS.
Thanks...
........
I think I have answered my own question. I looked at the back of the PC board to see if any of it made an sense and it looks like what I thought was C1 is C4... I think the red thing is C1...
Does that sound right???
Attachments

Last edited:

dr*audio
Fish fingers and custard!
The small red thing is a capacitor. It's Mylar or Polyester so you don't have to change it if you don't want to. The large yellow caps are both 2.2uF at 100V. I know you don't want to hear this but those are Mylar or Polyester also and needn't be changed. The only ones I think worth changing are the 2 electrolytics, 6.8uF and 47uF.
OMI
Super Member
Thanks...
I was QUICK on the DE-soldering GUN and removed the 2.2 uf CAPS... I had not touched the other one (RED one). I will leave it in... Being that I removed the 2.2 uf and have 2 NEW ones I will change them out...
Gotta learn some way

Now on to SOLDERING 101... Or SOLDERING for DUMMIES...
My next challenge will be to put the CAPS in and not screw up everything around them
I was QUICK on the DE-soldering GUN and removed the 2.2 uf CAPS... I had not touched the other one (RED one). I will leave it in... Being that I removed the 2.2 uf and have 2 NEW ones I will change them out...
Gotta learn some way
Now on to SOLDERING 101... Or SOLDERING for DUMMIES...
My next challenge will be to put the CAPS in and not screw up everything around them
dr*audio
Fish fingers and custard!
Soldering for dummies:
1. Put the new part through the holes in the board and bend the leads inward or outward to lock it in.
2. Hold the iron tip to the joint.
3. Touch the solder to the tip and draw it down onto the joint. Coat the joint with a nice fillet of solder.
4. Withdraw the iron and solder.
5. Cut the excess lead.
When you get better at it, cut the excess lead off before you solder and coat the joint and the end of the lead with solder for better protection against oxidation. To find out where to cut the lead, lay the solder next to it and place the diagonal cutter on top of the solder. That's the length of lead to leave (the thickness of the solder (.030 - .040")
1. Put the new part through the holes in the board and bend the leads inward or outward to lock it in.
2. Hold the iron tip to the joint.
3. Touch the solder to the tip and draw it down onto the joint. Coat the joint with a nice fillet of solder.
4. Withdraw the iron and solder.
5. Cut the excess lead.
When you get better at it, cut the excess lead off before you solder and coat the joint and the end of the lead with solder for better protection against oxidation. To find out where to cut the lead, lay the solder next to it and place the diagonal cutter on top of the solder. That's the length of lead to leave (the thickness of the solder (.030 - .040")
OMI
Super Member
O.K.
No fires... That's good...
No smoke... That’s good...
Have the 2.2 and 6.8 uf CAPS soldered into place. Have to get a GOOD set of diagonal cutters in the morn to cut the leads off as the ones I have are shot...
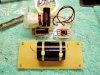
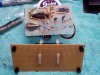
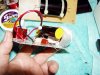
Now to the 47 uf CAP. It is tooooo big to put directly on the PC board and it appears that the lead wire diameter is larger than the holes on the PC board. Was not sure about a clip... So..... I got some off-sets and PC board and have mounted the 47 uf CAP to the secondary board. Was thinking of epoxying the board to the inside bottom of the cab. Now if this looks like it will work how do I wire the 47 uf CAP to the board. I have some braded electrical wire that also got... Would I solder the wire to back side of the X-Over PC board, or the front side looked at the PC board and answered my own question on this one.... If I have to solder a wire it has to be done on the BACK of the board where the traaces are.. .. OR?????
No fires... That's good...
No smoke... That’s good...
Have the 2.2 and 6.8 uf CAPS soldered into place. Have to get a GOOD set of diagonal cutters in the morn to cut the leads off as the ones I have are shot...
Now to the 47 uf CAP. It is tooooo big to put directly on the PC board and it appears that the lead wire diameter is larger than the holes on the PC board. Was not sure about a clip... So..... I got some off-sets and PC board and have mounted the 47 uf CAP to the secondary board. Was thinking of epoxying the board to the inside bottom of the cab. Now if this looks like it will work how do I wire the 47 uf CAP to the board. I have some braded electrical wire that also got... Would I solder the wire to back side of the X-Over PC board, or the front side looked at the PC board and answered my own question on this one.... If I have to solder a wire it has to be done on the BACK of the board where the traaces are.. .. OR?????
Attachments
Last edited:
dr*audio
Fish fingers and custard!
Nice job! Yep, solder to the back of the pc board an you're done. Well, after you glue the board in. I would use hot melt glue, not epoxy. If you ever have to replace the cap you want to be able to get it off. Or you could screw the board into the case, I like that better.
OMI
Super Member
FINISHED!!!! 
Due to the lack of space in the cab at the bottom I slopped some epoxy on the bottom of the stand-offs and placed the board with the big CAP in a back corner. One side had dampening fiber, and the other was free of it... So that’s where the CAP went. The leads were long enough to work the board in and still have a bit of slack to work the X-Over back in place.
Hooked 'em up to a small Rotel and they sound great. The wife is napping so no real work out yet... Later for that...
Due to the lack of space in the cab at the bottom I slopped some epoxy on the bottom of the stand-offs and placed the board with the big CAP in a back corner. One side had dampening fiber, and the other was free of it... So that’s where the CAP went. The leads were long enough to work the board in and still have a bit of slack to work the X-Over back in place.
Hooked 'em up to a small Rotel and they sound
great. The wife is napping so no real work out yet... Later for that...Attachments


Fast_Eddie
Upper-middle fi
Man, that is some first class work there! I'm really impressed! This is a great thread!

OMI
Super Member
TY folks...
As long as I can finish a project and NOT screw it up I have done good
Now I have room on my high tech work bench for my other projects:
1. Clean and lube and??? A dual 701 TT
2. Clean, lube, re-finish and ??? A Pioneer Cassette deck CT-F-700 ( the case is HUGE!!!)
3. Clean and lube and??? my Denon DP-60L TT
As long as I can finish a project and NOT screw it up I have done good
Now I have room on my high tech work bench for my other projects:
1. Clean and lube and??? A dual 701 TT
2. Clean, lube, re-finish and ??? A Pioneer Cassette deck CT-F-700 ( the case is HUGE!!!)
3. Clean and lube and??? my Denon DP-60L TT

First class job you've done with those speakers. Please don't take this the wrong way, but - was it worth it?
It looked like you went through a lot of effort and money on these speakers, was it a labour of love?
I've recently bought a pair of DCM TF350's. Got them from a little old lady. Sounded awful at her place, but thought that was just the poor recordings she has. Plus they were cheap enough, so I went for it. Got them home and they sounded alright, except the woofer on the left speaker had no surround. It had gone completely. The right one was ok. After asking around here, I found out how to get the sock off. Will get the woofer refoamed, but not sure if it's going to be worth it. I think they sound alright, nothing exceptional. The reason I'm spending money on refoaming it is so I can sell them again.
I'm not sure on the history or breed of these speakers. Am I expecting too much for their pedigree? Or is my pair faulty?
It looked like you went through a lot of effort and money on these speakers, was it a labour of love?
I've recently bought a pair of DCM TF350's. Got them from a little old lady. Sounded awful at her place, but thought that was just the poor recordings she has. Plus they were cheap enough, so I went for it. Got them home and they sounded alright, except the woofer on the left speaker had no surround. It had gone completely. The right one was ok. After asking around here, I found out how to get the sock off. Will get the woofer refoamed, but not sure if it's going to be worth it. I think they sound alright, nothing exceptional. The reason I'm spending money on refoaming it is so I can sell them again.
I'm not sure on the history or breed of these speakers. Am I expecting too much for their pedigree? Or is my pair faulty?

Fast_Eddie
Upper-middle fi
Puunda said:Got them home and they sounded alright, except the woofer on the left speaker had no surround. It had gone completely. The right one was ok. After asking around here, I found out how to get the sock off. Will get the woofer refoamed, but not sure if it's going to be worth it.
Hang on there. If there is no sound at all from the woofer, getting it refoamed will not help.
OMI, you might know- what are the woofers? Are they a Vifa? I know they still make some of the drivers from this era, and some are very nice.
DCM made some really nice speakers. I would think that a pair of these in good shape would sound dang nice. I've never heard them, but I do really like my Time Windows.
Take care,
Ed
OMI
Super Member
Puunda
I paid $20.00 for the speakers at a local thrift store. I spent about $50.00 for the X-Over parts and spent about $30.00 for the cloth, surrounds, glue, etc.... So for about $100.00 I have a pair of very nice speakers now.
I had never done any CAP replacement before so I thought this would be a good set of speakers to learn from. It worked out well.
Never been much of a DIYer, so I am amazed when I can get a set of speakers that looked like these did and end up with what I have
I have learned to do the "simple" stuff like re-foaming surrounds, re-veneering, simple part replacement and belt replacement. Do not have test equipment, nor the knowledge to do deeper diagnostics.
I have found that with most vintage stuff that looks like hell at the TSs, that all it needs is a good cleaning, new belts and maybe some veneer and you have piece of equipment that is as good as it was when it was first sold.
I end up with some nice items that I could never have purchased when they were new due to their initial cost...
I also post my exploits for others that are DIY challenged so that they might also take the "plunge" so to speak and give it a try... And with ALL the folks that DO have the technical knowledge on this board, and the help that they give, it makes it easy to do a job like this :yes:
Also the “trickle down” theory works well for the folks around me… When I get more stuff than I have room for I have to find new homes for the OLD so I can make room for the NEW… I have a Bud at work who now has a complete system thanks to the “trickle down” effect. Another guy at work that has a small church has 2 sets of speakers, a Sansui cabinet system, and soon a Kenwood cabinet system for his church. A Bud at work stopped in last Saturday holding a Denon DP-60L TT that he just got for $3.50 and gave it to me… I powered it up later in the week and it works… I had a Pioneer SX-780 that I had gotten a while back at a TS and it was put away for a later project. I got it down and it was in good shape so I cleaned the face and knobs and adjusted DC offset and gave it to him.. He needed an amplifier anyway…
Better stop my ramblings now…..
I paid $20.00 for the speakers at a local thrift store. I spent about $50.00 for the X-Over parts and spent about $30.00 for the cloth, surrounds, glue, etc.... So for about $100.00 I have a pair of very nice speakers now.
I had never done any CAP replacement before so I thought this would be a good set of speakers to learn from. It worked out well.
Never been much of a DIYer, so I am amazed when I can get a set of speakers that looked like these did and end up with what I have
I have learned to do the "simple" stuff like re-foaming surrounds, re-veneering, simple part replacement and belt replacement. Do not have test equipment, nor the knowledge to do deeper diagnostics.
I have found that with most vintage stuff that looks like hell at the TSs, that all it needs is a good cleaning, new belts and maybe some veneer and you have piece of equipment that is as good as it was when it was first sold.
I end up with some nice items that I could never have purchased when they were new due to their initial cost...
I also post my exploits for others that are DIY challenged so that they might also take the "plunge" so to speak and give it a try... And with ALL the folks that DO have the technical knowledge on this board, and the help that they give, it makes it easy to do a job like this :yes:
Also the “trickle down” theory works well for the folks around me… When I get more stuff than I have room for I have to find new homes for the OLD so I can make room for the NEW… I have a Bud at work who now has a complete system thanks to the “trickle down” effect. Another guy at work that has a small church has 2 sets of speakers, a Sansui cabinet system, and soon a Kenwood cabinet system for his church. A Bud at work stopped in last Saturday holding a Denon DP-60L TT that he just got for $3.50 and gave it to me… I powered it up later in the week and it works… I had a Pioneer SX-780 that I had gotten a while back at a TS and it was put away for a later project. I got it down and it was in good shape so I cleaned the face and knobs and adjusted DC offset and gave it to him.. He needed an amplifier anyway…
Better stop my ramblings now…..
OMI
Super Member
Ed,
Did not even look
But I had called DCM and they had replacement woofers
but the replacement woofers are $32.20 plus shipping...
http://www.dcmspeakers.com
Did not even look
But I had called DCM and they had replacement woofers
but the replacement woofers are $32.20 plus shipping...
http://www.dcmspeakers.com
shrinkboy said:pu- you should send 'em to omi-san for an overhaul....he's in bidness now
I forgot to mention I'm in New Zealand.
Fast_Eddie said:Hang on there. If there is no sound at all from the woofer, getting it refoamed will not help.
Ed
There is sound from the woofer, sorry about that. But obviously, it dosen't sound right not having a surrond on them.
OMI said:I paid $20.00 for the speakers at a local thrift store. I spent about $50.00 for the X-Over parts and spent about $30.00 for the cloth, surrounds, glue, etc.... So for about $100.00 I have a pair of very nice speakers now.
Good score.