

You are using an out of date browser. It may not display this or other websites correctly.
You should upgrade or use an alternative browser.
You should upgrade or use an alternative browser.
Ultimate Marantz Model 7 Restoration Thread
- Thread starter crooner
- Start date



ernie richau
Active Member
Hi
I just saw your thread and am excited to hear your take on the new caps.
When I was replacing the caps in my 7 removing the top and bottom covers did increase the noise level during testing. Maybe you could have a new cover made with just glass over the control indicator.
Where did you find the top hat knobs?
Nice work,
E

crooner
Tube Marantzed
Hi
I just saw your thread and am excited to hear your take on the new caps.
When I was replacing the caps in my 7 removing the top and bottom covers did increase the noise level during testing. Maybe you could have a new cover made with just glass over the control indicator.
Where did you find the top hat knobs?
Nice work,
E
Hi ernie,
Welcome to the thread!
The restoration is coming along nicely. The Cactus caps are quite a revelation so far. Glad I went ahead with them.
I wired up the new attenuator last night. Hopefully I can test the whole thing later today.
Yes, I figured the shielding provided by the non magnetic aluminum covers helped with the noise. Excellent suggestion on having a window made for the indicator only.
I found the white top hat covers on eBay. Some fellow was selling a set of 4 original Daka Wares for around 10 bucks each and jumped on them. I already had a spare slide power switch for a 7T also in white. To complete the new look I may paint the acorn plastic covers in the back in white to match the shorting plugs...
I am also ordering a brand new reproduction WC-2 walnut case from Germany. I like the WC-2 better for this project because of the top opening:

Last edited:
crooner
Tube Marantzed
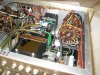
Finished wiring up the attenuator today. Tried to dress the wires as neat as possible. I'm a little concerned with the length of the wires coming from the balance control. They had to be extended to reach the attenuator which sits near the center of the preamp. The original wires were rather short. I hope they don't pick up any noise...


Last edited:
ernie richau
Active Member
Looks very nice. I have worked with equipment where we were concerned about noise on longer conductors in the past. In those cases we used a shielded wire. Sometimes grounded only at one end.
If you measure noise on it maybe you could give that a try??
If you measure noise on it maybe you could give that a try??
crooner
Tube Marantzed
Looks very nice. I have worked with equipment where we were concerned about noise on longer conductors in the past. In those cases we used a shielded wire. Sometimes grounded only at one end.
If you measure noise on it maybe you could give that a try??
Thanks! I didn't have the time to fire it up today. I am hoping tomorrow night after work. If noise is an issue I'll try shielded cables. I have some nice Belden here I could use...
Last edited:

canuckaudiog
On a quest for high fidelity
Wow, this is quite a project you are undertaking here.
That's great you have a reference, that helps immensely!
I hope it all works out, you've made some very intelligent choices with this restoration. I love that volume control and LED display, especially.
I will be following along!
That's great you have a reference, that helps immensely!
I hope it all works out, you've made some very intelligent choices with this restoration. I love that volume control and LED display, especially.
I will be following along!
crooner
Tube Marantzed
Thank you very much canuckaudiog!!
I am listening to the preamp as I type with the new attenuator wired in. A whole new different experience. Very smooth volume range. No blasting as you turn the volume up. At first it appears the bass is a little light or weak compared to my reference. But it may require some burn in. It may be that the greater clarity gets rid of muddiness in the bass that passes as low end extension.
Made a little YouTube video of the preamp in action:
ernie richau
Active Member
Just checked out the clip. That is very nice.
I can relate to the noise issue with the stock volume control. I have had to go in and clean mine a second time to get it right.
Let's hope the bass issue sorts it self out with a little time.
E
I can relate to the noise issue with the stock volume control. I have had to go in and clean mine a second time to get it right.
Let's hope the bass issue sorts it self out with a little time.
E
crooner
Tube Marantzed
Just checked out the clip. That is very nice.
I can relate to the noise issue with the stock volume control. I have had to go in and clean mine a second time to get it right.
Let's hope the bass issue sorts it self out with a little time.
E
Thanks! The volume and balance pots on this particular example are sealed so they are not easy to clean. I drilled a couple of tiny holes on the balance pot and sprayed some DeOxit inside of it. The noise went away. Khozmo suggested that I removed the balance pot altogether, but I like having this control, so it will stay in circuit.
I do notice a little bit of white noise compared to my reference and it lessens a bit when I move the flat cable that powers the LED display away from the attenuator and signal cables. I may have to experiment to find the ideal wire dress.
Once I replace all the power supply filter cans I am hoping the noise floor will be lower still.
It is useful to point out this noise is only audible with the ear next to the speaker. No noise can be heard from the listening chair at any output level.
I think the preamp is sounding quite good but it hasn't opened up yet. It sounds a little restrained. As I put more hours on it, I am hoping it will sound even better. The issue with the bass could be due to the tubes I am using. They are Telefunkens and test great, but who knows.. I am going to put in the Teles in my reference to be sure....
Last edited:
canuckaudiog
On a quest for high fidelity
I think that it does need some time to break in. How are the voltages in the circuit? Are they lining up with where they should be?
Personally, I've never been a huge fan of Telefunken tubes. I always found them a little bit bass shy. Certainly try them in your reference pre and see what it sounds like there.
Personally, I've never been a huge fan of Telefunken tubes. I always found them a little bit bass shy. Certainly try them in your reference pre and see what it sounds like there.
crooner
Tube Marantzed
Voltages are good. 18V output to heaters and 300V raw B+ voltage before filtering. Need to measure the derived voltages, and if they are not 100 percent that's ok since I plan to replace all the voltage divider resistors with vitreous enamel types.
As for the Teles I plan to do the other way around. I will take the tubes out of my reference and try them in the candidate preamp. I have always found Telefunken tubes go very well with the LS3/5As which don't produce any deep bass. However, last night the sound was less full than what I am used to. This is the upper bass region where the LS3/5A has very strong response.
As for the Teles I plan to do the other way around. I will take the tubes out of my reference and try them in the candidate preamp. I have always found Telefunken tubes go very well with the LS3/5As which don't produce any deep bass. However, last night the sound was less full than what I am used to. This is the upper bass region where the LS3/5A has very strong response.
I think that it does need some time to break in. How are the voltages in the circuit? Are they lining up with where they should be?
Personally, I've never been a huge fan of Telefunken tubes. I always found them a little bit bass shy. Certainly try them in your reference pre and see what it sounds like there.
Last edited:
ernie richau
Active Member
Hi
As you go through rolling tubes between preamps I am very interested in the differences you hear.
Thanks
E
As you go through rolling tubes between preamps I am very interested in the differences you hear.
Thanks
E
crooner
Tube Marantzed
Absolutely. I will let post any differences I hear. I think they will be subtle, since most of my Telefunkens have similar GM readings on my B&K. I think noise level or tube rush will be the most noticeable difference among them.
I have just finished replacing the cables going to the volume control. I used shielded Belden cable to replace the cables coming from the balance control, which actually carry the signal coming from the selector switch, so they are very important. While I was at it, I replaced the output cables going to the grids of the tubes. I used the same Belden type. Enclosed them in a woven mesh with shrink tubing for a little "bling"
Will post pictures later today.
I am hoping the shielded cables will reduce white noise and residual hum even further.
crooner
Tube Marantzed
The design, by the way, relies heavily on shielded cables connecting the tube board to the volume control. Earlier units were missing one shield. Later preamps added an extra shield terminated with a 1K resistor on the ground lug of the volume control. Apparently these multiple shields cancel hum fields by induction.
I tried replacing these cables with fresh Beldens. Tried to mimic the originals in every way. And still got more hum that I thought acceptable. Ended up reusing the old cables but wrapped them in mesh to match the cables I made coming from the balance control.
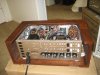
I also added a new reproduction wooden case:



I tried replacing these cables with fresh Beldens. Tried to mimic the originals in every way. And still got more hum that I thought acceptable. Ended up reusing the old cables but wrapped them in mesh to match the cables I made coming from the balance control.
I also added a new reproduction wooden case:
Last edited:
crooner
Tube Marantzed
I hope you all had a great Labor Day weekend!
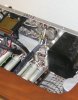
Today I went ahead and bypassed the output level controls on the preamp. I replaced the 500K pots and 180K resistors with 680K vintage Allen Bradley resistors on each channel.
The cathode follower output level pots have limited usefulness when driving a Marantz power amp since they remain set at their max positions for the best S/N ratio.
So eliminating them made sense. Should yield an improvement in sound quality.
I tried to arrange the wires as neatly as possible. Dressed the wire bundle in a black mesh to match my other cables....


Today I went ahead and bypassed the output level controls on the preamp. I replaced the 500K pots and 180K resistors with 680K vintage Allen Bradley resistors on each channel.
The cathode follower output level pots have limited usefulness when driving a Marantz power amp since they remain set at their max positions for the best S/N ratio.
So eliminating them made sense. Should yield an improvement in sound quality.
I tried to arrange the wires as neatly as possible. Dressed the wire bundle in a black mesh to match my other cables....
Last edited:

crooner
Tube Marantzed
Hi Airtime,
I had thought the Khozmo was the only stepped attenuator with remote control option. It uses a stepper motor for this. And the 48 steps really give you fine resolution compared to the typical 24 step types.
The IR sensor was placed in the same bracket as the 49 pilot lamp. The opening on the front panel is not very big but having the remote right in front of the preamp while sitting on my listening chair works fine.
The IR sensor cables are a twisted red/black pair going to the pilot lamp area as seen on the pics posted above.

s-petersen
Scott
Does having the top cover off make any difference in hum?