• The move to the new server is done. There are some software and database maintenance updates in process. This has us passing the hat around to help out. We appreciate any donations. Seriously, even a dollar helps. The payment page may be found here - https://www.audiokarma.org/support.html

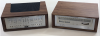
Wood Receiver Cases/Cabinets-How I Built a Few

FireGuruMN

Active Member
Here are the steps I took to build these wood cases:
upload_2022-1-8_12-3-37.png
After exhaustive searches of the interweb I found only one relatively complete guide on how to build nice wooden cases for vintage (or modern) audio receivers. And now I can't even find that one anymore. So in case there are other fools out there that want to build their own cases I thought I would document my efforts here.

I have piles of vintage audio equipment and most of the pieces will look better with wooden cases. Especially the tube equipment that has been pulled from consoles (NOT BY ME!). So I have gone down the expensive and time consuming path of acquiring the skills and tools, tools, tools needed to do a reasonable job of building these cases. If you only need one or two cases do the right thing and buy them from one of the online vendors. The $300 or so they charge for a case is well worth the price. But if you enjoy building and have all the tools then here are some instructions that may help you.

Enough yacking here we go:
 
Register to hide this ad
I build my cases our of 3/4" baltic birch plywood. That is excessive. I have numerous sheets laying around from speaker building projects. It is the only plywood I buy anymore. Note: GET THE GOOD STUFF. Good stuff has 17 layers of solid veneer. The outer layers are full thickness veneer, Not the paper thin covering that most stores stock on the shelves. I special order mine through Menards. It does not cost that much more than regular plywood and is an absolute joy to work with until you have to lift a sheet on your own (like 80 pounds as I recall).
It looks like this:
upload_2022-1-8_12-15-53.png
no gaps in the laminations anywhere.

I was fortunate enough to have an original wood case for a Marantz model 120 tuner (tuner works, scope is dead, rats nested in it before I got it). The dimensions needed to be adjusted to fit the 1180DC amplifier and 2100 tuner that I was building cases for. But I could see exactly how the old case was built and match the trim for the from face to an original case. If you don't have a case there are usually pictures on the internet that you can use to get some feel for how they are built. What I do now is just build all the main parts of the cases the same and only adjust the front trim to match the original cases. I find that the original cases were often built to a certain price point using 1/2 partical board or other cost saving materials. I'm going for a look here, not a museum piece.

Rip the plywood down to what ever depth you want for your case, minus the depth of the face trim. I went down the rabbit hold and made an extension table for my table saw because cutting 4x8 plywood on your own without one is too much excitement for my aging heart. I also followed an on-line guide to properly setting up my table saw, aligning rip fence, cleaning blade, and 100 other things. It cuts better than it ever did and is much safer now also. It is important to have the depth of each board very accurate. If the face boards do not fit tight it will upset you.

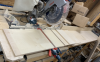
Then I used a power miter box to rough cut each board that I needed. I'm not going into dimensions of the cases. Measure your amplifier and figure it out. It gets complicated when you have to figure in extra room so leave some fudge for things like bottom screws on the amplifier and such. When I build my Scott case for an LK72, I had to route out 1/4 so the output tubes would fit. The tubes were JJ's and apparently are taller than the originals. Think everything through. I do not miter the corners at this time. That comes next. I found that the power miter box could not hold an accurate enough miter for me. And it has a maximum depth of 14"inches which means I'm at the limits of its reach.
upload_2022-1-8_12-32-48.png
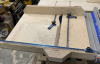
This is the way to cut miters!:
upload_2022-1-8_12-33-33.png
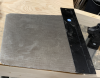
I can't believe I have been on this earth for 56 years and not owned one of these. Build one. Search for "table saw sled" on the interweb. There are lots of plans out there. The nicest bits of this one are the hold down clamps. My hands (and all 10 fingers) are no where near the dangerous bits of the saw. When I cut the miters, I measure once and cut several times. Meaning that the last cut is literally shaving a layer of dust off the miter. Some people call this a "spring cut". It is the best way to make sure nothing is being bent, stressed, overpowered, overworked when you make the last cut.
I always mark my boards like this:
upload_2022-1-8_12-38-12.png
A tick mark where the exact measurement is and a rough mark to show the angle direction. I'm an idiot and this is idiot proof. mostly. If you make something idiot proof the world will make a better idiot.
When you have to cut the narrow side boards it is good to have a square jig:
upload_2022-1-8_12-40-32.png
Just a perfectly square piece of plywood. In later projects I learned to put a piece of 1/4 inch scrap under the board I am cutting so the mitered edge of the work piece does not sneak under the square jig and ruin your day.
Sometimes it is most important to have the boards exactly the same length even if it is not exactly the length you wanted. So keep shaving until the miters line up exactly:
upload_2022-1-8_12-43-46.png
In the end the only place that dimensions have to match exactly is the face of the amplifier. And depending on how the amplifier fits in to the face there is often lots of slop allowed there also. For the Marantz cases there is no room for error on the face since it fits into a recess. But the way the trim pieces fit in, you can make up for some errors with a little sanding. More on that later.
 
At this point many of you are wondering: hey, is he making all his cuts before he put the veneer on? What a fool. I'm unfriending him. So personally I like to put my veneer on after the case has been built. That works best for me. Live your life. I have imagined that it is also possible to put your face boards on before making all the miter cuts also. At least for some face profiles. Again, live your life. I am obsessed with getting my wood grain to match as it falls over the edges. That is easier for me if I veneer at the end.
Next step:
Biscuits. Remember biscuits from the 1990's? The are still useful.
upload_2022-1-8_12-50-59.png
In early efforts to build cases (pictures of shame/bloopers will follow at the end) I found it very frustrating to hold the miters together in the proper alignment during glue-up. Biscuits solve that for me. You could cut splines or just wing it if you are feeling lucky. I have also seen people applying masking tape to hold the seam together flat and then folding the seam. Biscuits are it for me. My biscuit world has always been frustrated with getting slots that are too shallow for my biscuits. So I cut #20 slots and use #10 biscuits. Problem solved.
Do a cross check and make very sure that all your boards are the same depth by standing them up on your table saw top (or some other flat surface). Run them through the saw again if they are not good enough for the girls you go with.
Layout all your boards in order:
upload_2022-1-8_12-55-21.png
I label them at this point. Pick a Top Front board and label that on the inside because all other surfaces will get covered or sanded away. Then label all the edges where they join A-A, B-B, C-C, D-D. This will create calm in your soul when all the boards are covered in glue, biscuits are falling to the floor and band clamps are banding and clamping where you don't want them.
Next put marks between each seam at the center and 2 inches from the front and back. This is where you will align the biscuit slot cutter. Really two biscuits would be enough. But three is not too many and not too few so that is where I ended up.
Set you biscuit slot cutter to 45 degrees and some appropriate depth that will not cut through your work piece.
upload_2022-1-8_13-2-18.png
Real men glue first and as questions later. Personally I dry fit everything before the glue even comes off the shelf. I also get my clamps adjusted so when the glue starts flying they will be close to the correct length.
upload_2022-1-8_13-6-35.png
You don't need a lot of glue. This is not a speaker or kitchen cabinet. Just a pretty box.
If you don't already have a set of these band clamps, pause the recording and go buy some right now.
upload_2022-1-8_13-8-29.png
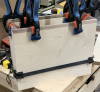
And make sure you use the corner blocks. They make the holding force much more even. First apply light pressure. Then make sure all the boards are exactly lined up on the face side. Tap with a block of wood and hammer to get them perfect. DON'T dent the face by pounding too hard. Put the face down and tap the back side. Break the seam if you have to. Again, use your table saw top as a flat surface. Here it is pictured on cardboard so the glue gets contained but I did use the table saw when lining up the face.
p.s. I have no idea why those biscuit centering marks do not line up. Don't tell anyone.
While the glue is setting up get started on the face trim.
 
There are two profiles of trim in this case:
upload_2022-1-8_13-15-28.png
One goes all around the face and the other (with the angle) goes on the sides. It's a unique look to this case. Most brands have the same trim all the way around. I bought this walnut a Rockler. If you buy the rough cut wood it is much less expensive but nothing at Rockler is cheap ever. It is also available on the interweb. For this project I used a table saw to cut the depth and the miter. I subsequently have built a nice router table with a lift and that makes for smoother cuts. Again if your last cut is just shaving off sawdust then you will have a nice finished edge usually.
This case has some blocks in the sides of the face to hold the extra trim:
upload_2022-1-8_13-21-54.png
Just made from scrap plywood.
At this point you should probably fit your amplifier into the case and make sure nothing has gone terribly wrong. Honestly, I put my receiver in the case and saw that my fact trim boards were too thin to match the height of the amplifier. So I went back and cut thicker fact trim boards to cover up my other mistake. Don't tell anyone.

Cut the face boards by marking directly on the case. No tape measures here please. Make it a little long and sneak up on the actual length you need one hair at a time.
upload_2022-1-8_13-24-12.png
I made all my cuts with the monster power miter box. I have a very expensive 80 tooth blade and I run it through the work VERY slowly. It's scary trying to hold the small pieces close to the blade. I have a neat tool I use to hold the work piece when it is close to the blade. It has saved many fingers in my lifetime.
upload_2022-1-8_13-28-40.png
Search the interweb for "hold down stick". I tried to make my own but $20 is a small price to pay.
Another option is to make a 45 degree jig for the table saw sled. That's on my list of things to do. The nice thing about tablesaws is that almost all of the dangerous spinny things are hidden away under the table. But that is the only thing that is on the plus side of safety. You will notice that my saw does not have a "riving" knife. That is very bad. I have been looking for one that will fit but I am still looking. Those knifes prevent kickback and pinching and are a big safety plus.
Once all your face boards are cut perfectly to match your case glue them together:
upload_2022-1-8_13-30-57.png
At this point start worrying about extra glue because some of these surfaces will be showing. Use water and paper towels. Just wiping the glue away with a towel will leave residue that will not accept the stain the same as the other wood. And use a knife to clear extra from the inside corners.
Keep an eye out for problems like this:
upload_2022-1-8_13-33-19.png
The thickness of those boards was not the same so the corner is crap. Start over. I'm not sure what went wrong when cutting that board to size in the table saw.
Now, another point of order. The original marantz case was built with the veneer running over the sides of the face frame. Some other cases have the veneer butting into the back of the face frame. Scott cases are like that because they have a miter on the outside of the face frame and the veneer would look bad with a miter on it. You will see some brands with a groove cut around the case and painted black where the face frame meets the veneer. This is their way of hiding their imperfect seams with a "design detail". So if your case has veneer butting to the back of the face frame then put the veneer on BEFORE you cut and build the face. Obviously but just bringing it to your attention.
Depending on you impatient you are, you can wait for your glue to dry on the face frame or leave the clamp in place and put it on the case.
upload_2022-1-8_13-47-11.png
Again, not much glue is required here. And if you don't have those awesome blue "bandy clamps" go get some. They were a gift from a family member that understands me but they are worth the cost in this case. yes, that is "Rockler blue" if you have trouble finding them.
Somewhere about this time I fit in those extra side pieces. I put the amplifier in the case to get the right fit.
upload_2022-1-8_13-50-47.png
They stick out past the face and the extra gets sanded off. I also put some spacers under them to get them to match the surface plate of the amplifier. Basically shim, sand, push, squeeze until it fits. Then glue away.
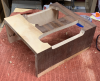
If you are lucky you might have something that looks like this:
upload_2022-1-8_13-53-32.png
Now on to veneering. Man I hate this part.
 
Last edited:
There are all kinds of veneer out in the world. But here is what I learned:
PSA pressure sensitive adhesive veneer is regular veneer with some nasty nasty 3M adhesive applied to it. You peel the paper off the adhesive and press it down onto your wood. Done. My main complaint with this is that the adhesive has a thickness. It is thick enough that you can see it on the corners after it is applied. It looks like a black stripe on every seam. Oh, and it smells like a the south end of a north bound dead skunk in a toxic waste dump. The smell never seems to go away. Oh, and there are special requirements that the surface be smooth before applying it. Some people say it should be sealed. Too much effort.
The kind of veneer I use is paper backed, or sometimes wood backed. Again it is regular veneer but this time a very thin paper is applied to hold the veneer together. The paper does not make a nasty black line at the seams. But the downside of this veneer is you need to use contact cement to glue it to your project. And contact cement is the devil's spit.

Get whatever species of veneer you want. Walnut, mahogany, rosewood. whatever is normal for your equipment brand. or whatever makes you happy. It can be expensive. And if at all possible look at the grain before you buy. Knot holes are interesting but not appropriate. Get something with some character in the grain so it is easy to tell if you match the grain around the edges. If you can find "figured" walnut it looks super cool. It has patterns that seem to changed in the light.

But I digress. . .
If you plan ahead, lay out your veneer for a couple of days on a flat surface so some of the curl gets worked out of it. That will make the rest of the process less annoying.
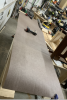
upload_2022-1-8_14-20-22.png
Layout your veneer face down on a "safe" surface so you will not damage it. Cut a strip to the correct depth to match your case. Make sure it is long enough to cover the sides and top. The bottom does not need to be covered but I usually cover it anyway because I'm nuts. Veneer can be cut with a box cutter. Just score it and it will break sort of like sheet rock. You have to leave about a quarter to half an inch overlap on every edge because gluing this stuff down is not an exact science. Cut all the lines very square just like you were building the case. This will help lining things up later.
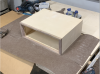
upload_2022-1-8_14-3-47.png
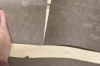
Before you take another breath label each seam in the front corner.
upload_2022-1-8_14-12-22.png
Then put matching labels on your case for each corner. Again, when your veneer, case, eyeglasses, gloves, dog, face, tools are all covered in contact cement, you don't want to be figuring out which corner goes where.
upload_2022-1-8_14-15-3.png
Sand the plywood on your case down to 220 grit. Just enough so it feels nice to the touch. I draw squigle lines with a pencil and then sand those off to know when I have touched all the surfaces. Draw your letters back on when you sand them off. Wipe everything down to remove the dust.
Now you absolutely have to setup two work spaces. One will be for gluing and the other for routering/sanding. Keep them far apart.
Get some contact cement and a "chip" brush. DO NOT get that water based contact cement. It is useless.
upload_2022-1-8_14-29-30.png
If it does not say it will kill you and blow up your garage then get something else.
Get one of the "J" rollers.
upload_2022-1-8_14-30-49.png
Maybe you can live without it but you won't live as well.
Get gloves. This glue is nasty. Have an extra pair handy because you will probably need them once the first pair starts sticking to your dog.
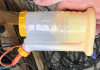
Get acetone. Not turpentine or any other paint thinner. ACETONE. Acetone is a solvent and will remove the contact cement if you spill. And you will spill. It also dries completely with no residue.
upload_2022-1-8_14-37-19.png
Point a reasonable layer of glue on the veneer. HINT: hold the veneer on the case surface when it will be installed when you are painting on the glue to the veneer. It is the perfect way to make sure you are not getting glue from your workbench onto the finished surface of the veneer.
Put a less reasonable layer of glue on the case. I usually put two coats on the case because the glue soaks into the case more than the veneer. It takes about 20 minutes to get tacky.
NOTE:Some of these pictures are from different projects because I'm a failure in some technical things.
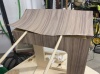
Get some dowels. 1/2 inch diameter works fine.You need enough dowels to keep your veneer from touching the case until you have it lined up where you want it. Three is a good number. Contact cement in ENTIRELY UNFORGIVING. If you are doing it right the two surfaces will bond instantly and permanently as soon as they touch. If they don then you waited too long or not long enough.
upload_2022-1-8_14-40-36.png
Line up your veneer so it overhangs every edge of the case. Get it as close to the edge where you want the grain to match up. Make sure it is square. Pull out the middle dowel and press down a point with your hand. You can still move the veneer a tiny bit at this time. Then press down a line all the way across. Then work from the line out to the front and back keeping all the air bubbles out as much as possible. Then use the J roller to really push the surfaces together. Be careful not to roll over the edges and crack the veneer.
Now take your project over to the "dirty" table. Really, no need to wait. I trimmed my veneer right away.
upload_2022-1-8_14-52-23.png
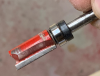
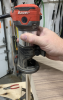
Theoretically you can trim veneer with a knife. I did that on several pairs of speakers. But buy a trim router and get on with your life. You need a flush trim bit with a bottom bearing. 1/2 inch diameter if fine. Adjust the depth so no more that 1/4 inch of the bit is exposed. This will prevent cutting into your case if your router is not perfectly flat on the surface. You will find that one way the router will tend to push the veneer down onto the case and the other way it will pull it up. The cleanest cut is when it pulls it up. There is not much need to worry about "climb cuts" like when you are cutting real wood.
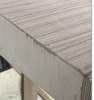
But regardless there will be some paper and a tiny lip of veneer left when you are done. I'm pretty sure the router bits are designed to leave this lip but the paper is just annoying.
upload_2022-1-8_14-58-26.png
 
Sand it off.
upload_2022-1-8_14-59-35.png
DON'T use a sponge pad. You want a solid flat sanding block. This is a 2x4 with a 6" sticky sanding disk. 120 grit if good. Works for me. You have to keep a sharp edge on the case.
upload_2022-1-8_15-1-17.png
For this sanding you hold it flat against the unfinished surface of the case. Once you put veneer on you have to hold the sanding pad away from the finished surface.
Then same process for the top. But now you have to match the grain on the top with the grain on the side. And the dowels go the other way. And the curl of the veneer get super frustrating.
upload_2022-1-8_15-4-22.png
Remember after you router this side hold the sanding block away from the finished surface:
upload_2022-1-8_15-5-31.png
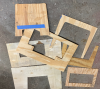
Hmmm. I was going to go on a rant about cutting in the bottom and top vent holes but it seems I do not have any pictures of that process. I wonder whey those might have gone. Oh well, here is a bunch of text with out any pictures.
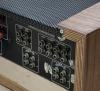
If you are doing a tuner case then there is no need to cut vent holes. The metal case is totally sealed do I'm not worried about the wood case not having any vents. But the amplifier must absolutely have vents on the top and bottom. Those purists reading this will note that the original Marantz cases had hand holds cut into the bottom and the sides. UGLY. I'm not putting them on mine. I did go to the trouble of trying it out on a sample case but it just was not going to happen on my finished cases. But I did have an original case so I could trace out the top and bottom vents. I downsized the top vent a little bit because the perforated metal I have is only 12" deep.
It might seem that the obvious way to cut these vents is with a reciprocating saw (jig saw). But I found that the jig saw could not keep its blade vertical enough to cut a decent edge. So I cut a plywood template with the power miter box and table saw so as to have perfectly straight lines. Then sanded it nice and smooth.
 
Here is some of my pattern collection:
upload_2022-1-8_15-32-8.png
The top ones are for this project. HUGE top vent.
So once you have a pattern, attach it to the case in exactly the right location. The best way to attach such a pattern is to put masking tape on the case and on the pattern and then hot glue the two pieces together. You can try double sided tape but a lot of that leaves residue and is hard to remove. You can try clamps but routering is a very violent operation and mine always got in the way or slipped. Masking tape and hot glue is a winner for me. But before you glue the pattern in place you must us a jig saw to trim about 1/8" in from your final line. That is because you do not want to remove too much material with the router or you will have a choppy cut.
This is the bit you need for following the pattern. I think it is called a template or patterning bit.
upload_2022-1-8_15-38-54.png
Mine is 1/2 inch. Make sure you go in the "easy" direction with your router. Try it out on a sample board first. It is way too exciting if you push the router in the wrong direction. And don't pause when you move, the bearing can chew into your pattern and make you sad. I used 1/4 inch plywood for my patterns.
While I am showing off router bits, here is the setup I used for my trim router on the veneer. pardon the glue mess.
upload_2022-1-8_15-41-25.png
Speaking of glue, get on of these bottles, they are wonderful:
upload_2022-1-8_15-42-13.png
"Glu-Bot" for glue bottle. How clever.
Where was I? Oh yes.
Once your top vent is cut out you need to make a slot for the perforated metal.
Then you need another router bit. This one is a "slotting" bit. Again, clever naming. Wow. And they said this would be hard.
upload_2022-1-8_15-44-28.png
Practice with this bit on something you don't love. It can be exciting to use the first time. Keep your router flat!
Next time for metal.
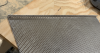
I found mine on Ebay. Its some local guy that sells parts to build dog kennels. "dogboxparts.com" or something. Whatever. There are lots of places to buy this stuff but it is hard to find the right thickness, hole size, hole spacing, hole angle, blah blah blah. This description might help:
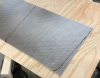
3/32" Hole Perforated Metal Aluminum Sheet 1/16" Thick 12"x 24" x 5/32" stagger. Its like $50 a sheet. See, I told you this was not cheap.
Mark it with a sharpie and BE SURE to allow an extra 1/2" or so to fit into your slot.
upload_2022-1-8_15-49-52.png
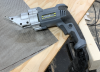
Now you can cut this with a jig saw, or a tin snips, or 100 other ways but live it up a little and buy one of these babies:
upload_2022-1-8_15-50-58.png
I got this for some repairs on my treehouse and swore I would never need it again. But I have found dozens of [legal] uses for it.
Then how are you going to put that bend in the metal. Survey says: Buy a "metal break". Poor naming on that. It should be "metal bend" in my book.
upload_2022-1-8_15-53-21.png
This one was $18 at harbor freight after I spend days finding out what I needed and then where to get it. I have never found another use for this tool though. And I keep loosing it.
Put marks on each side where you want the bend because there is no easy way to tell how far you have the metal into the break otherwise.
Boom:
upload_2022-1-8_15-55-24.png
I never expected that to go so well.
After extensive online research, photo chromatic spectral analysis, optical interference interpretation and scientific debate I was able to determine that the correct color for the metal was "satin black". But before you go spraying make very sure you wipe down the metal with acetone to remove the metal coating that is probably on the surface.
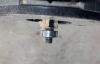
I put a screw here to hold the metal in:
upload_2022-1-8_15-58-43.png
Oh no, see that gap in the miter. Looks like my saw is cutting at 46 degrees instead of 45. Gotta look at that. . .
 
Now the [almost] fun part. At least the most satisfying part. Finishing.
I use this stuff:
upload_2022-1-8_16-5-3.png
The medium walnut has some warmth to it that is missing from the dark walnut stain. And yes, I am a sinner and I put poly on my cases instead of leaving the oil finish alone. Live your life.
But before applying any of this goo, lightly sand all surfaces with 320 sandpaper. And wipe down with a tack cloth. The veneer has a rather nice finish but its better with a little sanding. The veneer is VERY THIN. Very little sanding is allowed. And be very careful along the edges when it is natural to apply more pressure and sand too much off.
One coat of oil is usually good. If you let it dry you can put on another coat and make it darker. If you don't let it dry and try to put on another coat all you do is wipe the second coat off.
Poly is two coats minimum. Three if you want the deluxe cycle. Sand with 320 between each coat. Let dry 24 hours between sanding. Depending on temperature and humidity. Just read the instructions. . .
Before and after applying oil. I love that part.
upload_2022-1-8_16-14-3.png
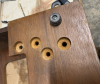
The original case took the shotgun approach to mounting holes:
upload_2022-1-8_16-16-53.png
I just put in the holes I needed. The easiest way to do this is to remove the bottom plate and use that to mark the holes. But you could use cardboard or whatever to transfer the hole locations over.
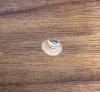
I didn't get my forstner bits until xmas so this is not too pretty:
upload_2022-1-8_16-19-26.png
Make the through hole a bit big and put a washer on the back side. Its easier than trying to be perfect.
I like these footies (home depot brand):
upload_2022-1-8_16-12-28.png
Low profile and center washer built in. Be sure to set the front ones back far enough so you don't see them. That gives a nice floating look.
Oh my. Where has the day gone. What did I miss. I'm sure you will tell me.

This is what the "figured" walnut looks like on a Scott Case:
upload_2022-1-8_16-24-10.png

TTFN.
 
I promised flops:
I keep this to remind me where I came from.
upload_2022-1-8_16-35-3.png

Trying to stain birch to look like anything except birch. Good thing I got over my fear of veneer. Otherwise dimensionally accurate.
upload_2022-1-8_16-36-12.png

I highly recommend making a "sampler" to figure out the best way to do things. This was where I was trying to cut out handles and decided I did not like handles so I quit trying to cut out handles. I had another sample for slotting, templating, biscuits, veneering and other skill tests. The dog might have eaten it because I cannot find it anywhere. Probably best.
 
At this point many of you are wondering: hey, is he making all his cuts before he put the veneer on? What a fool. I'm unfriending him. So personally I like to put my veneer on after the case has been built. That works best for me. Live your life. I have imagined that it is also possible to put your face boards on before making all the miter cuts also. At least for some face profiles. Again, live your life. I am obsessed with getting my wood grain to match as it falls over the edges. That is easier for me if I veneer at the end.
Next step:
Biscuits. Remember biscuits from the 1990's? The are still useful.
View attachment 2446315
In early efforts to build cases (pictures of shame/bloopers will follow at the end) I found it very frustrating to hold the miters together in the proper alignment during glue-up. Biscuits solve that for me. You could cut splines or just wing it if you are feeling lucky. I have also seen people applying masking tape to hold the seam together flat and then folding the seam. Biscuits are it for me. My biscuit world has always been frustrated with getting slots that are too shallow for my biscuits. So I cut #20 slots and use #10 biscuits. Problem solved.
Do a cross check and make very sure that all your boards are the same depth by standing them up on your table saw top (or some other flat surface). Run them through the saw again if they are not good enough for the girls you go with.
Layout all your boards in order:
View attachment 2446328
I label them at this point. Pick a Top Front board and label that on the inside because all other surfaces will get covered or sanded away. Then label all the edges where they join A-A, B-B, C-C, D-D. This will create calm in your soul when all the boards are covered in glue, biscuits are falling to the floor and band clamps are banding and clamping where you don't want them.
Next put marks between each seam at the center and 2 inches from the front and back. This is where you will align the biscuit slot cutter. Really two biscuits would be enough. But three is not too many and not too few so that is where I ended up.
Set you biscuit slot cutter to 45 degrees and some appropriate depth that will not cut through your work piece.
View attachment 2446335
Real men glue first and as questions later. Personally I dry fit everything before the glue even comes off the shelf. I also get my clamps adjusted so when the glue starts flying they will be close to the correct length.
View attachment 2446344
You don't need a lot of glue. This is not a speaker or kitchen cabinet. Just a pretty box.
If you don't already have a set of these band clamps, pause the recording and go buy some right now.
View attachment 2446352
And make sure you use the corner blocks. They make the holding force much more even. First apply light pressure. Then make sure all the boards are exactly lined up on the face side. Tap with a block of wood and hammer to get them perfect. DON'T dent the face by pounding too hard. Put the face down and tap the back side. Break the seam if you have to. Again, use your table saw top as a flat surface. Here it is pictured on cardboard so the glue gets contained but I did use the table saw when lining up the face.
p.s. I have no idea why those biscuit centering marks do not line up. Don't tell anyone.
While the glue is setting up get started on the face trim.
I will add use a plywood blade for cutting the Baltic. Way less tear out. Don’t go cheap and buy the Baltic plywood at the big box stores. Really cheap and lots of voids.
 
Don’t go cheap and buy the Baltic plywood at the big box stores.
This was special order from Menards. $80 a sheet when I ordered. I recall it being twice that when I picked it up. It might be back to normal price again now.
3/4 x 4 x 8 Baltic Birch Plywood
Model Number: 1253102

https://www.menards.com/main/buildi...tic-birch-plywood/1253102/p-1444441907409.htm

$149 a sheet. Should have bought more back in the day at $80 a sheet. . .
You can get hobby sheets at Rockler and maybe other stores.

But the stuff they have in the stores on the shelf is not this stuff even if they say it is.

This wood selection is not super critical in this application since it is not structural but if you are building speakers the voids and "un dense" off-the-shelf plywood is a very poor choice.

But I built a mobile work bench with baltic birch plywood and it is insanely heavy. Sometimes dense wood is bad. . .
 
Thank you for taking the time to document and photograph your process.
Well done and well-written.
 
This was special order from Menards. $80 a sheet when I ordered. I recall it being twice that when I picked it up. It might be back to normal price again now.
3/4 x 4 x 8 Baltic Birch Plywood
Model Number: 1253102

https://www.menards.com/main/buildi...tic-birch-plywood/1253102/p-1444441907409.htm

$149 a sheet. Should have bought more back in the day at $80 a sheet. . .
You can get hobby sheets at Rockler and maybe other stores.

But the stuff they have in the stores on the shelf is not this stuff even if they say it is.

This wood selection is not super critical in this application since it is not structural but if you are building speakers the voids and "un dense" off-the-shelf plywood is a very poor choice.

But I built a mobile work bench with baltic birch plywood and it is insanely heavy. Sometimes dense wood is bad. . .
So true. The stuff on the shelf is crud.
Windsor Plywood and Woodcraft are good sources if you have one near you.

A heavy workbench is gold!
 
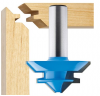
Excellent work! Where my son works, they ditched biscuits and are now doing carcasses by using a lock miter bit.
 
lock miter bit.

Had to google that one. Cool. Pretty nice that it cuts the miter and the interlock at the same time. In a production shop that would remove a lot of process steps.
https://www.rockler.com/rockler-45-deg-lock-miter-router-bits-1-2-in-shank

upload_2022-1-8_18-28-54.png

But from the short video I watched it looks like there is a lot of trial and error in setting up the router table to make the cuts correctly. Biscuits are more moving parts but pretty fool proof. Maybe I get one of these bits next xmas. . .

Love your avatar. I have an original reel to reel tape of Whip Cream. Its one of my favorite things next to all my other favorite things (original Star Wars laser disc set). blah blah blah.
 
Last edited:
You've convinced me, order any cases I need is the way to go. My Son has taken to modding and now building guitars, so we've got a number of tools for woodworking. He has patience and a calmness that makes his work easier. ( He's also real good with Kids and Animals. ) Me, I have the patience of a weasel that got into the espresso.

Incredible work.

Mark Gosdin
 
Back
Top Bottom