• The move to the new server is done. There are some software and database maintenance updates in process. This has us passing the hat around to help out. We appreciate any donations. Seriously, even a dollar helps. The payment page may be found here - https://www.audiokarma.org/support.html

Yamaha C-65 inquiry

Yamaha built the side panels on these units out of plastic. Seen it on 3 different control amps from 83' to 89' and am not a fan of it. This one has 3 of 4 broken screw holes on the side panel bottom that the top cover screws to. Anyone figure out a way to fix these broken spots? :dunno:
Thanks
I use screws with a large flat head if only a small amount of the plastic is blown out. Or washers. If they are really blown out I use a long sheet metal piece with holes at the screw locations that will span the gap between the holes.
 
I use screws with a large flat head if only a small amount of the plastic is blown out. Or washers. If they are really blown out I use a long sheet metal piece with holes at the screw locations that will span the gap between the holes.
I like the sheet metal idea. Probably better than my wood block idea. 2 out of 3 are really blown out. I'll assume the prior owner was stacking heavy components on top of it.
 
I use screws with a large flat head if only a small amount of the plastic is blown out. Or washers. If they are really blown out I use a long sheet metal piece with holes at the screw locations that will span the gap between the holes.
I use black anodized aluminum metal stock. With 4 holes milled for the bottom & case screws.
 
Thanks fellas... I'll manufacture some metal strips then. Yet to choose a thickness but will figure out in time.
 
F...I have no metal fabrication skills. I bought the metal strips but I'm leaning toward the duct tape idea now lol. Gotta farm out the metal fab work. Ugh.
 
Last edited:
I just fastened the straps to the plastic side rail...


:idea:
 
Last edited:
I finished the C-65, this is actually a CX-800u but I blended it into the thread as the side panels are equally shitty. Assuming they're the same.
Thanks
 
Last edited:
3 years later...The time capsule continues. Been enjoying this control amp with an M-60. The C-60 isn't re-capped yet but can tell it's due for a re-cap...or so my old ears believe. Besides, a guy needs a winter project. Been sound testing this fine piece all this time for volume control faults. Why? Bought it cheap with a smashed balance control wheel and caved in volume control. They were both stuck & would not move.
Straightened out the bent volume pot shaft & it's chassis mount. Amazingly it survived and sounds great after all this time. I didn't see the point in re-capping this with an unobtanium broke dick pot. But since it's been good, time to proceed with with re-capping.

Here's where I need an assist though. I had to replace the wrecked balance control pot. The best replacement I found has a short shaft and need an extender to mate with the balance wheel. I'm tempted to leave the damn wheel off honestly, and have been happy without it for all this time. I just centered the new replacement pot & never installed the wheel. F it, the thing gets wrecked anyway from dudes sliding it in & out of cabinets. It if survives that, the shipping goons are sure to wreck it.

I won't bore ya with the winter re-cap unless ya wanna ride along. Just need a shaft extender...or someone to convince me to leave the damn wheel off. I'm leaning toward F the balance wheel. Who uses it anyway? Would anyone notice or care if ya bought one of these without the wheel?
Thanks
20260119_014313.jpg
 
Last edited:
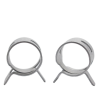
I have salvaged a few of those Balance knobs with a small tubing spring clamp.
1768806081895.png

They need to be a hair smaller than the plastic shaft.
 

Attachments

  • 1768805743859.png
    1768805743859.png
    971.6 KB · Views: 1
Sometimes I'm thick headed while trying to understand...
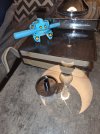
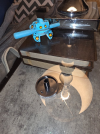
Here's the original broke dick balance control pot. My installed replacement pot has a shorter shaft. I'm not sure how to join them. Maybe I'll understand more when I'm in there again...soon. 20260119_023439.jpg
 
Last edited:
Wanted to showcase the fine piece before popping the hood again.

3 years ago...
-Removed the corrosive glue & affected parts.
-Cleaned the scratchy & gummed up controls
-Fixed smashed volume pots
-Been working fine

Time for a winter time re-cap though, it's due & worth it. That's all I wanna do honestly. But lemme ask ya'll this while in there though. I'd rather not F with the original op amps but some folks do, and seem to cream their pants about it afterward. What's inside the new ones that make them better? Is it worth it?
20260119_025757.jpg
 
Last edited:
Love the C-60 pre-amp! I bought one a few years ago because I wanted to try different cartridge loading, and fell in love with that whole series of Yamaha products. Since then I have also bought two T-80 tuners and a TX-1000 tuner, to go along with my M-4 amp (another product I love).

OPAMP rolling is one of those areas like recapping. Is it necessary? Do you hear a difference? On paper, the newer parts are better. But does that translate to sounding better? The placebo effect is a big factor here, IMHO. You spent money on a new part, you were careful to install it, it MUST sound better! Or does it? With our audio memory being so short, without two identical units to blind test together, it could be hard to really say. A largely personal decision for the most part. You could introduce problems where there were none before.

For myself, I'm not into swapping chips, OPAMPS, whatever, just for the sake of it. I swap them when they have failed, that's it. Recapping is a different story for me. But again, a largely personal decision.

The C-60/65/80/85 pre's are near identical, share the same boards, with the 80/85's adding parametric tone controls and the inverted outputs. But other than those two differences, are all pretty much identical. They sound nice. The biggest pitfalls with these pre's is the input selector switches getting dirty, and the corrosive glue under the heat sinks corroding a couple of resistors. The larger sized1000uF/25V "For audio" caps in my C-60 (C-201/202/361/362) were seriously down on capacitance, well below their 20% tolerance. But they are easy to work on, and well worth the trouble. Go for it! I'd enjoy a write up on it with pictures, of course!

 
Here's the original broke dick balance control pot. My installed replacement pot has a shorter shaft. I'm not sure how to join them.
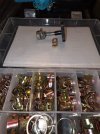
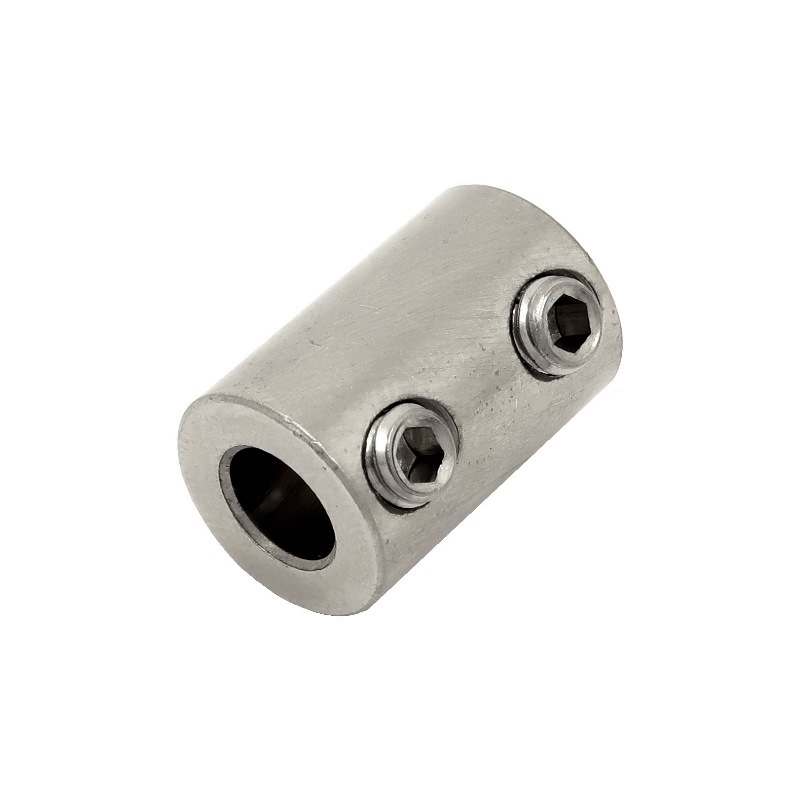
There might be enough room to use a coupler shaft. Something like this. You could then adjust the length desired.


Personally, I would check McMasterCarr first. Use a caliper to determine needed inside diameter of the coupler

Model RC hobby stores may have small couplers. Smaller the better. A mill/lathe and roll your own.
 
Last edited:
Sometimes I'm thick headed while trying to understand...
Here's the original broke dick balance control pot. My installed replacement pot has a shorter shaft. I'm not sure how to join them. Maybe I'll understand more when I'm in there again...soon. View attachment 3679743
4 out of my last 5 damaged balance controls had snapped wafers and broken knobs.
 
I have also bought two T-80 tuners
I have one myself & love it...

For myself, I'm not into swapping chips, OPAMPS, whatever, just for the sake of it.
Yeah due to cost, plus there's so many op amps in the C-60, I probably won't replace them. If I do, will just be the output pair. Sounds pretty good as is.
But, I did replace the op amp in the T-80 with a fancy $12 Texas Instruments gig and thought it sounded better.
 
4 out of my last 5 damaged balance controls had snapped wafers and broken knobs.
Thanks for the good info in post #56. The balance wafer survived this time but the pot was wrecked. 20kohm IIRC. My short shaft replacement works but...it doesn't have the centered detent notch. I can live with it and mark the wheel.
 
Last edited:
Discovered this tonight about these control amps. It was a monumental sound fidelity find IMO. I set my power amp input level attenuators at 12 o'clock instead of the usual full clockwise level. Then set the control amps variable loudness to Flat 12 o'clock as well.
It made the control amp do more work and had to crank the volume higher than usual of course. But, the sound fidelity was so incredible I almost made a new thread about it. The power amp ran less hot in class A mode as well. Thinking I finally found the sound synergy regarding the C- 60 / M-60 combo here. Try it. Dead center the power amp input levels.

20260124_035154.jpg
Then...Dead center the control amps flat loudness inner wheel as well...

20260124_035230.jpg
 
Last edited:
Back
Top Bottom