• The move to the new server is done. There are some software and database maintenance updates in process. This has us passing the hat around to help out. We appreciate any donations. Seriously, even a dollar helps. The payment page may be found here - https://www.audiokarma.org/support.html

Yamaha CA-2010 Restoration

Do these deteriorate like the electrolytics?
No. Polyesters are self-sealing. Don't even get a soldering iron close to the polystyrenes. Ceramics and Mica's last forever.

Lotsa folk replace the polyester " Chiclet's". Bout the ownly reason I may replace is for physical damage ie glue!
 
Last edited:
Any advice for the low capacitance caps at the bottom of the function board? Having a hard time finding films that fit. Looking to replace the 3.3uF 50V (2 in signal path) & 1uF 50V. These are currently 5mm.
 
Last edited:
C135,6 3.3uf/50V audio path.
Prefer wima mks2 (if you could find them). Second choice would be UFG (100V?) and live with the slightly increased noise. Not a fan of UKL in audio path.

C141 1uf/50V noise path any 1uf/100V electrolytic Nichicon, panasonic. Sure you could use mks2 but seems like an unnecessary expense for a noise path
 
Just for my knowledge would another brand of film cap be considered equivalent?
Yeah, I'd think that any film cap would be better than an electrolytic.
tan delta is the same for both wima and tdk.
Someone (mtf?) explained that the wima was preferred because of it's manufacture using "schoopage" to connect terminals
 
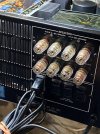
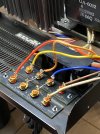
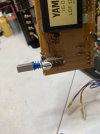
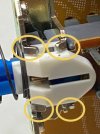
Broke one of these tabs taking the filter board out. Fabricated a decent substitute using one of the broken speaker terminals from this unit.

image.jpg
 
Last edited:
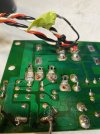
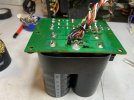
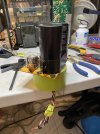
Fabricated some 3D printed spacer rings at the library with my daughter this afternoon to help with fitting the new filter caps. Thanks to Avionic for the idea.
IMG_2107.jpeg
 
Fabricated some 3D printed spacer rings at the library with my daughter this afternoon
Look good. I just finished that job on the 1010 here. Cook'n the coupler switch at the moment.

I left about 5-6" pigtails. You will see why when you go to install them on the board. Makes it easier to thread them in the OEM slots.
 
Last edited:
Replaced the power switch as I felt the original was a bit sticky at first. It was likely just the front end / mechanical side in hindsight. Probably not operated for some time / dried grease. Regardless I changed the switch and cleaned up / re-lubed the mechanical side. Feels more crisp now. Cleaned the first switch while I was down there. Speaker selector looking good. Took bit to get it clean. Hopefully the others clean up a little quicker. IMG_2118.jpeg
 
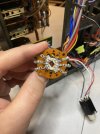
Reviewing the circuit diagram, I believe this meter output mode selector switch is in the signal path. Anyone have any tips to get this guy opened for a cleaning? IMG_2122.jpeg
 
See the hole in the top of the switch? I use a pen vice drill to make it larger and spray WD40 contact cleaner in there and work it a zillion times then put DeOxit D100 or F100 in there after. and work it again.

Athanasios
 
See the hole in the top of the switch? I use a pen vice drill to make it larger and spray WD40 contact cleaner in there and work it a zillion times then put DeOxit D100 or F100 in there after. and work it again.

Athanasios
Thanks for the advise Athanasios. Have you ever tried to actually open this switch?
 
Thanks for the advise Athanasios. Have you ever tried to actually open this switch?
Yes, you have to desolder it from the board and pry the brown section off. there are little fingers that are very delicate. be careful as they are easy to lose .

There are new switches that may fit if you don't want to clean them. Not sure of the dimensions of the original switches compared to the new ones.
you would have to do research on that.

Athanasios
 
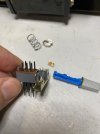
Got it this far, but can’t seam to be able to pry that top brown part off without undo damage. It looks like those prongs lock the brown top on.

Was thinking I might try to clean it from here in this state.

PS I didn’t lose the second slider. It’s there somewhere.

IMG_2123.jpeg
 
  • Like
Reactions: mbz
Got it this far, but can’t seam to be able to pry that top brown part off without undo damage. It looks like those prongs lock the brown top on.

Was thinking I might try to clean it from here in this state.

PS I didn’t lose the second slider. It’s there somewhere.

View attachment 3708371
Oppps !!! Should be ok, It take a lot of prying slowly around the rim of the brown cover. little by little. I was using an Xacto blade to go around the
cover slowly lifting maybe .5 mm at a time till it got past the wider part of the solder pins. clean those pins as well as it will creep back into the body.

Athanasios
 
Back
Top Bottom