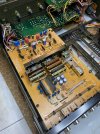
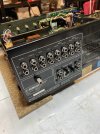
I've never torn these switches down for fear of causing harm. I just squirt the white slits with D5 a few times over succession of days with lots of cycling and they seem to work ok afterward for me. Not saying I know better, cuz I don't.


I use non intrusive test probes for the same purpose...or a syringe from the county health department for a D100 dose. Oh the addiction.I use a pen vice drill to make it larger and spray

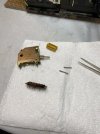
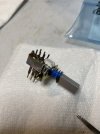
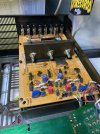
I get this far then use a deoxit soaked pipe cleaner to scrub the inside of the switchGot it this far, but can’t seam to be able to pry that top brown part off without undo damage. It looks like those prongs lock the brown top on.
Was thinking I might try to clean it from here in this state.
PS I didn’t lose the second slider. It’s there somewhere.
View attachment 3708371

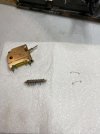
I’m going to strongly agree with stopping at that point. Unfortunately I did not and I cracked that brown top part. 2-part epoxy missions now. But I think I salvaged it. Super clean thou.I get this far then use a deoxit soaked pipe cleaner to scrub the inside of the switch


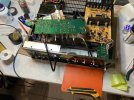
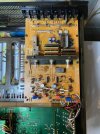
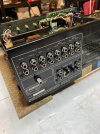
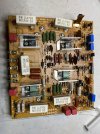
We would have to know the pin spacing on the switch , however some times the slot that the metal switch carrier has that hold the switch to the chassis do not match and you have to modify the switch or if its like yours a single switch you can also buy he associated carrier.Salvaged that meter selector switch (not fun to get back together) and cleaned the mode switch. Changed the caps also. Done with this board.
Changing that mode switch outright would be a better option. If anyone has sourced one please advise. View attachment 3709589
Right, putting the little spring lever mechanism back together isn’t impossible, but it’s not fun. Possibly of failure is there. Maybe your first advice is the best. Open the hole a little and give a good flush. Something to consider for next time.We would have to know the pin spacing on the switch , however some times the slot that the metal switch carrier has that hold the switch to the chassis do not match and you have to modify the switch or if its like yours a single switch you can also buy he associated carrier.
Athanasios
The syringe injection method mentioned earlier was authored by @Bratwurst7s. Wanted to give credit where it's due. Caig sauce is expensive & syringes minimize waste.Open the hole a little and give a good flush.

Seams to be working well with MM testing.The syringe injection method mentioned earlier was authored by @Bratwurst7s. Wanted to give credit where it's due. Caig sauce is expensive & syringes minimize waste.
I enjoyed watching the teardown of that switch though. Good stuff. Hope it works well.

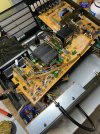
PavelI almost forgot to Deoxit the muting switch before reinstalling the assy.
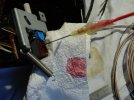
This is my Deoxit mod. A medical infusion needle with the tip ground down to a conical shape and popped onto the end of the spray tube, sealed with hot glue.
The needle serves several functions.
One, it is small enough to be pushed into the tiny holes on the top etc of many Alps switches with a tight fit. All of the fluid is forced into the switch.
Two, the smaller diameter of the needle raises the delivery pressure and together with the tight fit the Deoxit boils out of every opening of...