• The move to the new server is done. There are some software and database maintenance updates in process. This has us passing the hat around to help out. We appreciate any donations. Seriously, even a dollar helps. The payment page may be found here - https://www.audiokarma.org/support.html

Pioneer PL-L1000A Thread

The Mobile Fidelity Geo-disc works very well on the 1000 series tables, otherwise the distance including collet washer to stylus tip is 49mm.

Thanks!
I do have one of those MFSL Geo-discs, it came in the Rolling Stones box set. I'll ask my son to bring it over.

:beerchug:,
James
 
I almost forgot to Deoxit the muting switch before reinstalling the assy.

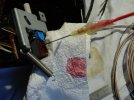
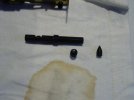
This is my Deoxit mod. A medical infusion needle with the tip ground down to a conical shape and popped onto the end of the spray tube, sealed with hot glue.
DSC03297.JPGDSC03298.JPG
The needle serves several functions.
One, it is small enough to be pushed into the tiny holes on the top etc of many Alps switches with a tight fit. All of the fluid is forced into the switch.
Two, the smaller diameter of the needle raises the delivery pressure and together with the tight fit the Deoxit boils out of every opening of the switch.
Three the long thin needle allows access into some really tight spots.

I gave the switch 3 shots, with vigorous working between shots.

:beerchug:,
James
 
Last edited:
Back together.
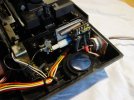
The Teflon sheathing is pretty stiff but I managed to get it bent and shaped into position. The circuit board originally only had the one cable tie on the wire bundle coming from the tonearm. There was just enough room in the hole to use a second tie to the left around the new connection cable to minimize pressure on the solder connections. It is not optimal but I figured that it had to be better than nothing.

I was able to get the switch plate positioned right in it's original position as far as I can tell, so hopefully it won't need to be adjusted. I won't reconnect the spring until after the EV mech is back in.

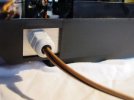
DSC03299.JPGDSC03302.JPG
I took the 2 pieces of cable sheathing that were cut off and inserted them in the strain relief with the cable before tightening it. The cable is held in place very tightly, anything that would make it move would probably pull the entire table off of the shelf.

:beerchug:,
James
 
Last edited:
After finishing the above work I rechecked continuity on the wires and got 00.0 ohms on all 5 connections between the end of the tone arm and the solder connections. So I think that they are good.

Two last maintenance items.
I have some light teflon oil and applied one drop to each end of the front guide rail after standing the base on it's side and worked the rail until the oil was worked in.
While doing that I noticed that the little shelf that actually lifts the tone arm was lowering sluggishly after being lifted. So it got 2 drops of oil with vigorous working between drops and it is moving smoothly now.

Other than finishing the EV mech I can't think of any more maintenance items to complete. If anyone has any thoughts on anything that I am missing I am all ears.

:beerchug:,
James
 
I am impressed with your work and your attention to detail on this table :thumbsup: This is looking great.
Have you considered having the original cartridge retipped, or do you hope to improve on it?
 
I am impressed with your work and your attention to detail on this table :thumbsup: This is looking great.
Have you considered having the original cartridge retipped, or do you hope to improve on it?
Thanks for the kind words cason!

I am absolutely open to having my old Adcom re-tipped. I am also completely out of the loop and will have to find someone (preferably in the EU) that can do that for me.

But I am also interested in a new MC cartridge.
On top of that I would like to locate either a second original headshell or a replacement from a different Pioneer model that will fit or new production that will fit.

I am open to all suggestions in this direction.

:beerchug:,
James
 
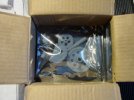
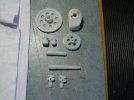
Well, the first thing that I see is that Miguel has tossed in a few extra parts that were not in the sales description. :)

DSC03305.JPG
There is an extra, larger motor pulley, and 2 different worm gears.

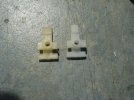
And, what is this?
DSC03307.JPG
The long part is a sled lock plunger. Not sure what the other 2 are.

I am going to take a walk in the rain with my wife and after I get back we can take a deeper look.

:beerchug:,
James
 
The small wedge shaped black part appears to be the piece under the tonearm that centers it as it descends. I haven't figured out the 3rd part yet. Anyone have any ideas?
 
I won't get any farther today. I will want to sit down, take my time and do some measurements and test fittings with the new parts.

And it is already well past Beer-O-Clock and rapidly approaching Music:30.

:beerchug:,
James
 
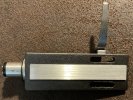
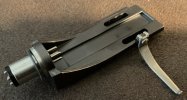
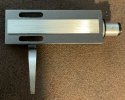
Well James, seems you have garnered some good will with this thread. It’s not often anymore that I am able to give back to this site and its members much, relative to all I have received over the years of participating here. But, today I can give a little something. This is the only thing I have left, salvaged from my PL-L1000 before I sent it on its way to help save other similar turntables.
IMG_0460.jpegIMG_0456.jpegIMG_0452.jpeg
I know it’s not perfect, but it’s an original and I’d like you to have it.
Message me your mailing address and I’ll get it off to you.
Bob
 
Well James, seems you have garnered some good will with this thread. It’s not often anymore that I am able to give back to this site and its members much, relative to all I have received over the years of participating here. But, today I can give a little something. This is the only thing I have left, salvaged from my PL-L1000 before I sent it on its way to help save other similar turntables.
View attachment 3335139View attachment 3335140View attachment 3335141
I know it’s not perfect, but it’s an original and I’d like you to have it.
Message me your mailing address and I’ll get it off to you.
Bob

Wow!
I am humbled and honored. This represents Audiokarma at it's best and I will gladly accept your kind offer.

I will PM you shortly.

:beerchug:,
James
 
My kids came over for Sunday family lunch. I feel fortunate that they all live nearby and that we have been able to keep up with the tradition of Sunday lunch together.

So anyway, my son brought something with. For the first time in 12 years there is an LP in my apartment. As I recall I bought this one (very well) used and it is quite worn, and a cutout too boot.
DSC03310.JPGDSC03311.JPG
And thanks for the reminder about the Geo-Disk a_retent! I had completely forgotten about it.

:beerchug:,
James
 
Ok, I took the EV mech partly back apart and am slowly comparing parts. There are some quality issues mostly minor, a couple possibly more serious, I will note them as I go.

Everything is being measured with Mititoyo dial calipers as accurately as I can but most of the measurements should be taken as approximate. Sometimes I miss having access to an optical comparator and a full set of hole gauge pins.

First off, the steel axle for the worm gear and large pulley measures a consistent 1.99mm in diameter. From there I went to the large pulley.

DSC03312.JPG
I will list the measurements in a "Part/feature/original/new" format.

The original pulley is completely symmetrical, hubs, flanges etc.
The new part is formed with a protruding hub on one side only. The outer flanges of the belt groove are not formed with the same outside diameter, but I don't see that affecting it's functionality any.

DSC03314.JPG

Belt pulley, Large.
Hub Dia = 5.91mm/6.95mm.
Hub outer width (total) = 7.35mm/6.71mm.
Wheel width at the OD = 4.075mm/4.25mm.
Wheel OD = 23.75mm/22.95mm and 21.67mm.
Groove width at top = 1.95mm/ Because of the different flange OD's I didn't measure the new part here.
Wheel OD at the bottom of the belt groove = 20.31mm/20.02mm.
Because of the square edge of the caliper faces it was not possible to measure fully into the bottom groove, especially the original part which has less of a radius at the bottom. The new part has a larger radius and I think that if I could measure them more accurately they would both be about 20mm.

Belt pulley, Small.
Barrel OD = 5.83mm/5.86mm.
Top rim OD = 5.86mm/6.52mm.
Height = 8.2mm/7.71mm.
Groove width at top = 1.9mm/2.12mm.
OD at bottom of groove = 3.73mm/4.01mm. The same factor applies here as with the large pulley, I believe that they are nearly the same. This would be an issue if there is a difference with the new parts because it could affect the worm gear speed, but I am guessing that minor differences are not going to cause a big problem.

I test fit both pulleys on the free end of the axle. Both could be pushed on only a couple of mm before they started getting tight. I think that there is no question that they will have a tight fit. However since both of my original pulleys are still good I am going to keep using them and keep the new parts as a reserve.

I see no serious problems with the pulleys, with one "maybe". The original groove form is very much a V shape with a small radius at the bottom. It would seem logical that they will tend to wedge the belt into the groove, and help hold it against slipping. The new parts have a larger radius. I don't know if that is enough to make it perform less well than the original parts.

Everything else is basically cosmetic or doesn't seem that it would have any affect on function.

:beerchug:,
James
 
Last edited:
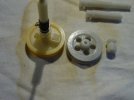
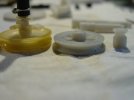
Next up are the worm gear axle hubs. I have only gotten started here.

DSC03315.JPG

Even before taking any measurements I see a couple of problems here.

First, test fitting them in the frame shows that they fit a bit loose, especially the locking hook which doesn't engage very tightly. I will take some measurements tomorrow but I think that at a minimum the hook should snap in deeper, as it is I would have worries about how securely they are fitting.

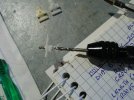
Second, the hole diameter is too small. The hubs would be a press fit on the axle as they are. I took a 2mm and then 2.1mm drill bit and hand reamed the holes and with 2.1mm they are OK.

DSC03316.JPG

That is as far as I got today and it is now Music-O-Clock. More tomorrow.

:beerchug:,
James
 
Bratwurst7s, what do you plan to use to ensure that the stylus is traveling exactly along the line passing though the platter's center?
 
If one uses the original head-shell and the proper offset, the stylus, by design, follows a line passing through the plater’s center.
 
Back
Top Bottom