• The move to the new server is done. There are some software and database maintenance updates in process. This has us passing the hat around to help out. We appreciate any donations. Seriously, even a dollar helps. The payment page may be found here - https://www.audiokarma.org/support.html

Pioneer PL-L1000A Thread

Your dustcover looks pristine!

What make and model of headshell is that? Looks nice.

:beerchug:,
James

Thank you James, I've tried my best to be cognizant of how easy these acrylic covers scratch. I use an automotive paint finishing product called fill-n-glaze occasionally. It helps to fill in the micro scratches that accumulate over the years. The cover passes the new look distance test at .9m (or 3ft.) any closer and you start to see the aging...kinda like myself. :biggrin:

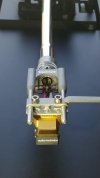
The headshell was marketed by a company named Orsonic. I have 2 different models, AV-1 (previously pictured) which weighs 9 grams and an AV-11 (pictured below) which its weight is 11grams, both look very similar. They were available in silver or black but are getting harder to find as the company stopped producing them years ago.
Message_1587493604006.jpg
As you can see there's not alot of physical difference between the two. I did not use the aluminum screws that came with the headshells. I opted to use an allen head stainless screw to mount the cartridge on both headshells. I much preferred the look of them over the supplied screws.
 
Last edited:
Hello, Bratwurst7s, hope you have recovered already!

I have a question about the horizontal tracking accuracy in PL-L1000:
  • does it follow the groove only towards the centre during the play, or it can also move the sled to the outside - according to the excentrisity of an LP?
 
OK, so I am finally getting back to this thing. I have a lot of stuff to report, that will take a few days.

But to start with, the headshell that cason so kindly donated to me arrived several days ago in perfect condition. In fact it looks like new.

DSC03318.JPGDSC03319.JPG

cason, I am very grateful for your very thoughtful gift. I am in your debt. If you ever need something from Germany, like some Canton, Braun or Grundig tweeters etc, by all means contact me.

:beerchug:,
James
 
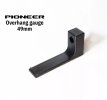
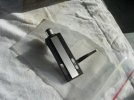
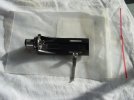
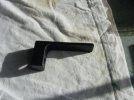
Next, shortly after that the reproduction headshell overhang gauge arrived. This is a nice item, much better than the original in my opinion, with the one exception that not being clear you can't look through it to check the position but have to look from the side.

DSC03320.JPGDSC03321.JPGDSC03322.JPGDSC03323.JPG
This part requires some hand fitting to work properly.
The opening is a very tight fit, in my case too tight to insert the headshell barrel. I view that as a plus.

I used a small round file, thin knife file and some 320 grit sandpaper to adjust the opening. I still have a fairly firm fit that holds the headshell quite securely, and with this thing I can stand it on the bench and work with it. It is very solid and I like it a lot.

:beerchug:,
James
 
Getting back to the new 3D parts, specifically the drive belt pulleys to start with.

After thinking about it some more I really don't like the open round bottom grooves. The v-grooves are there for a reason. They have more sirface contact area and the belt will tend to be pinched into the groove by tension.

A practical example:
The steel suspension cables that support elevators go from the top of the cabin, up over a drive roller and back down to the top of the counterweight. The drive roller has v-grooves for the cables and this is the only "securing" of the cables over the roller. The weight provides the tension that pulls the cable into the grooves.

I have written Miguel about this and all of the other things that I have found, he is going to be making some revised parts.

Next up is those axle mounting parts, PWN-391. I gave him my measurements and where I thought that material needs to be added to strengthen the hook and make the part fit more securely, as is it is far to loose to be comfortable with.

:beerchug:,
James
 
James,
I am happy the headshell arrived safely. Don’t consider yourself “in my debt,” just help someone else out along the way. That is (or was) the spirit of AK.
Bob
 
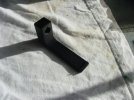
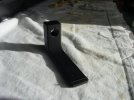
Lets jump to the lifting cam, PN PNX-272.

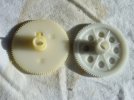
The new part has a serious problem on the outer flat surface where the large gear wheel mates. The new part is very roughly and unevenly made, and far too thick.
I measured 7.5mm from the back side of the barrel to the front flat face on the original part. The new part is a minimum of 7.75mm and partly much more. As it is it is so thick that the snap ring can't be installed after installing the gear wheel.

DSC03327.JPGDSC03350.JPGDSC03351.JPG

I took a small flat file and worked the area where the barrel of the gear mated and got it pretty close, but the part needs to be re-done. Most people are not going to want to do so much hand fitting I think.

The cam surface had a lot of little striped on it like one often sees with 3D printed parts, this was not much of a problem, I just cut a strip of 320 grit sandpaper and smoothed it down.

I can't measure the cam shape and curve, but comparing them the flatter, open end is longer than the original. I have not fit or tested it for operation so can't say if that affects it's function.

The 5mm center hole was a bit too small and it was a very tight fit on the mounting shaft. A bit of work with a 5mm drill bit was enough to get it fitting well.

:beerchug:,
James
 
James,
I am happy the headshell arrived safely. Don’t consider yourself “in my debt,” just help someone else out along the way. That is (or was) the spirit of AK.
Bob
I agree absolutely that this is the spirit of AK, and you nailed it. But if there is any way that I can be helpful to you in the future it will be my pleasure.

:beerchug:,
James
 
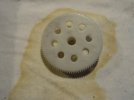
Next up, the large gear wheel PN PNW-394.

While the outer surface looks a bit rough the part is pretty good in most aspects, but also has a few nits to pick.

First off, the center hole is also too tight, needing some light reaming and burnishing with a 5mm drill bit.
Second, the outside diameter is a bit small, 36.3mm vs 36.6mm, so it is a bit loose in contact with the worm gear.

Third, the teeth are straight cut rather than angle cut like the original gear. Since it fits in the worm gear a bit loose that might not be a problem, but I think that the angle cut will be better and track with the worm gear much better.

Fourth, the teeth have casting filling part of the bottom of the teeth opening on the side that faces the cam. I took a razor knife and an hour of time and was able to clean them up reasonably well.

DSC03349.JPGDSC03348.JPGDSC03326.JPG

:beerchug:,
James
 
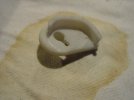
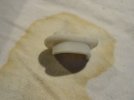
Lastly I will address the worm gear, the only part that I really need.

Firstly, I like the new parts, mostly, with one exception. :biggrin:

I am mainly going to compare the original part and the similarly sized new one. The long new one is exactly the same except for the extended barrel.

The new part has a thicker center barrel, 3.8mm vs 2.75mm.
The OD at the teeth is 4.74mm old, 4.68mm new.
Doing some rough measuring I came up with a tooth depth of 2mm with a 1.1mm pitch on the original part. So with the thicker center and slightly smaller OD we can see that the tooth depth is shallow, only roughly 1mm. This is not enough to use with the original gear wheel, the teeth bottom out badly in the worm gear.

DSC03325.JPG
What is a poor Bratwurst to do?

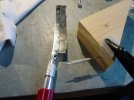
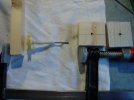
I squeezed a needle between a couple of pieces of wood, mounted the worm gear on it, and attacked it with a razor saw.
DSC03335.JPGDSC03336.JPG

Then used a razor knife and a knife edge file to work the groove. This in several steps and an hour of time and I was able to get the tooth depth to an acceptable depth. Perhaps not perfect but good enough.

:beerchug:,
James
 
I made a mistake and didn't get a good photo of it, but the large drive belt pulley is not pressed onto the axle shaft flush to the end. The shaft ends perhaps a half mm before the side face of the pulley.
I knew that I was going to have to press the new worm gear onto the axle and didn't want to risk pressing the pulley further on the axle and risk splitting it, I want to keep using it.
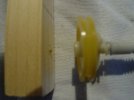
So I drove a screw through a small block of wood and adjusted it so that just enough was sticking out to function as a stop.
DSC03338.JPG

Drilled a 3mm hole through another block so that I would be pressing against the fat part of the worm gear barrel and used a screw clamp to press the worm gear on. I did remember to replace the nylon washer that had suffered heat damage first.

DSC03340.JPG

:beerchug:,
James
 
Adding holes that can accept set screws is a nice touch, and I did order some M2 set screws and 1.6mm progressive taps. Miguel has told me that the holes were planned for 1.6mm set screws but by then I had bought the 2mm ones.

The fact is that the worm gear is very secure on the shaft as it is. I do not have any expectation that is will slip or shift position, I could tell while pressing it on that it is on tight. In the end I did not bother with the set screws.

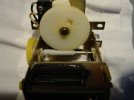
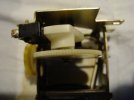
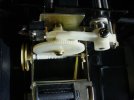
The entire lift mech is now back together. The new drive belt that I bought on ebay several years ago fits quite tightly, perhaps too tightly, we shall see how long it lasts.

At the last minute I remembered to test that the motor works with a 9V battery. It does, but it squeeks a bit running in one direction, the other direction it is silent. Both bearings got one drop of teflon oil.

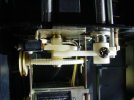
DSC03345.JPGDSC03346.JPG

:beerchug:,
James
 
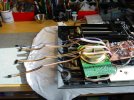
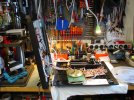
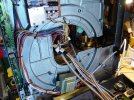
I did buy some cable extensions last summer. Everything is hooked up now and in the morning I will start testing.
Is there anything that I have forgotten to do?

DSC03365.JPGDSC03367.JPGDSC03369.JPGDSC03374.JPGDSC03375.JPG

We are now up to date. It is time for some Bratwurst, cheese, bread, beer and music.
:beerchug:,
James

edit 17 May 2025: Member jjbunn posted a link to the jumper cable set:
 
Last edited:
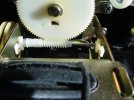
I just did a brief test.
Powers on.
The arm elevation works, quietly, in both directions.
The manual sled position rocker works, in both directions, the platter turns, the sled movement speed is good and not too fast, the sled stops immediately with no tendencies to overtravel.

Not tested:
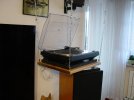
Playing a record,
Auto play,
Diameter settings,
45rpm,
Functions with an oscilloscope hooked up. That will wait for sometime after I have bought a new scope.

I am going to put it back together now. Before taking it in to the living room I will do some experimenting to try to determine the correct length for some replacement travel lock screws.
The cartridge overhang will be checked, reset if needed.
By the afternoon it should be in place on it's new platform and I will set the tracking weight. Good that I remember that 1.7gm is what it is supposed to be.
Then we will see if it will play a record.

:beerchug:,
James
 
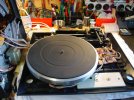
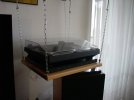
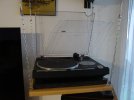
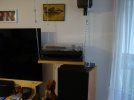
Successfully back together and sitting in place, not leveled, adjusted or hooked up yet.

The cartridge was positioned incorrectly at 48mm, adjusted to 49mm. Time for an old guy nap and then I will start leveling.

DSC03376.JPGDSC03379.JPGDSC03377.JPGDSC03380.JPG

:beerchug:
 
Back
Top Bottom