• The move to the new server is done. There are some software and database maintenance updates in process. This has us passing the hat around to help out. We appreciate any donations. Seriously, even a dollar helps. The payment page may be found here - https://www.audiokarma.org/support.html

Pioneer PL-L1000A Thread

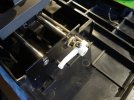
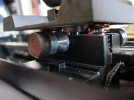
On to the next task. The rear sled roller was very easy to remove.

In spite of reading all available info in the collected threads I am still a little unsure of exactly where the 4 to 6 drops of silicon oil are being added.

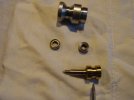
I am thinking that will be in the cavity area formed by the center cylinder when it is inserted in the roller body. The area where my screwdriver tip is pointing.
DSC03252.JPG
Is this correct? That seems to make sense, as the thick oil in that area would create drag.

Next question.
Did you fellows clean the bearings? If so what did you use?
Some of the original oil has made it's way into the bearings, so it would seem to make sense to clean everything before adding the fresh oil.

The bearings are not identical. The inner bearing (sled or forward side) is 3mm thick and is closed on the outer side. The outer bearing (rear side) is 2mm thick. It has one side that is partly but not completely closed. Both bearings have one side that is completely open and this was installed towards the middle.

:beerchug:,
James

edit 30 Oct 2024: Note that there is a small M3 washer that fits on the end of the threaded portion of the axle that is not shown in my photos. It is very easy to miss, in my case it fell down into the magnet well and I almost missed it.
 
Last edited:
One esoteric observation:

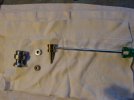
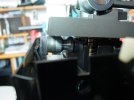
The brass bushing is fitted on the steel axle as a "wobble" part. It does not turn on the axle so must have some form of spline and is fixed against rotating. It appears to have a collar pressed into the top and bottom holding it in place on the axle. It has very little movement along the axle but is free to wobble around the axle.
DSC03253.JPG

:beerchug:,
James
 
I decided to wing it.

Up until now I have never cleaned old silicon oil off of anything so I did a bit on online investigation. The results were amusing. Some said IPA (not the beer) and acetone, some said IPA and Acetone will never work. Naptha or Toluene were recommended.
In the end I used some paint thinner first, that seemed to work very good. Then I flushed the paint thinner with some acetone. All the party came out squeeky clean.

So this oil is so thick that "drops" are pretty large. Going with the "fill the cavity of the center wobbler" approach I put everything back together and held the assy with the center pushed up enough to expose the cavity.
4 drops nearly filled the cavity but going by feel it seemed that the roller turned a bit easy. 5 drops completely filled the cavity and felt pretty good.

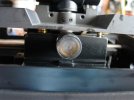
Getting the roller out without removing the rear guide rail was easy but to give myself the max room to reinstall it I removed the rear rail and used the end of a small paintbrush to tip the sled up a bit, this gave easy access. After that it was a piece of cake to get the roller put back in.

The new rubber cap fits perfectly and after popping it on I realized that it is translucent and you can see the end of the roller through it.

I made a mark on the top end of the guide rail before removing it. After cleaning it I reinstalled it turned 180° so there is now a virgin roller surface. Not that the top surface was bad in any way, but what the heck.

After all of that I tested the sled's rolling action, it seems pretty good. We will see later if I have to make any adjustments.

DSC03254.JPGDSC03255.JPGDSC03257.JPGDSC03258.JPG

With 75mL of this oil, and using 5 drops at a time, I figure that I have about 74.5 lifetimes worth of oil left.

:beerchug:,
James
 
All that is left now as far as basic maintenance goes is to finish the EV mech and replace the RCA cable. I am kinda wanting to save the cable for last so now I an waiting for the parts for the EV to arrive.

:beerchug:
 
Excellent :thumbsup:
Thanks!
I am actually having fun.

I need to start considering what I want to buy for a new cart. I have been a bit lazy in that direction.

The old cart has a lot of hours on it. Highly technical estimate of running hours: Way too many.

And I need to get at least one disk over from my son for testing. I am recalling that I have a very worn copy of Dave Mason Headkeeper that would suffice for the first turn on, it will hardly matter if it gets damaged.

After I am sure that everything is working correctly perhaps a couple of MFSL albums.

:beerchug:,
James
 
The CX-1 is supposed to have a pretty good phono section but up until now mine has never been used with a TT by me.

However, when I rebuilt it I did pay special attention to the phono EQ section. Nichicon UES Muse bi-polars and Wima film caps, Vishay-Dale RN 1% metal film resistors etc. And all parts were tested and sorted to under 1% tolerance and matched L&R.

So I am hoping for some good results.

:beerchug:,
James
 
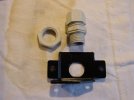
Yesterday a friend that is an electrician stopped by for a beer and brought me some screw type strain reliefs. This motivated me to go ahead and start preparing for swapping out the connection cable.

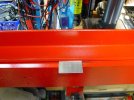
I was kinda hoping that I would be able to use the original mounting plate but the only way that I could fit the new type part would be to file the plate to shift the hole position, and I don't want to do that.

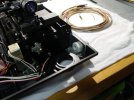
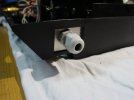
DSC03265.JPGDSC03267.JPG
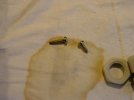
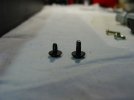
By the way, the 2 screws for mounting the strain relief plate are not the same length. The longer one goes on the left and the short on on the right.

:beerchug:,
James
 
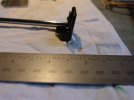
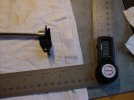
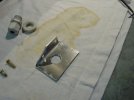
The original plate is 1.5mm steel and it has a lower mounting flange that is bent at a slight angle. I just recently bought a digital angle ruler and it shows that the flange is bent at 8.5° to the rear from 90°.

DSC03261.JPGDSC03262.JPG

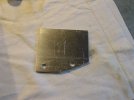
I looked in my metal stash and found a piece of 1.5mm aluminum and got started measuring, marking cutting and drilling.

DSC03268.JPG

:beerchug:,
James
 
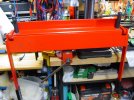
A couple of years ago I bought a very simple sheet metal brake and is used by simply clamping it in a bench vise, so it doesn't have to be permanently mounted anywhere.
It's nothing special but it sure comes in handy sometimes.

DSC03270.JPGDSC03271.JPGDSC03272.JPGDSC03273.JPG

:beerchug:,
James
 
To paraphrase Groucho: It may look a bit crude but don't let that fool you. That's because it is a bit crude.

But it has the positive attribute of doing what it is supposed to.

DSC03277.JPGDSC03279.JPG

:beerchug:
 
Last edited:
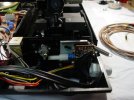
I marked the position of the muting switch plate before removing is so that I can get it close to correct when it is put back in. Note that again the mounting screws are different lengths and the longer one goes in the top hole.

The switch plate assy will fit back in with just enough space.

DSC03284.JPGDSC03285.JPGDSC03287.JPGDSC03288.JPGDSC03275.JPG

This way it is a non destructive mod and the original part is undamaged.

So I guess that tomorrow I will gather up my courage and do some soldering. Those tiny little wires scare me.

:beerchug:,
James
 
I need to start considering what I want to buy for a new cart. I have been a bit lazy in that direction.

Hundreds+ carts to choose from. However, not all will physically work well on THIS particular table. jhaan92 was blessed with installing an Ortofon black on the 1000a he sold. The customer just bought it based on his buddy's opinion. Unfortunately, the height of that particular cart made it next to impossible to properly set the VTA. I've used audio technica's Precept440, 440mla, and 150mlx on my (2) PL-L1000 tables and had zero issues adjusting VTA and VTF. I'm certain there are many other carts that will work but unfortunately Ortofon requires more fiddling than is necessary for this particular table. The carriage height adjustment is kinda limited on this table for proper operation.
Please understand, I'm not waving the AT banner flag here, just suggesting you be cognizant of how tall the cartridge body is when buying. In addition, I believe the arm on the 1000 series tables are considered to be medium compliance. Hope this helps.

BTW, cool thread so far. :bigok:
 
Hundreds+ carts to choose from. However, not all will physically work well on THIS particular table. jhaan92 was blessed with installing an Ortofon black on the 1000a he sold. The customer just bought it based on his buddy's opinion. Unfortunately, the height of that particular cart made it next to impossible to properly set the VTA. I've used audio technica's Precept440, 440mla, and 150mlx on my (2) PL-L1000 tables and had zero issues adjusting VTA and VTF. I'm certain there are many other carts that will work but unfortunately Ortofon requires more fiddling than is necessary for this particular table. The carriage height adjustment is kinda limited on this table for proper operation.
Please understand, I'm not waving the AT banner flag here, just suggesting you be cognizant of how tall the cartridge body is when buying. In addition, I believe the arm on the 1000 series tables are considered to be medium compliance. Hope this helps.

BTW, cool thread so far. :bigok:
Thank you for this, very good info! And thanks for the kind thoughts.

I had not even considered cartridge height as a limitation, this is very helpful. And I am absolutely open to thoughts on particular carts or brands, and AT is on my short list, I will look into the models that you listed.

If I could find someone that can re-tip my Adcom I would be tempted to try that too. It gave me some pretty good sound. I believe that it is an XT Crosscoil, unfortunately my son has lost the documentation that I had for it. At $170 it was a pretty expensive item for me back in '83.

I am going to need to find a headshell overhang gauge also, or the secs that would be needed to have one 3D printed. Another thing that my son lost, along with the 3 travel screws, I still need to find their length specs.

:beerchug:,
James
 
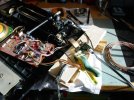
Getting ready to swap out the cables. I clamped together some odds & ends of boards and clamped the switch plate level on them to get a stable work zone.

DSC03289.JPGDSC03295.JPG
I will try to clean up this rats nest a bit too.

:beerchug:,
James
 
I used a needle to unravel and unwrap the braid. I kinda wanted to test the new and old cables for capacitance but I can't get any of my meters to read the new one as anything other than a 1.3 ohm resistor.

DSC03293.JPG

I guess that there is nothing left to do but get to work. Wish me luck. I hope that I don't need it but it never hurts to be lucky.

:beerchug:,
James
 
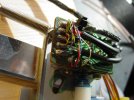
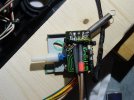
Not the prettiest work that I have done. Actually I would say not very pretty at all. But it checks good for continuity.

I never, ever, want to solder one of these things again. My nerves are shot and it is time for a beer. I will put the thing back in tomorrow.

DSC03296.JPG

:beerchug:,
James
 
Back
Top Bottom