

You are using an out of date browser. It may not display this or other websites correctly.
You should upgrade or use an alternative browser.
You should upgrade or use an alternative browser.
Z19 Crossover
- Thread starter Zilch
- Start date


I have no idea what Jeffrey is saying.......
Backhanded compliment on the excellent job you've done on the Z19s.
I read back in the M19 thread and you were sort of apprehensive about building them, yet yours are going to be some of the nicest examples so far.
Anybody that can ride a motorcycle to Deadhorse can build a Z19, but not all will turn out as sweet as yours.

Zonker92
All shiny and chrome
Yeah, I fingered you were joking there, but on the Interwebz it's easy to be misunderstood. I think they look beautiful, too.
Those coils are not polarized, as far as I can tell. And if they were, they'd be so marked. My understanding is that no component in this design is polarized; not the resistors, coils or caps.
I'm gonna run the separate negative and positives out to this input; I can leave it split or combined as I choose. Cheap on that there auction site.

Those coils are not polarized, as far as I can tell. And if they were, they'd be so marked. My understanding is that no component in this design is polarized; not the resistors, coils or caps.
I'm gonna run the separate negative and positives out to this input; I can leave it split or combined as I choose. Cheap on that there auction site.
Last edited:

ricohman
Adventure Rider
Backhanded compliment on the excellent job you've done on the Z19s.
I read back in the M19 thread and you were sort of apprehensive about building them, yet yours are going to be some of the nicest examples so far.
Anybody that can ride a motorcycle to Deadhorse can build a Z19, but not all will turn out as sweet as yours.
I misunderstood you, sorry about that!

I actually traded some very nice 901 series II for my Altec 19's.
ricohman
Adventure Rider
Yeah, I fingered you were joking there, but on the Interwebz it's easy to be misunderstood. I think they look beautiful, too.
Those coils are not polarized, as far as I can tell. And if they were, they'd be so marked. My understanding is that no component in this design is polarized; not the resistors, coils or caps.
Thanks.
Only 1/2 done though. Have to make sure they are wired correctly and I am still working on a bracket to support them to the aluminum plate.
I actually traded some very nice 901 series II for my Altec 19's.
OOohhh... See, I remembered the bike trip, forgot about the trade-in. I can see where my reply came off as whack.
On the brighter side, a pair of M19s went for a large but unmentionable sum on a large but unmentionable auction site today, and weren't as nice as yours IMHO.
So I think you are going to be an extremely proud owner in a couple of days when the Z19s are finalized.
Zonker92
All shiny and chrome
OK, here's my progress, for my 846B Valencias. 902s should arrive this Friday. The L-pad and binding post plates will go into the cigar box lids. After I finish the boxes I'll put them on the backs of the speakers. I found 18-gauge wire was as thick as I could go without it becoming impossible to work with.

ricohman
Adventure Rider
Nice. I like the idea of another strip for the wires going to the L-pad. I think I may copy that.
Are the cigar boxes just going to sit on top of the speakers?
I need to buy some aluminum sheet and cut a few more pieces on the brake. I've gone through 3 sets trying to mock up a nice looking face plate. I would like to label the front "Z19". I may end up TIG welding a bracket to the back to hold the xo but I would like to keep it bolted together.
Are the cigar boxes just going to sit on top of the speakers?
I need to buy some aluminum sheet and cut a few more pieces on the brake. I've gone through 3 sets trying to mock up a nice looking face plate. I would like to label the front "Z19". I may end up TIG welding a bracket to the back to hold the xo but I would like to keep it bolted together.
Last edited:
Zonker92
All shiny and chrome
Groovy. The boxes will go behind the speaker cabinets, basically hanging onto their backs. The stock set-up has a square hole in the back and the crossover is on a plate screwed to the inside wall, covering that hole from the inside. I'll remove that plate and use the existing screw holes that it will leave inside the cabinet to screw an MDF plate inside there.
That will leave a big new MDF surface inside the opening that I can attach the boxes to from the outside, using long screws and spacers of some sort, without damaging the cabinets. I’ll put woofer gasket material (like foam weather stripping) on the edges of the boxes where they rest on the cabinets.
I'll post photos later this week when it's done.
That will leave a big new MDF surface inside the opening that I can attach the boxes to from the outside, using long screws and spacers of some sort, without damaging the cabinets. I’ll put woofer gasket material (like foam weather stripping) on the edges of the boxes where they rest on the cabinets.
I'll post photos later this week when it's done.
ricohman
Adventure Rider
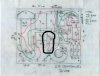
Question about soldering the caps. Do I have to run wire from each or can I just solder leads together?
I have circled 4 leads leads in the attached pic. Do I need to run 1cm of wire between each?
I know this will sound like a dumb question but I have limited experience building my own crossovers.
I have circled 4 leads leads in the attached pic. Do I need to run 1cm of wire between each?
I know this will sound like a dumb question but I have limited experience building my own crossovers.
Attachments

westend
Audiopile
Soldering the leads would be OK but cap leads don't offer much strength, if that is a consideration. Another thought is if you want to isolate the soldered leads with tube or shrinkwrap. In that case, what you end up with is a jacketed copper conductor, i.e. wire.Question about soldering the caps. Do I have to run wire from each or can I just solder leads together?
I have circled 4 leads leads in the attached pic. Do I need to run 1cm of wire between each?
I know this will sound like a dumb question but I have limited experience building my own crossovers.
Anyway you connect them is going to work so pick the easiest, right?:thmbsp:
Zonker92
All shiny and chrome
You can solder them to each other with no connecting wire.
What I did was run them through the mounting board and then twisted them together with the wire that led off to the other components. I soldered the resulting pigtail and then off to my next junction!
Man, I just finished mine and fired them up. Sweet! (First I A - B'ed the first one against my other speaker and there was a dramatic difference in clarity and tonal balance.)
What I did was run them through the mounting board and then twisted them together with the wire that led off to the other components. I soldered the resulting pigtail and then off to my next junction!
Man, I just finished mine and fired them up. Sweet! (First I A - B'ed the first one against my other speaker and there was a dramatic difference in clarity and tonal balance.)
Attachments

ricohman
Adventure Rider
Thanks guys. I ended up just twisting them all together and soldering the joint. Its far quicker and looks clean. I'm not worried about strength as the caps are glued to the board anyway.
Getting closer to my model 19's actually making some music.
Zonker, thats looks very nice!
Getting closer to my model 19's actually making some music.
Zonker, thats looks very nice!
Zonker92
All shiny and chrome
Moe Picks:


My goal was to be able to install these on my 846Bs without making any permanent changes to the speakers. So I removed the stock crossovers, replaced their plates with new pieces of MDF, holding four terminal binding post plates, screwed to the stock holes in the back of the cabinet, then hung these boxes off the lower two screw holes in the MDF plate, where the binding post plates attach at the bottom.


My goal was to be able to install these on my 846Bs without making any permanent changes to the speakers. So I removed the stock crossovers, replaced their plates with new pieces of MDF, holding four terminal binding post plates, screwed to the stock holes in the back of the cabinet, then hung these boxes off the lower two screw holes in the MDF plate, where the binding post plates attach at the bottom.
Last edited:
ricohman
Adventure Rider
Found this thread to reference on Lpad wiring:
http://techtalk.parts-express.com/showthread.php?t=205712
Hope it was right...
I've read that twice now (http://techtalk.parts-express.com/showthread.php?t=205712) and one guy says #3 is common but the diagram show it as +?
I am going to solder to the L-pads tonight and I would like to get this right the first time.
Is #1 on the left or right when looking at the lpad from the front? The Parts express diagram doesn't really explain it but I think I read somewhere it was on the left.
Last edited: