• The move to the new server is done. There are some software and database maintenance updates in process. This has us passing the hat around to help out. We appreciate any donations. Seriously, even a dollar helps. The payment page may be found here - https://www.audiokarma.org/support.html

2015 trying to bring it back, some help please.

Richs_Trains

Well-Known Member
Hey All,

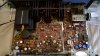
While the 2265B is waiting for a relay and filter caps, I decided to open up a 2015 that is waiting. This unit is in pretty nasty shape. The bass and selector were pretty much frozen in place. I cleaned all the controls and managed to get the bass and selector moving freely again. All the lights were out except for the dial pointer and the velum was dark brown, so I have installed new paper and LED's. After basic cleaning, I decided to fire her up and see what's up. Well, there is nothing from the tuner, either AM or FM; I get no deflection of the tuning meter and no sound, this is beyond me so I need some help on this one. The other thing that jumps out is, the right channel is about twice as loud as the left and it seems that the left channel is the normal volume and the right channel is too live, if that is possible, if not then the left channel is too low. The do not sound bad or distorted, just very different volumes. I am planning on recapping the power supply and the power amp boards, but did not have all the caps handy, so some are on order. Hoping that someone on AK has some suggestions for the tuner and the amp problems, I do not have a scope, but have a DVM. Thanks in advance.... Rich

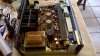
2015_2.jpg 2015_1.jpg
 
Register to hide this ad
Sadly I can't offer you any help but to say that the Marantz 2015 is IMO the best sounding Marantz out there. Something about that low powered little guy that just sounds oh so sweet.
Certainly worth saving.
Good luck!
 
I went ahead and recapped the power supply and was able to set the DC offset to 7.5mv as spec'd for both channels. Still no Tuner (no AM/FM or meter deflection), very unbalanced volume and also need the procedure to set the clipping using only a meter (don't have a scope yet). Any help would be great! Thanks Rich
 
AM and FM are on the same board. Might start by making sure the 100 board is getting power. I am really new at trying to translate schematics to the real world, but in lieu of an experienced mind on this I'll take a wild stab. It looks to me like power comes from the power supply, J801 into the 100 board at J111. J116 looks like ground, so I'm guessing that checking voltage between J111 and J116 should give something like 14 volts. Study the schematic and see if it looks like I'm reading this right. And of course, Deoxit the ever loving heck out of the input selector switch and Tape Monitor switch seeing as the unit is very dirty.
Steve
 
14.2v between J111 and J116, not the selector, have cleaned it to death. Thanks for the help Steven, I know you're just beginning, but you are way ahead of me!
 
Well, at least we have one piece of information. If P100 is getting power, it's going to take someone with more experience than me to suggest where to go from here.:dunno: Check the board top and bottom for bad components, broken traces, bad solder joints, etc. to rule that out.
 
Last edited:
Thanks for trying Steven, maybe we'll learn something from this in the end. Hopefully someone will chime in. Thanks Rich
 
I had and still have a few 2015's they are great units. You might want to check the voltages on the AM/FM board, as shown on the schematic and see what you get. The front end (everything near the antenna inputs) can get toasted by lightning strikes or strong static discharge. Depending on the units' previous life. The transistors in that area are suspect. be careful and don't short anything. Connect your meter negative lead to ground and then start snooping around. When you find something amiss pull it out of the circuit and test . I use a Hakko FR300 desoldering gun and a Peak/Atlas DCA55 Transistor / component tester. The tone board is also something to look at.
 
Beamer, I think this one had a rough life, I tried cleaning it last night and I am letting it dry, so I won't be powering it up for a day or so. Waiting on the caps for the power amp and then we'll go from there. Thanks for the help guys! Rich
 
I'm currently doing a 2010 and assume your 2015 is relatively very much the same. Any tips on how to remove those large caps with the 3 tabs?? The ones on mine are bent down on the board pretty tight making it difficult to remove without lifting the pad. Great job on the clean up by the way. Looks great.
 
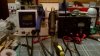
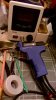
Dearslayer, I have a vacuum soldering iron that sucks the solder away. After using that to remove as much solder as possible, I heat the connection and gently pry up the tab with a small screwdriver. You have to get all three clean and vertical to remove it without damaging the traces. I have my de-solder iron set for 700 degrees and still struggles with the large tabs, it will go up another 150 degrees, but I don't want to burn the pads. If you don't have one of these and plan to re-cap a bunch of units, this is the way to go. I only bought a cheap one, but it had good reviews as long as it was good out of the box.

WP_20160929_00_38_51_Pro.jpg WP_20160929_00_39_23_Pro.jpg
 
Refer to my last post on the 2010 thread and it looks like maybe I should be investing in a good soldering/ desoldering iron. I'm currently using a Weller 100. I may have buggered up the pads removing one of those 3 tab caps!
 
I got this one on Amazon and I think it was around $100.00-150.00. Much cheaper than the name brands. I has been so great, when the legs are straight through, you just slip the nozzle over the leg, wait for the solder to melt and pull the trigger, all the solder is gone. The components just fall out so easy. It they are bent down, you can get the very tip of the leg in the hole of the nozzle, heat the solder and using the nozzle, straighten the leg and suck the solder, not the ideal way I assume, but it works for me and has made this hobby much more enjoyable. I also bought a solder station with a digital variable temp solder gun, hot are nozzle (for surface mount tech, which I'll never use) and it has a 0-15V dc power supply, so you can test lamps. I haven't used it much, I usually just solder the new caps in with the de-solder gun as soon as I remove them, but for close work it has a finer tip. Next up a scope, so I can trace the circuit problems and test output. Rich
 
Hmmmmmm sounds interesting although the brand name ones on Amazon are pretty pricy. What brand is yours? I normally don't have a lot of problems removing components but these heavier ones were extremely difficult.
 
Back
Top Bottom