You are using an out of date browser. It may not display this or other websites correctly.
You should upgrade or use an alternative browser.
You should upgrade or use an alternative browser.
2285B recap & binder post conversion
- Thread starter 1978_DREAMER
- Start date


Jailtime
Standin' on a corner
OK, I wasn't careful enough on the count of film substitutions that I needed. Does anyone have an extra Panasonic ECG 1uF 50V film capacitor that they could spare? It looks like Digi-Key has about a $9.00 minimum shipping fee. I'd be willing to replace it on my next order, I've got problems with my fill in Marantz 2252B so I'll be putting together an order for it eventually. Thanks, Jerry
I have a few I can spare. PM me an address.

1978_DREAMER
Active Member
Thanks
Thank you EchoWars and Jailtime. Digi-Key had under shipped my original order and I offered them the option of using first class mail for the replacements. It was delivered via FedEx so I thought that they didn't use the mail. With shipping at that price I don't mind paying for my mistake. Jerry
Thank you EchoWars and Jailtime. Digi-Key had under shipped my original order and I offered them the option of using first class mail for the replacements. It was delivered via FedEx so I thought that they didn't use the mail. With shipping at that price I don't mind paying for my mistake. Jerry
Last edited:
1978_DREAMER
Active Member
Shipping
I just placed my order at DigiKey and it looks like the first class mail should cost me about $2.80. That's very manageable! Thanks EchoWars for getting me on the right track! Jailtime I appreciate your offer, but I'll do this right. Jerry
I just placed my order at DigiKey and it looks like the first class mail should cost me about $2.80. That's very manageable! Thanks EchoWars for getting me on the right track! Jailtime I appreciate your offer, but I'll do this right. Jerry
1978_DREAMER
Active Member
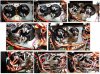
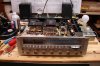
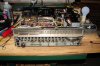
:yes:The soldering is done, I think I did OK for a first timer. Boy Oh Boy, 95 caps seemed like for ever for a beginner. Here's some pics of the ground bridge going together.

These are the 4 replacement main caps taking the place of the original duals with the eyelets crimped on, I soldered them when I got the iron fired up. They look to be a little taller than Catrafter's so I adjusted accordingly.

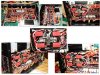
The wires are all in and I installed the recommended film bypass caps. That's a lotta' crap in a small bag!

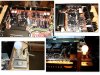
Here's 2 shots from the top side. I built my Dim Bulb Tester tonight and gave it a shot. A 60 watt bulb didn't seem to get the relay to trip so I tried a 75 watter and still wasn't happy. Probably more nervous than anything. Finally I put in EchoWar's recommended 100 watt bulb. Flipped the switch and watched it glow pretty bright, then the indicator lamps glowed a little brighter on the receiver, soon the relay clicked and the bulb dulled to a glow, to the point that I could make out the filament.

Enough success for tonight. Tomorrow, I'll get a meter out & try to adjust the trimmer resistors. Wish me Luck! Jerry
These are the 4 replacement main caps taking the place of the original duals with the eyelets crimped on, I soldered them when I got the iron fired up. They look to be a little taller than Catrafter's so I adjusted accordingly.
The wires are all in and I installed the recommended film bypass caps. That's a lotta' crap in a small bag!
Here's 2 shots from the top side. I built my Dim Bulb Tester tonight and gave it a shot. A 60 watt bulb didn't seem to get the relay to trip so I tried a 75 watter and still wasn't happy. Probably more nervous than anything. Finally I put in EchoWar's recommended 100 watt bulb. Flipped the switch and watched it glow pretty bright, then the indicator lamps glowed a little brighter on the receiver, soon the relay clicked and the bulb dulled to a glow, to the point that I could make out the filament.
Enough success for tonight. Tomorrow, I'll get a meter out & try to adjust the trimmer resistors. Wish me Luck! Jerry
Attachments

Gum Parker
Active Member
Quite an undertaking there 1978 Dreamer, looking good. I have one of these beasts waiting on me to restore it.
I was wondering... what bypass cap value and brand did you end up using? Couldn't quite make out from the photos. Also, the round pieces holding the pairs of main caps... is that sheet metal or some kind of thick acrylic?
I was wondering... what bypass cap value and brand did you end up using? Couldn't quite make out from the photos. Also, the round pieces holding the pairs of main caps... is that sheet metal or some kind of thick acrylic?

1978_DREAMER
Active Member
newbe questions
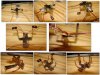
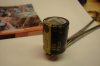
OK, I set the bias and offset DC voltages tonight but not before I toasted my 470uF cap on my P800 power supply board and had another one at risk. I confused my self by looking at the (+) value in the hatched area on the board and lined 2 caps up to the trace thinking it was (+). NOT!!!!! As I learned you take the position of the (+) literally to be the side of the cap that's (+) faces the (+) symbol. Lucky for me I only had to endure some toxic smoke for a short period of time before I got it shut down & cooled off. I pulled out my photos and sure enough I had 2 of them backwards. HUGE LESSON!!!! With the original cap back in place the settings adjusted right in. I'll order up a new one soon. I do have one question. I wasn't using my dim bulb tester, I thought that I wanted full line voltage to make the adjustments, after some re-soldering I made the adjustments with the DBT in the circuit. Is this OK or should I re-do the settings without it? I did learn something tonight, take good pictures for the positions of the caps, it's real easy to find the obvious errors. Here's the may-pop-soon cap.... Jerry PS I had actually gone through each board before soldering and checked off my sheet for correct values then went back and checked off for polarity, just confused what I was reading.

OK, I set the bias and offset DC voltages tonight but not before I toasted my 470uF cap on my P800 power supply board and had another one at risk. I confused my self by looking at the (+) value in the hatched area on the board and lined 2 caps up to the trace thinking it was (+). NOT!!!!! As I learned you take the position of the (+) literally to be the side of the cap that's (+) faces the (+) symbol. Lucky for me I only had to endure some toxic smoke for a short period of time before I got it shut down & cooled off. I pulled out my photos and sure enough I had 2 of them backwards. HUGE LESSON!!!! With the original cap back in place the settings adjusted right in. I'll order up a new one soon. I do have one question. I wasn't using my dim bulb tester, I thought that I wanted full line voltage to make the adjustments, after some re-soldering I made the adjustments with the DBT in the circuit. Is this OK or should I re-do the settings without it? I did learn something tonight, take good pictures for the positions of the caps, it's real easy to find the obvious errors. Here's the may-pop-soon cap.... Jerry PS I had actually gone through each board before soldering and checked off my sheet for correct values then went back and checked off for polarity, just confused what I was reading.
Attachments
Last edited:

bktheking
Gitter Done!
That dim bulb ain't so dim in the picture, you shouldn't see anything on the bulb. Bright like that indicated a short. It should glow bright for a second or two and then nothing. Unless of course you snapped the pic before power up. No biggie on the backwards cap, everyone has done it at least once.
1978_DREAMER
Active Member
bktheking, I may have snapped that pic before the relay engaged. If it was after, you are absolutely right! Thanks, I'll pay closer attention. I feel like I let some of you guys down on that cap, but I think I caught it in time. Hey, Gum Parker, some one else set me up on those films, I'm checking with him to see if I can publish. Jerry
1978_DREAMER
Active Member
As far as Gum Parker's question on mounting those main caps, I used Catrafter's approach and made simple bushings from some plywood I had laying around, he uses MDF I believe.

sssmokin99
Well-Known Member
Digikey will ship USPS First Class Mail. It's right there in the shipping choices, and should be less than $4.
Which comes in handy since they usually deliver on Saturday and UPS does not. Helps if you have a good letter carrier, too, lol....
1978_DREAMER
Active Member
 :yippy: Houston we have lift off!!! I corrected my mistakes and got sound on Friday night.
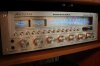
 This is about the 3rd time I have re-strung one of my Marantz's and it still isn't getting any easier but it was nice doing the repairs without fighting the string. Here' a pic with the front all prettied up and running break in.

I'll update the capacitor spread sheet when I get a chance and get that into the AK database. Gum Parker. the main caps bypass films are ECQ-E2225KF
2.2uF/250V Digikey part number EF2225-ND. Thanks guys, for all the technical support. 6 months ago I was trying to enlist help with this project and finally decided that I should be able to do this myself with "a little help from my AK friends". Beatles right? Jerry
Attachments


Leicalover
Love vintage cameras too!
Great! :thmbsp:
1978_DREAMER
Active Member
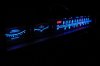
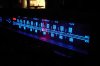
 :yes::thmbsp: Here she is! Back where she belongs! Singing her heart out! And lookin' pretty too, with a fresh set of LED's.
 I am really pleased! Between building new speakers this past summer (http://www.audiokarma.org/forums/showthread.php?t=385983) and now finishing a re-cap of my 1978, 85 watt receiver, I'm really believing in this vintage hardware. This is one smooth sounding set up! From extremely low volume all the way up to leaving the room with sore ears. Thanks everyone for your support when I had questions. Especially Tom, Kyle and Glenn on the Marantz info and Celt on the speaker info. It's feeling a little like 1978 again, except with a few more pounds and some spreading gray hair. Happy Listening! :yippy: Jerry
I still have that cap list to finish, but for now I think I'll just enjoy! :thmbsp: