• Please note that Audiokarma will be offline briefly for updates early on Monday morning, September 28th.

2285B recap & binder post conversion

Thanks Jerry. Maybe this is a silly question, but I'll ask anyway. Aside from the filter caps sections, were you able to recap all the other boards without removing any of the wire-wrapping, or did you find you had to undo some wire-wrapping? If you did unwrap some posts, did you rewrap them (with a tool I'm supposing) or did you just solder them?

For the tantalum caps, did you go by visual inspection to decide if they were tanatalum, or did you go by the owners manual? Do you happen to know or remember how many tantalum caps you replaced, and which ones they were?

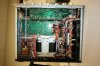
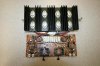
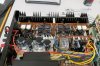
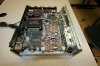
So far I have removed the P700 section/board and removed the electrolytic caps from that board, and I have taken apart the filter cap section. It's slow, but I am really enjoying it.

It looks like I also have a 2330B tuner board. The manufacturing date of my 2285B is 78-4-29.

Thanks, Randy
 

Attachments
  • IMG_8687.JPG
    IMG_8687.JPG
    90.9 KB · Views: 148
  • IMG_8706.JPG
    IMG_8706.JPG
    96.6 KB · Views: 126
  • IMG_8716.JPG
    IMG_8716.JPG
    113.6 KB · Views: 160
  • IMG_8730.JPG
    IMG_8730.JPG
    85.9 KB · Views: 133
  • IMG_8732.JPG
    IMG_8732.JPG
    95.5 KB · Views: 127
Last edited:
I believe there were 2 or 3 wires that frustrated me enough to unwrap. Those got clipped and stripped exposing fresh wire which I carefully re wrapped using 2 pairs of forceps. I seem to remember 1 or 2 factory soldered wraps that I undid, those may have helped with the change over to LED's. These were re-soldered. What ever method you choose just make sure you are creating a sound permanent connection.

As far as tantalums, there are 3 on the PS01 board that got Panasonic films, Digikey # P4675-ND. I also used 2 more of these to replace the 0.2, 50V electolytics on the P200 board.

I am a little hesitant to publish my cap list because I made some count mistakes and had to reorder twice to get everything. I have a spread sheet started that I have processed into a pivot table. Do you have Excel on your computer? I could try to finish it and PM it to you.

On the P200 tuner board don't make any pot adjustments unless you have a scope and know how to use it, which I don't.

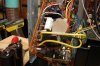
Here is one wires that got cut and I photo'd. its on the P800 board. Jerry

attachment.php
 

Attachments

  • DSC00042.jpg
    DSC00042.jpg
    75.1 KB · Views: 417
Last edited:
I worked on my cap list and submitted a new version to jailtime asking that he replace the previous one that I submitted with this update. The new Excel file has 3 tabs. Tab one repeats my earlier submission which is a total listing of all caps gathered from the parts list. Tab 2 is a pivot table giving some rough totals from tab 1 data. Tab 3 is a comprehensive list of electolytics and films that I replaced while doing this project. It also has board locations and manufacturer info along with Digikey part numbers. I hope this helps someone. Jerry

If I chose bad locations for the different caps, please correct me so I can update this file. I had some loose logic in my mind as I attempted this but it was not based on any true knowledge.

Here is the largest screen shot that the attachment manager would allow me to upload of Tab 3.

attachment.php
 

Attachments

  • Fullscreen capture 7152012 112005 AM.jpg
    Fullscreen capture 7152012 112005 AM.jpg
    98.5 KB · Views: 441
Last edited:
Thanks for the caps list Jerry!

When I am finished, I will compare all of the caps I replaced with the caps that you have on your list. I'll send you my results as well. I know some boards may be different, depending on when the receiver was built, but I think our receivers may have the exact same boards in them. We'll see I guess.

Today I removed all the electrolytic caps from the P800 and P400 boards. More tomorrow. I think the P200 board is next. It looks a bit nasty.

Thanks, Randy
 
Last edited:
I've finished removing all of the electrolytic caps. Gonna order the replacements and then re-populate the boards.

A question for Catrafter or Jailtime, or anyone else who might know the answer.

Of the roughly 100 caps I am replacing, eight are made by ELNA, who now make the Silmic II caps. Two of these are non-polarized and so I'm guessing they should be replaced with film. The other six are what I'm wondering about. Do you think I should replace these other six ELNA caps with ELNA Silmic II caps (if available), or should I not bother, and just replace all of the electrolytic caps with either Panasonic FC or Panasonic FM caps? I've read the Panasonic FC shootout thread, and others concerning caps, and I'm leaning towards using just one type of cap, but I'm really having trouble making up my mind.

Interestingly, when I was removing the electrolytic caps from my Marantz 2285B boards, I found a total of eight Elna caps. Two on the P400 board, C401, and C402, and six on the P200 board, C308, C309, C323, C324 and the non-polarized caps C246 and C310. 78 Dreamer told me that when he removed the old electrolytics from his boards he found Elna caps in C152, C169, C239, C246, C306, C310, C803 and C813. He also suggested that the fact that he found Elna caps in different locations on his boards, than I did on mine, probably means that the Elna caps weren't "special" caps, reserved only for certain circuits, but rather that the Elna caps were just one of several brands of caps that could be used in the boards. That makes sense, and I agree with it, which points me towards simply using Panasonic FC or Panasonic FM caps, and forgetting about the Silmac II caps alltogether.

Your thoughts and responses would be appreciated.

BTW, I am also replacing three tantalum caps on the PS01 board with film.

Thanks, JBLman
 
Last edited:
I've finished removing all of the electrolytic caps. Gonna order the replacements and then re-populate the boards.

A question for Catrafter or Jailtime, or anyone else who might know the answer.

Of the roughly 100 caps I am replacing, eight are made by ELNA, who now make the Silmic II caps. Two of these are non-polarized and so I'm guessing they should be replaced with film. The other six are what I'm wondering about. Do you think I should replace these other six ELNA caps with ELNA Silmic II caps (if available), or should I not bother, and just replace all of the electrolytic caps with either Panasonic FC or Panasonic FM caps? I've read the Panasonic FC shootout thread, and others concerning caps, and I'm leaning towards using just one type of cap, but I'm really having trouble making up my mind.

Interestingly, when I was removing the electrolytic caps from my Marantz 2285B boards, I found a total of eight Elna caps. Two on the P400 board, C401, and C402, and six on the P200 board, C308, C309, C323, C324 and the non-polarized caps C246 and C310. 78 Dreamer told me that when he removed the old electrolytics from his boards he found Elna caps in C152, C169, C239, C246, C306, C310, C803 and C813. He also suggested that the fact that he found Elna caps in different locations on his boards, than I did on mine, probably means that the Elna caps weren't "special" caps, reserved only for certain circuits, but rather that the Elna caps were just one of several brands of caps that could be used in the boards. That makes sense, and I agree with it, which points me towards simply using Panasonic FC or Panasonic FM caps, and forgetting about the Silmac II caps alltogether.

Your thoughts and responses would be appreciated.

BTW, I am also replacing three tantalum caps on the PS01 board with film.

Thanks, JBLman

Hey JBLman,
I haven't seen anything posted lately and tried to send you a PM but the link timed out. Have you hit a problem with your re-cap? I was hoping to see some dancing bananas by now.
Jerry
 
Hi Jerry,

I ordered all my caps from digi-key a month ago, but one cap is currently back-ordered, so they are waiting until that one cap is back in stock before sending me the whole order.

I have already bought through eBay bought some new cap clamps for the 6800 uF caps to be replaced.

Digikey expects the order to be shipped next week. Here's hoping.

Cheers, randy
 
I'm busy teaching right now, so project on hold. I'll start it up again in May. Sad watching my torn apart 2285B just sitting there waiting for me to fix it. Plus, no music right now!!
 
Before I started my re-cap I bid on and purchased a 2252b. That did 3 things for me. First it gave me one more opportunity to clean switches and get that technique a little more down pat. Second it gave me a comparison of the sound that was missing from my 2285b mainly the crisp clap of the drum sound. And third it gave me music while mine was apart. I hope your project goes back together well, once you get back to it!
 
Hi,
I have a Marantz 2252 and I am thinking of binding post conversion like you did.
Could I please have your template of the plate with 4 binding posts holes with flat?
I guess we don't have much freedom to choose different binding post other than Radio Shack due to the space available?
Thanks very much.
Paul J.
 
Here is the drawing that I used to cut the binding post adapter plate. I don't know how to open a PDF file so I can have it visible in this post. If you don't have a way to open it I can try something else.
Jerry
 

Attachments

Here is the drawing that I used to cut the binding post adapter plate. I don't know how to open a PDF file so I can have it visible in this post. If you don't have a way to open it I can try something else.
Jerry

OK, one of my co-engineers at work straightened me out. Here is the drawing as a picture.
attachment.php


Please note that I actually drilled and tapped the mounting holes. Probably #10-32 threads. It looks like there is room for nuts if you need to go that way. I think I used a piece of 1/8 steel that I had available.
 

Attachments

  • marantz 2285b speaker conn plate.jpg
    marantz 2285b speaker conn plate.jpg
    41.9 KB · Views: 161
Last edited:
Hi Jerry,
Thank you so much.
Pdf and jpg are all good for me. pdf was even better.
It looks the unit is inches I think.
No problem for me to convert them to mm.
 
Hi Jerry,
It's the question about the binding post conversion again.
How did you make the steel plate black?
What do you mean by "drilled and tapped"? Isn't it CNC cut?
Thanks very much.
Paul
 
The black color is enamel spray paint. The holes that the screws go into are tapped, no nut needed. The binding posts slip into the holes and are held in with the supplied nut.
Jerry
 
Pauljuhn, I just had a friend use a CNC machine to make two plates for me based on Jerry's drawing. They are awesome and they fit beautifully. I'd be happy to send you one for free if you PM your address to me.

Jerry, thank you so much for everything. It's been two years but I finally now have the time to finish my recap. It was a real gift your drawing with dimensions for the plate. Thanks!!!! I'll put up some pics when I have a chance.

I started installing caps yesterday and I'm about 1/3 finished. BTW, did anyone else run into cap CE40 being installed backwards according to the silk screen on the tone board. According to Audiokarma, at least one other person found the same thing. I installed the new CE40 cap the same way the old cap was installed, with the polarity opposite to what is shown on the silk screen.
 
Last edited:
Started installing caps yeaterday and I'm about 1/3 finished. BTW, anyone else run into a cap that was installed backwards according to the silk screen on the tone board. CE40. Someone else confirmed it already in Audiokarma. I installed the new cap just like I found the old one, installed against the polarity shown on the silk screen.

Yes, I have encountered this a couple of times; you can confirm with the schematic for orientation (although errors in Marantz service manuals are not that rare). The easiest approach is as you have done: install the replacement as you found the original.
 
Hey JBLman, it's been a while, but at least you only had a couple years delay. I was frustrated with mine for about 15 years until I found this wonderful web sight with great people sharing their skills. :yes: I hope the re-cap and a good cleaning gets you set up as well as it worked for me! I probably should have posted that template for the binder post plate sooner but I guess I'm the type that needs prodded into action. It's good to see you're back at it!
Jerry
 
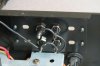
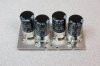
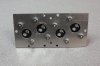
So, here are a couple of pictures of the new faceplate I made based on Jerry's pdf file, plus the new plate for new filter caps. More to follow. I've finished installing all the caps now, rewired everything, cleaned all switches and pots. Just need to adjust idle current bias and dc offset, and then fix the tuner string length and I will be done.

IMG_0389s.jpg

IMG_0381s.jpg

IMG_0384s.jpg

IMG_0386s.jpg
 
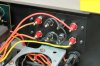
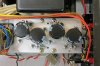
Some more pictures showing new caps, new binder posts, plus general overall progression. Almost done at this point.

IMG_0405s.jpg

IMG_0414s.jpg

IMG_0418s.jpg

IMG_0443s.jpg

IMG_0444s.jpg
 
Back
Top Bottom