• The move to the new server is done. There are some software and database maintenance updates in process. This has us passing the hat around to help out. We appreciate any donations. Seriously, even a dollar helps. The payment page may be found here - https://www.audiokarma.org/support.html

2500 from beyond the realms of death

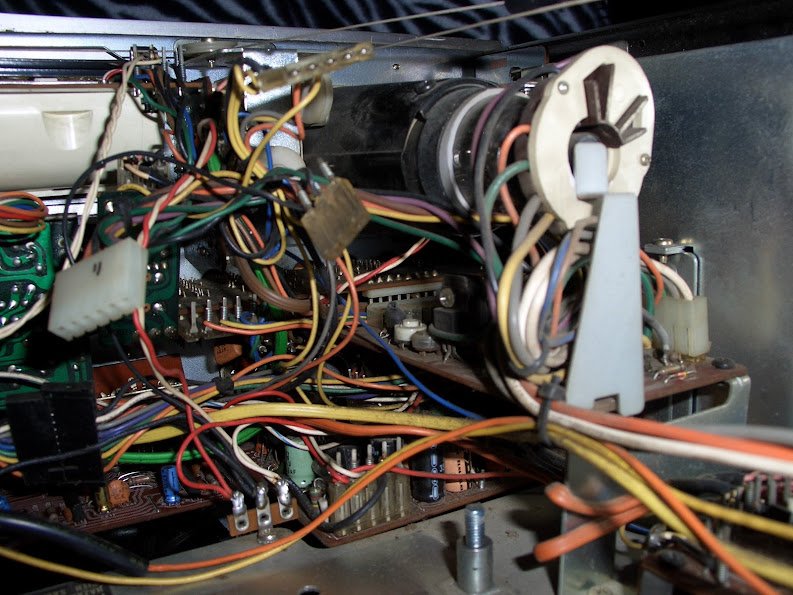
More photos from the second 2500 I'm working on. (chasing a hum and distortion in one channel).

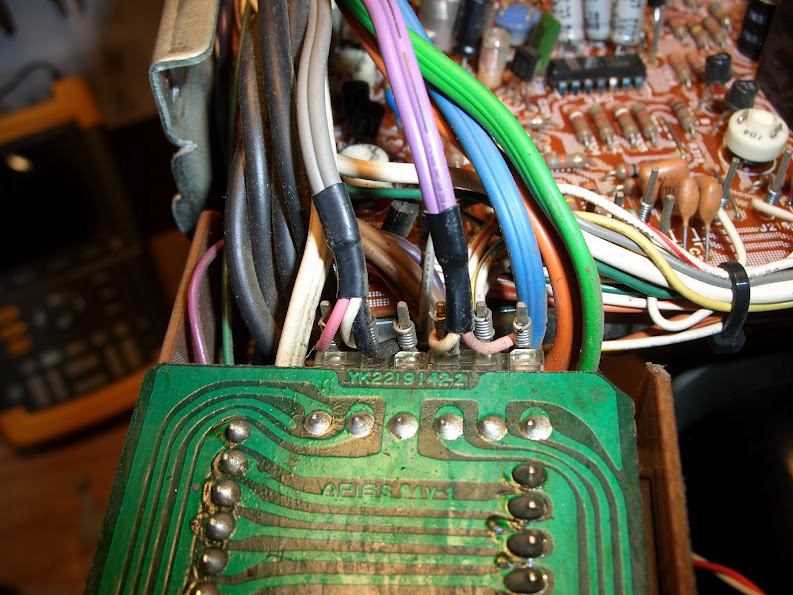
Figuring out the connectors on the boards in the front is the puzzle here.

pa6VQMZBS8X_fVa4zKkQEq2EP8ylmIo7B4TArNF73Vk=w542-h406-no


fzL35VS1VKTkFVHLBnL1BsqG36pYWEaa10nN1QyahM8=w1096-h823-no


4QE2uz_AjP04LV-avebpcAg8d6fABcNcNAvQRmcQ-j4=w1096-h823-no


-DpzPoSFldqhLwgh_kSBjOxb9QMis_JAkJaMlYm_KL0=w1096-h823-no
 
I'll be home in a few days and can offer photos as required. I have more than what I posted in my rebuild thread. I really appreciate that you're bringing a rare bird back to life. See, I assume your skilled efforts are going to be successful! :yes:

I agree with tx on the tuner, hoping yours is okay. Any extra volume knobs are worth way more than gold!

Thanks Randy. I just finished looking through your 2500 rebuild, very impressive and great pics. I did inspect the tuning cap thoroughly and all fins look good as well as its movement.

I just placed the parts order and am looking forward to this build. There is a lot of preliminary work to be done though. Aside from the wire mess, some boards are cracked in places and need to be repaired. Should be fun...

I really appreciate all the pics and and support from you guys. And with it I shall deliver one bad ass 2500!!!:guitar:
 
Bloody awesome project! Dont worry, that 'pile-o-junk' is doable, and will sound sweet!
There are a couple of really good 2500 threads here on the forum......they helped med a lot.
Keep posting with your progress.
 
A few more photos from a unique angle. I had to pulled the tranny sub chassis to replace the filter caps.

WrqhIx5UI7vMp_jLST-KzmFdwwFRVTNoTH8_QJ9bbeY=w794-h595-no


4XJ8TjHJJrQL16adlAz2rq3XX0cwVb0_ahFqQeUxWqQ=w794-h595-no


unLFcOhnYg0W-Dsi4cgkFywd-UPTSFwbCd8qYbteWQs=w794-h595-no
 
Well I dug in a bit tonight, starting with the chassis. I separated the clutter, remove the scope and cleaned things up. The only good thing about this thing being in pieces is the easy access. I prepped the new filter board, which has to be modified, and replaced the bypass caps on the rectifiers. I will be cleaning and repairing boards next.


From the boards in front of the tuner, under the scope.
There are some I couldn't get a good shot. Its nasty in that area. Real cluster of wires.

7mnXUT8EBJ6mgiSd0Kca_3kqdLzd-pmxBKjsNMb-JT4=w794-h595-no


jDTxsdq-dY4nEYpp-2gQhm3_ywmRm4ZB3leu41zGSQY=w794-h595-no


I already puller the far one off before grabbing the photo. It goes straight forward to those pins.

2nmcEp_FCND0AU_4ygrDxbBjnz90TnQRUcJm_oCcm3Q=w794-h595-no


CKEVUamkR6jgeY_5th4AZ3bJzYSa-ECNcMAHE5qKJ44=w794-h595-no


hxgN-psTKWQnfcZ4THY6cnIffXNhDk-wYnusFpQnTpk=w794-h595-no
 
Well I dug in a bit tonight, starting with the chassis. I separated the clutter, remove the scope and cleaned things up. The only good thing about this thing being in pieces is the easy access. I prepped the new filter board, which has to be modified, and replaced the bypass caps on the rectifiers. I will be cleaning and repairing boards next.


Looking good!

Where did the filter board come from?
 
Finished cleaning and fixing the detachable boards. I found plenty of signs of repair work too....


This isn't good. Whatever was used to break the traces just spread copper around. There was still continuity between those wires.


Here is the after shot. I just built a solder trace then covered it with epoxy.


Sent from my HTC6525LVW using Tapatalk
 
Haha, thanks. I do have much faith in this one. I haven't even begun to get into this, but this is definitely my least favorite part. And it has to be done. Nice and clean, and new greese.


Sent from my HTC6525LVW using Tapatalk
 
Im calling it a night here. These are a pain. It is a must to remove all the old solder from the through holes and transistor leads. Otherwise they will not seat properly.


Sent from my HTC6525LVW using Tapatalk
 
Amplifier boards are finished. Basically everything was stripped but the 1/4 watt resistors and a few diodes. Vishay metal films and non inductive wirewounds. I literally checked all the 1/4 watters. Fun...


Sent from my HTC6525LVW using Tapatalk
 
Looking good. I hate cleaning up the work someone else did, but when it's trashed like that, forget it. You must be far more patient than I am.

Have you been inside a 4400? This 2500 looks every bit as fun. :D
 
Looking good. I hate cleaning up the work someone else did, but when it's trashed like that, forget it. You must be far more patient than I am.

Have you been inside a 4400? This 2500 looks every bit as fun. :D

Thanks. I don't know if im very patient, but I would hate to have a smoke show because I cut corners. I saw the inside of a 4400 once and said, nope. The clutter makes my brain glitch. I rebuilt a Sony 7065 and It was the same thing, except the wires are just long enough to be where they are.:no:
 
Back
Top Bottom