• The move to the new server is done. There are some software and database maintenance updates in process. This has us passing the hat around to help out. We appreciate any donations. Seriously, even a dollar helps. The payment page may be found here - https://www.audiokarma.org/support.html

AGH! Why do things keep breaking on me?!

Saffire

Active Member
If you've seen my posts about my Pioneer SX-50, the receiver that I broke while trying to recap it, I have an update here.


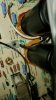
I've successfully bridged all of the broken traces with jumper wire, and sealed the crack with Gorilla Glue.

20200802_190517.jpg

However, after putting the receiver back together, and powering it on, nothing happens. It does turn on, but the relay does not click and there's no radio station frequency displayed. The function display icons are all illuminated as well.
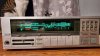

20200802_213821.jpg

These 3 things lead me to believe that there's something else that's wrong, but I really have no idea what it could be. All the wires are in their correct spots, and I've done everything that I could think of. I guess it'll be a parts unit for now. I'm going to work on it more tomorrow. I've been standing up for almost 4 hours now. :confused:
 
Register to hide this ad
Could be unrelated to board break (though it'd be the first place I'd look.)
We never asked. Sometimes traces are on both sides of board. Is it possible you have other traces to repair?
Also, you say you recapped unit.
Are you certain all new caps are correct value, polarity?
Last thing to look. Cold solder joints, solder bridges near your work.
One other thought, Sometimes loose wires can be detached while maneuvering boards for work.
Once you get past a thorough inspection, you really have to start testing. Continuity on your trace repairs, then supply voltages, then other section voltages against manual.
 
check continuity of traces point to point in case you missed a crack .. i can see at least 3 spots that night be cracked ..could just be scratches or the light but better to go over every track with your meter . also there might be a broken resistor etc .
 
For simple cracked traces, I would just scrape off the resist around the crack, and bridge the crack with solder (providing the PCB is otherwise mechanically sound). Use a short bit of tinned copper wire (or component lead offcut) if necessary.

As a student, I rescued a TV from a skip that had a crack across the entire main board, and managed to get it working again using the above technique.
 
Could be unrelated to board break (though it'd be the first place I'd look.)
We never asked. Sometimes traces are on both sides of board. Is it possible you have other traces to repair?
Also, you say you recapped unit.
Are you certain all new caps are correct value, polarity?
Last thing to look. Cold solder joints, solder bridges near your work.
One other thought, Sometimes loose wires can be detached while maneuvering boards for work.
Once you get past a thorough inspection, you really have to start testing. Continuity on your trace repairs, then supply voltages, then other section voltages against manual.

Whoops, my bad. I didn't fully recap the unit. I only changed the filter caps. I'm going to pick up a digital multimeter and see what I can do.
 
Hold up.
IIRC You said it worked before you started.
If you only changed filter caps , for now, you only need to look there.
If it worked before. You want to concentrate on what changed since you started.
Once we fix that you can go on and do other work.
At this point that only adds to the possible issues you may have to trouble shoot.
Kind of like going on a long journey and losing your keys before you leave the house.
You know the keys are somewhere in the house.
 
Hold up.
IIRC You said it worked before you started.
If you only changed filter caps , for now, you only need to look there.
If it worked before. You want to concentrate on what changed since you started.
Once we fix that you can go on and do other work.
At this point that only adds to the possible issues you may have to trouble shoot.
Kind of like going on a long journey and losing your keys before you leave the house.
You know the keys are somewhere in the house.


That makes sense. The stereo had absolutely no issues before I cracked the board. I think that one of my jumper wires is at fault here.
 
Make sure you did not cross a trace or miss connecting one. Or inadvertently hook something back wrong. Focus should be on power supply board where any work was done or the cracks are.

Also check voltages out of power supply making sure they match service manual (will be close, often not exact match). Double check grounding too. Continuity checks with power off can be used to double check connections.

Sometimes you have to keep going back looking, and going through things before finally recognizing where the problem is. Not always obvious.
 
I think those guys are right about another cracked trace. Pretty fair guess that one of the power supply lines is open. Most gear has several voltages going on. Are there any traces on the other side of the board?
 
I think those guys are right about another cracked trace. Pretty fair guess that one of the power supply lines is open. Most gear has several voltages going on. Are there any traces on the other side of the board?

Let's forget about the old SX-50 for a second.

Today, I got a new SX-50 in the mail, with an unmolested board. I decided to replace the filter caps on this one as well, with the Nichicons I tried on the old SX-50.

Everything was going perfectly well, until I hit the power switch. Now it has the same exact issue as the old SX-50. All function lights illuminated. No speaker relay click. And the radio station frequency is missing.

What am I doing wrong here? Did I break something again?
 
I'm just going to cut to the chase.

I have two receivers. A Pioneer SX-50 with a broken, but repaired PCB. And a perfect SX-50.

When I turned on the broken SX-50, I was greeted with nothing. All the input lamps (phono, CD, etc) on the display were illuminated, which isn't normal. The FM frequency number was missing from the display, and the speaker relay was not clicking.

20200802_213821.jpg

Now, I thought this was an issue with the PCB being broken. Boy, was I wrong!

I removed the brand new Nichicon filter caps from the broken SX-50 to use in the perfect SX-50. I did a very clean solder job. The joints were great, I didn't hold the iron on the pads for too long, and I made sure to clean up the excess flux before powering on the receiver.

So, I powered up the perfect SX-50. And guess what? SAME exact issue as the broken SX-50. I think it's some kind of protection mode. At the time, I thought the filter caps were maybe faulty, so I put the original caps back in the receiver. But it's still not working, same issue! I'm at my wit's end, I'm very frustrated and I just really want all this to work. Can someone please guide me through this?
 
I've heard that the glue used to glue down filter caps to the PCB can sometimes become corrosive over time, and short out components, triggering a protection mode.

These are what the caps currently look like. Should I scrape off all that glue?

20200803_215502.jpg
 
There's also the matter of adjusting bias. Would too high of a bias cause this amp to go into protection mode?
 
Are you installing the caps in the proper orientation? Check your before pics

Yes, I installed them properly. I even re-installed the old capacitors in their proper orientation, and it's still the same issue. I'm thinking that it's a issue with the bias, or maybe the filter cap glue becoming corrosive/conductive?
 
Have you damaged any wires or ground connections when replacing caps.
Have you checked power supply voltages as per the service manual, need to check both +ve and -ve supplies
to tuner, display, pre, power and cpu...
 
Ohh man, I may have found my blunder here...

The flux I used to solder the capacitors onto the PCB is Oatey's No. 95 lead-free tinning flux.

It turns out, that stuff is for PIPES. Not electronics. Gosh darn it... This flux is the only type that my local Home Depot had. I thought it would work with electronics.

It's really tough getting the residue of that stuff off the PCB. There's still a minor film of it. Is it possible that the residue is creating a short circuit? How can I clean it off?
 
I think I've finally narrowed down my issue on my not-cracked SX-50. (I have two SX-50's. One with a cracked PCB, and this one that isn't cracked.)

After replacing the filter caps, the receiver is now stuck in protection mode, the speaker relay isn't clicking. Keep in mind that this receiver was working perfectly before the re-cap. The reason why I replaced the filter caps is because they weren't doing a good job at filtering out noise. (e.g. turning my ceiling fan on would cause a loud pop to be heard through the speakers.)

I didn't know what I did wrong at first. I did a good job at soldering. The joints aren't cold and they're making solid contact with the pads. The resistors and diodes around the capacitors weren't damaged by heat. And the PCB looks nice and clean to me.

Then I realized, what if my flux is conductive? There was a little bit of film left on the board that didn't want to come off. The flux I used is Oatey No. 95 lead-free tinning flux. It was all I could find at my local Home Depot, and unfortunately, I didn't know it was actually plumbing flux until now. What can I do, now? I heard that certain plumbing fluxes contain zinc, which is TERRIBLE for PCB's. Is my amp done for?
 
you should clean it off and remove the solder .then solder again with rosin cored solder . you may need something like acetone to clean it off .

by the way it would be better if you kept to one thread about these amps .
 
Okay,
Get one more sx50. Now make a video. We'll see where you go wrong :D.

All kidding aside, (not making fun of you, or at least no more fun than I make of myself anyway).

I'm not sure your issues are related, though they quite possibly could be
 
Back
Top Bottom