• The move to the new server is done. There are some software and database maintenance updates in process. This has us passing the hat around to help out. We appreciate any donations. Seriously, even a dollar helps. The payment page may be found here - https://www.audiokarma.org/support.html

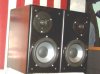
AK Design Collaborative - Insignia-Class Economy Speakers (a.k.a Indignia)

The PE cabs are gorgeous, and I see several companies using them for their commercial products lately. The baffles on mine were quite snug.

With a lot of patience, gentle persuasion with the wide, beveled edge my painters' 5-in-1 tool and a soft cloth evenly around the perimeter ultimately prevailed without marring the finish. The four screws have to come out first, of course.

I'm now thinking that lightly tapping on a rod in through the binding post holes on the rear might assist with this, but I never tried it myself.... :dunno:

If I can find a long enough rod I'll give it a whirl.

Russellc
 
The PE cabs are gorgeous, and I see several companies using them for their commercial products lately. The baffles on mine were quite snug.

With a lot of patience, gentle persuasion with the wide, beveled edge my painters' 5-in-1 tool and a soft cloth evenly around the perimeter ultimately prevailed without marring the finish. The four screws have to come out first, of course.

I'm now thinking that lightly tapping on a rod in through the binding post holes on the rear might assist with this, but I never tried it myself.... :dunno:

Well Zilch, there was no need to tap through anything on this pair, once the bolts were un done, the front baffle just came off with no effort. Hope others have this luck as well!:thmbsp:


Russellc
 
Well, the PE cabs on the Indignia's sure resemble my Era Design 4's.


107era1.jpg
 
About the missing inductor. I checked with PE, and they say they won't have them until December 29th. Okay, if I can't wait that long, what exactly do I need to do to replace it? I found at Madisound a 15 awg, 1.5 mh, iron core inductor. The ones from PE are: 1.5 mh, 18 awg. Will the gauge of the wire make a difference? Can it be used, or will I have to find an 18 awg, 1.5 mh inductor? Sorry, I just can't wait that long, I'm dying to hear these.

Ron
 
Thanks guys!!!!! Sounds like Erse will be the ticket! The speak's are in Shawn's room yelling at me to get 'em up and runnin'. Damn! I can't wait, I'm so fricken stoked!!

Thanks again,

Ron
 
Before others follow the same route, keep in mind the PE ones are paid for and will be delivered when they come in.
 
Before others follow the same route, keep in mind the PE ones are paid for and will be delivered when they come in.

True. I believe its the same coil used in the econowave crossover isnt it? May be a good excuse to build that crossover as well, for all those considering it.

russellc
 
Awfully quite around here, everyone busy building? I'm at a stand still until the baffle panel line at Dave's gets to me. I have an extra set of 1.5s on hand I bought for another project, so that's not a holdup. For those of you who have cut your own holes, whatis the protocal? I would need a Plunge router (about to buy anyway), a circle jig, hole saw for the port?

Another question, what's everyone using inside the cab, (dampening wise)
I suppose fiberglass insulation? What size hole saw required, or is there a clever guide to use with a router?

Thanks,

Russellc
 
It wasn't pretty but I just used an electric jigsaw and lots of filing to cut the speaker and port holes. I drilled a 1" starter hole with a paddle bit before using the jigsaw. The blades refused to stay perpendicular to the 3/4" MDF I was using for a baffle so the hole required lots of filing in order to fit the drivers.

As RayW suggested, I went to Walmart and bought a big bag of some quilted batting for the interior. It came in a very large sheet. Because it was pretty thin, I used a double layer and hot melt glued it to 3 sides of the interior cab as Ray recommended. I also wrapped batting around the horizontal brace installed in my home made cabs. No obvious audible cabinet resonance that I can hear.
 
Sorry guys, been tied up a bit with some family health issues. I'll be getting some free time this coming week.
 
It wasn't pretty but I just used an electric jigsaw and lots of filing to cut the speaker and port holes. I drilled a 1" starter hole with a paddle bit before using the jigsaw. The blades refused to stay perpendicular to the 3/4" MDF I was using for a baffle so the hole required lots of filing in order to fit the drivers.

As RayW suggested, I went to Walmart and bought a big bag of some quilted batting for the interior. It came in a very large sheet. Because it was pretty thin, I used a double layer and hot melt glued it to 3 sides of the interior cab as Ray recommended. I also wrapped batting around the horizontal brace installed in my home made cabs. No obvious audible cabinet resonance that I can hear.

Having the gloss black pre built cabs, I really wanted them machined perfectly, thanks for the suggestion on the batting!
I just wondered what tools it took, and what was used to hold the baffle steady whilst being machined.

Russellc
 
For those of you who have cut your own holes, whatis the protocol? I would need a Plunge router (about to buy anyway), a circle jig, hole saw for the port?

1) Lay out the locations on the rear of the baffle. Dimensions are from the center. Don't forget to mirror-image the layout. Drill small pilot holes perpendicularly through to transfer the centers to the front.

http://audiokarma.org/forums/showthread.php?p=1940777#post1940777

2) With the pilot holes as centers, use a router and circle jig to cut the driver counterbores into the face to the depths specified on the drawing. There are techniques to minimize chipping of the factory finish.

3) Similarly, cut the through holes for the drivers themselves. This may be done from the rear.

4) Use a wood rasp, Dremel, or alternative to cut the keyway in the tweeter hole for clearance of its terminals.

5) From the rear, using a Forstner or spade bit, drill a counterbore the outside diameter of your duct pipe to the specified depth.

6) From the front, use a 1.5" hole saw to complete the port opening.

7) Touch up the front finish where the recesses have been cut.

OR, just have Dave do it.... :D


Another question, what's everyone using inside the cab, (dampening wise); I suppose fiberglass insulation?
Choose wisely from this list:

http://www.bobgolds.com/AbsorptionCoefficients.htm

OR, print out this pic, take it to your local HVAC sheet metal fabrication shop and say,"Do you have any of this stuff?"

http://audiokarma.org/forums/showthread.php?p=2060300#post2060300

 
1) Lay out the locations on the rear of the baffle. Dimensions are from the center. Don't forget to mirror-image the layout. Drill small pilot holes perpendicularly through to transfer the centers to the front.

http://audiokarma.org/forums/showthread.php?p=1940777#post1940777

2) With the pilot holes as centers, use a router and circle jig to cut the driver counterbores into the face to the depths specified on the drawing. There are techniques to minimize chipping of the factory finish.

3) Similarly, cut the through holes for the drivers themselves. This may be done from the rear.

4) Use a wood rasp, Dremel, or alternative to cut the keyway in the tweeter hole for clearance of its terminals.

5) From the rear, using a Forstner or spade bit, drill a counterbore the outside diameter of your duct pipe to the specified depth.

6) From the front, use a 1.5" hole saw to complete the port opening.

7) Touch up the front finish where the recesses have been cut.

OR, just have Dave do it.... :D


Chose wisely from this list:

http://www.bobgolds.com/AbsorptionCoefficients.htm

OR, print out this pic, take it to your local sheet metal shop and say,"Do you have any of this stuff?"

http://audiokarma.org/forums/showthread.php?p=2060300#post2060300

Wow, most informative. Thanks for the mini guide to finishing baffles. As small as this one is. I think I'll let Dave do it, but I am aquiring a plunge router soon and will eventuall get brave enough.

Thanks for the tips,
Zilch

Russellc
 
Zilch,

I've been playing with my Zilchplugz (sounds a bit risque, eh?) which effectively seal the ports. Elsewhere in this thread you suggest that they will provide more bass with boundary reinforcement.

To my ears, the Indignias seem to have better bass without the plugz but admittedly my comparisons have only involved the Indignias located close to walls (boundary reinforcement).

I reviewed the latter half of this thread and don't recall ever seeing a comparison of the frequency response of Indignias plugged vs. unplugged, with speakers in the same location. If I missed it somewhere, sorry. If such a comparison hasn't been prepared yet is it possible for you to prepare one if you have the time/inclination?

BTW, how long does it take to run such a test and what are the basic steps?

Thanks for your response (pun intended).
 
If you're playing Indignias in freespace, as I do, on stands, for example, away from the floor and walls, there is no boundary reinforcement, and ported provides bass augmentation. Move them close to a wall, or a corner, and these boundaries will reinforce the bass further. Too much? I don't know; that's a matter of preference. But if so, a remedy is to plug the ports.

HOWEVER, when operated closed-box like this, the power handling of the woofer is derated; it's making all of the bass without assistance from the port, so don't expect to be using Indignias to rock the house in this alignment, unless you've mated them with a sub and have a highpass filter cutting off the low frequencies to them. Otherwise, consider Indignias more as "personal scale" speakers.

Measuing the bass response is done in the extreme nearfield (1/4" to 1/2",) and there's a member experiment using a simple R/S SPL meter in my KLH-17 thread that worked out well for a closed-box alignment. Vented is a bit more difficult; you have to measure the woofer and port separately (itself an issue when they are in close proximity,) and integrate the responses after correcting for the differences in diameter between the woofer and port. You can get an approximation by measuring between them at some greater distance back, but that's not terribly accurate.

There are more sophisticated means, but even the big boys with anechoic chambers can't measure the very low frequency response directly. Groundplane gets it, but that generally requires a large, quiet outdoor space to accomplish; JBL has been known to use a flat rooftop, and Meyer Sound, a large parking lot, Joni Mitchell not withstanding.... :D
 
Thanks for the cogent response, Zilch.

In addition to better bass, they sound a bit "faster" unported on my tiny desk in a nearfield setup. While it's unfortunately a very non-uniform environment, it is still very enjoyable at low to low-mid volumes listening to uncompressed music on the local college radio stations.
 
Back
Top Bottom