• The move to the new server is done. There are some software and database maintenance updates in process. This has us passing the hat around to help out. We appreciate any donations. Seriously, even a dollar helps. The payment page may be found here - https://www.audiokarma.org/support.html

Barn find Sansui AU-7900

So practically no change.
Could you try to measure vR1 with different positions ( remind the one position you started with yesterday)
From leg 1-2 should be 0 ohm, from 2-3 should measure 470 Ohm with the trimmer turned clockwise and close to 0 turned counterclockwise.

View attachment 2603890
1-2 is 0
2-3 is 0 turned counter clockwise

2-3 turned full clockwise doesn’t register unless I bump the MM up to 200k and then it bounces all over the place. From 11.4 to 19.4 and everything in between. It never stabilized.
 
If you're 100% sure about these measurements than this means you will need a new trimmer.
You could try some de-oxit or similar products. Make sure it's dried well after.
 
If you're 100% sure about these measurements than this means you will need a new trimmer.
You could try some de-oxit or similar products. Make sure it's dried well after.
Could you point me in the direction of a model number for a trimmer that would work? It’s no problem to replace the trimmer. I’ve used D100 on it before and didn’t make a difference so I’m sure it needs to be replaced.
 
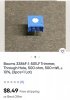
Bourne 3386F-1-501LF. Top adjust 500 ohm.
Be really careful. I have a box of useless trimpots because of not checking really really good.
Sometimes they use the picture of this or similar but in description or artikelnr. it's different!
 
Bourne 3386F-1-501LF. Top adjust 500 ohm.
Be really careful. I have a box of useless trimpots because of not checking really really good.
Sometimes they use the picture of this or similar but in description or artikelnr. it's different!
I’ll look around and check with you before I buy something.
 
Bourne 3386F-1-501LF. Top adjust 500 ohm.
Be really careful. I have a box of useless trimpots because of not checking really really good.
Sometimes they use the picture of this or similar but in description or artikelnr. it's different!
How does this look to you?
 

Attachments

  • 4CA692F6-014D-4914-A8C3-20EB03630C64.jpeg
    4CA692F6-014D-4914-A8C3-20EB03630C64.jpeg
    72.1 KB · Views: 12
That should be it. Just realise that the price at for example Mouser is $1.61
I understand that they have a method where they also send small orders for free.
I see that price is for 3 pc.
 
That should be it. Just realise that the price at for example Mouser is $1.61
I understand that they have a method where they also send small orders for free.
I see that price is for 3 pc.
Ok great! I’ll get it ordered and get back with you in a few days when I’m ready to install it. I’ll get 3 of them but we really should just worry about replacing the one, and then testing, right? I don’t want to get ahead of myself. Stick with me. I’ll have them in a few days.
 
Best replace them on both channels.
I’ll do that! Hey on a side note, I wanted to show you what I dug out of a barn today. It’s a mess!! Bose 1800 with a mouse nest that’s seen 100 generations of mice! It’s awful. But most everything (except the two front handles) is here.
 

Attachments

  • 2CF6B7DE-6261-413A-AE28-B6E609345EA4.jpeg
    2CF6B7DE-6261-413A-AE28-B6E609345EA4.jpeg
    121.2 KB · Views: 18
Best replace them on both channels.
While we are waiting on those parts I wanted to show you a few more things I pulled out of that barn! Thought you might like seeing some cool finds.
1968 fender bandmaster!
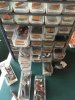
Tons of new/old stock resistors and ceramic caps
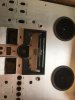
A pioneer sx 780
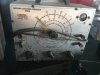
An oscilloscope from tektronix
Tons of cool stuff.
 

Attachments

  • A38DE744-0ABD-41B9-8044-848F6FC4407B.jpeg
    A38DE744-0ABD-41B9-8044-848F6FC4407B.jpeg
    109.1 KB · Views: 22
  • 1A8DCEE3-66D9-453C-ABBC-620B5D8350DB.jpeg
    1A8DCEE3-66D9-453C-ABBC-620B5D8350DB.jpeg
    100.8 KB · Views: 21
  • 216B017F-8BA1-4358-947D-426589AEEDEE.jpeg
    216B017F-8BA1-4358-947D-426589AEEDEE.jpeg
    135.2 KB · Views: 21
  • 94FFC0A6-F91F-4F6D-AB64-1F42CA4513CA.jpeg
    94FFC0A6-F91F-4F6D-AB64-1F42CA4513CA.jpeg
    81 KB · Views: 20
  • 8DDAEBD0-3C55-4124-84B0-94E6D158C6A4.jpeg
    8DDAEBD0-3C55-4124-84B0-94E6D158C6A4.jpeg
    126.8 KB · Views: 20
  • 68F182A6-C03D-4745-AD29-0963716B6AF4.jpeg
    68F182A6-C03D-4745-AD29-0963716B6AF4.jpeg
    116.4 KB · Views: 20
  • C9D3B04B-F88B-4E67-9E53-9910C2F253F9.jpeg
    C9D3B04B-F88B-4E67-9E53-9910C2F253F9.jpeg
    107.6 KB · Views: 20
Ok, that looks nice!
Looks like you have some more work.
You have any plans to get that equipment working again?
I remember you also had a Kenwood receiver?
 
Ok, that looks nice!
Looks like you have some more work.
You have any plans to get that equipment working again?
I remember you also had a Kenwood receiver?
Yes also have the kenwood KR-9000GX. I have 2 sets of Bose 901 IV, and a set of series I 901, which is why I would love to get this 1800 fixed. I’ve cleaned up most of the mouse debris to see the extent of the damage. The amplifier boards were already unplugged and unbolted from the heatsink. It’s a mess. BUT it actually looks fairly simple to put together. All the wires are modular. One of the amplifier boards has 2 power transistors missing. It came from a barn, the guy owned an audio/music/repair business from the 70s to 90s. He closed shop in 1994 and passed in 06. This amp has been in that barn 25 years at least.
 

Attachments

  • image.jpg
    image.jpg
    121.2 KB · Views: 17
  • image.jpg
    image.jpg
    151.2 KB · Views: 19
  • image.jpg
    image.jpg
    132.9 KB · Views: 18
  • image.jpg
    image.jpg
    144.1 KB · Views: 18
Nice collection you have there. Even though no Sansui's. Here in the Netherlands the distributor of Sansui and Bose were the same.
There is a schematic available from the Bose 1800 so should be possible to repair it. Will have to find out what are the correct output replacements.
Circuit wise not especially simple though. High rail voltages. Would probably be best to start with a physical restoration. Cleaning, verifying connections ar correct and solid. Checking al traces and solderpads, etc. After that you can start looking at the electrical part.
Do I understand correctly that this amplifier is supposed to drive the 901 speakers?
 
Last edited:
:rflmao::rflmao:
Nice collection you have there. Even though no Sansui's. Here in the Netherlands the distributor of Sansui and Bose were the same.
There is a schematic available from the Bose 1800 so should be possible to repair it. Will have to find out what are the correct output replacements.
Circuit wise not especially simple though. High rail voltages. Would probably be best to start with a physical restoration. Cleaning, verifying connections ar correct and solid. Checking al traces and solderpads, etc. After that you can start looking at the electrical part.
Do I understand correctly that this amplifier is supposed to drive the 901 speakers?
I’m well into the physical cleaning of it. I have the mouse nest out finally, heatsink off, found as many screws as I could in the mouse nest. It was halfway in repair when it got thrown in storage. So screws are missing, connections have been removed, wires are chewed off, corrosion, the damage is extensive. I’ll be in the cleaning stage for a while. Yes! The 1800/1801 amplifiers and 4 or more 901’s make up what they call the Bose super system. I know the bad rep they get. I know there’s worlds better. But I like them. And this amplifier is the holy grail of Bose amps. I also have the spatial receiver to use as a pre-amp. On the lookout for a 4401 pre amp! It will be a fun project. I’ll definitely need you after we get this Sansui fixed. My next two major restores are this Bose and a pioneer sx 780. I’m going tacky with that pioneer. Purple LED lights and cocobolo veneer. It’ll be beautiful!
 

Attachments

  • BF7F5ED0-71FC-4FD0-97CB-FC500D62CD0D.jpeg
    BF7F5ED0-71FC-4FD0-97CB-FC500D62CD0D.jpeg
    148 KB · Views: 10
  • E08892D9-9C02-44E0-893B-B1B52E951EBB.jpeg
    E08892D9-9C02-44E0-893B-B1B52E951EBB.jpeg
    89.8 KB · Views: 11
Nice collection you have there. Even though no Sansui's. Here in the Netherlands the distributor of Sansui and Bose were the same.
There is a schematic available from the Bose 1800 so should be possible to repair it. Will have to find out what are the correct output replacements.
Circuit wise not especially simple though. High rail voltages. Would probably be best to start with a physical restoration. Cleaning, verifying connections ar correct and solid. Checking al traces and solderpads, etc. After that you can start looking at the electrical part.
Do I understand correctly that this amplifier is supposed to drive the 901 speakers?
Hey Gris! Hope all is well. I’m supposed to be getting those parts for the Sansui today. I had a few rookie questions I wanted to ask you. Is it necessary to turn the bias down on both VR before I pull them from the board? Since VR01 is the one giving us trouble, should I replace it first and test to see if the bias adjusts before I replace VR02, Or just replace them both, then test?
My last question is, when I get the parts can you help me make sure the leads are in the correct 1,2,3 order when I install them? Thanks again! Hopefully today might be the day the Sansui sings again!
 
If you remember which way is turning up the current, clockwise or counterclockwise, put them as low as possible. Change them both at the same time. Should be self-explanatory how to replace them. Check them before installing with the DMM.
Most important, always start from the DBT after component replacement!
 
If you remember which way is turning up the current, clockwise or counterclockwise, put them as low as possible. Change them both at the same time. Should be self-explanatory how to replace them. Check them before installing with the DMM.
Most important, always start from the DBT after component replacement!
Just got them in the mail. Haven’t made any moves yet. How should I check them with the MM? It should be on 200DC and checking pin to pin right?
 

Attachments

  • 508256CF-DC07-43A6-B741-4060F9877A54.jpeg
    508256CF-DC07-43A6-B741-4060F9877A54.jpeg
    78.9 KB · Views: 8
Back
Top Bottom