That is the filter caps charging up, but it should be a single pulse of bright filament and steady dim glow after. If it goes out, it's not pulling any juice at idle, probably because there is something wrong with the power supply rails and why the protection relay won't close. I'd look for proper voltages in the amplifier sections and verify that all the fuses are passing current -- solder cracks at the fuse holders can prevent current flow, eh?


You are using an out of date browser. It may not display this or other websites correctly.
You should upgrade or use an alternative browser.
You should upgrade or use an alternative browser.

DBT and go back to basics. Check the Power Supply and filter rail voltages. Recheck the amp settings. Look for something out of specs.
The amp settings must be adjustable and stable.
Remember, with the receiver on the DBT you can't run any volume or it will do weird things.
The amp settings must be adjustable and stable.
Remember, with the receiver on the DBT you can't run any volume or it will do weird things.

EvilDingo
Active Member
DBT and go back to basics. Check the Power Supply and filter rail voltages. Recheck the amp settings. Look for something out of specs.
The amp settings must be adjustable and stable.
Remember, with the receiver on the DBT you can't run any volume or it will do weird things.
So I should set the amps L&R vr1 and vr2 with the unit plugged into the DBT without a load and no volume?
Hard to check diodes in circuit when connected to a capacitor. Bad voltage readings on the power rails will tell you if they are bad (although they usually fry in my experience and go open). If one is bad you will lose that rail, will have low voltage I think (if I remember correctly).
They are very inexpensive, probably worth replacing them with higher amperage new ones on spec. I will be doing that on the KA-80.
They are very inexpensive, probably worth replacing them with higher amperage new ones on spec. I will be doing that on the KA-80.
EvilDingo
Active Member
Offset can be adjusted on the DBT.
Idle can be checked for adjustment but brought back to full CCW before line voltage is applied.
Reset the idles after its on full line voltage.
Thanks Zeb!
I have printed out the service manual. My "older" eyes were having a hard time with them on the computer. Good old paper and reading glasses!
Anyway, Ive found the reference voltages I was looking for and will test tomorrow. This is really interesting, giving me a chance to relearn many things from almost 25 years ago.
The procedure I mentioned is a few of the steps from a long traditional phrase here in the forum.
Its call "Tickling the dragons tail". It refers to the adjustment of the amps after work has been done.
I thought you would get a kick out of it.
It hasn't been used much in resent memory.
MTF might know, or even started the phrase. It was used before I joined AK, and that was over eleven years ago.
Its call "Tickling the dragons tail". It refers to the adjustment of the amps after work has been done.
I thought you would get a kick out of it.
It hasn't been used much in resent memory.
MTF might know, or even started the phrase. It was used before I joined AK, and that was over eleven years ago.
EvilDingo
Active Member
Thanks Zeb. I will definitely tickle the dragons tail! I think that is going to stick. I haven't gotten there yet though.
I did take pin readings on the power supply, I think I have it figured out, but maybe you can confirm if I am reading the schematics correctly.
Pin 20: Supposed to be +33v, I have -1.4v
Pin 22: Supposed to be +50v, I have -1.6v
Pin23: Supposed to be +23v, I have -.7v
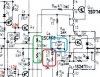
If I am reading the schem correctly, the Q1 Transistor feeds these pins.
I measured the Q1 Transistor and I have +65V coming in which is correct but then I'm supposed to have 50 v coming of the one leg that feeds pin 22 and 60v out on the other leg which is 10v high.
Pin16: Supposed to be +13v, I have -.3v
Pin17: Supposed to be 7.5v, I have -.3v
Q5 coming in has 24v and its supposed to have 13.5v. Coming out both legs Q5 has 0
So I am thinking bth Q1 and Q5 are bad, I also think Q6 is bad as well.
So at this point, if you think I am on the right path, Im going to replace all the transistors just to be safe. Anyone have a part number for the large heat sinks...I want to add those as protective measures.
All the symptoms add up if I am reading the schems correctly:
No feed from pin16 to the protection assembly
No feed from pin 17 to the function lights (mine are out)
Thanks for any input! I really appreciate!
Dave
I did take pin readings on the power supply, I think I have it figured out, but maybe you can confirm if I am reading the schematics correctly.
Pin 20: Supposed to be +33v, I have -1.4v
Pin 22: Supposed to be +50v, I have -1.6v
Pin23: Supposed to be +23v, I have -.7v
If I am reading the schem correctly, the Q1 Transistor feeds these pins.
I measured the Q1 Transistor and I have +65V coming in which is correct but then I'm supposed to have 50 v coming of the one leg that feeds pin 22 and 60v out on the other leg which is 10v high.
Pin16: Supposed to be +13v, I have -.3v
Pin17: Supposed to be 7.5v, I have -.3v
Q5 coming in has 24v and its supposed to have 13.5v. Coming out both legs Q5 has 0
So I am thinking bth Q1 and Q5 are bad, I also think Q6 is bad as well.
So at this point, if you think I am on the right path, Im going to replace all the transistors just to be safe. Anyone have a part number for the large heat sinks...I want to add those as protective measures.
All the symptoms add up if I am reading the schems correctly:
No feed from pin16 to the protection assembly
No feed from pin 17 to the function lights (mine are out)
Thanks for any input! I really appreciate!
Dave
I concur.
You should look at all the diodes and resistors on that board. You can check them in circuit with the power off. It doesn't take but a few extra minutes.
Resistors for value and diodes for forward voltage. If a resistor does not meet the value, desolder one side and recheck.
Revisit assemblies for any signs of damage.
Why does it fail after it was assembled?
You should look at all the diodes and resistors on that board. You can check them in circuit with the power off. It doesn't take but a few extra minutes.
Resistors for value and diodes for forward voltage. If a resistor does not meet the value, desolder one side and recheck.
Revisit assemblies for any signs of damage.
Why does it fail after it was assembled?
EvilDingo
Active Member
I concur.
You should look at all the diodes and resistors on that board. You can check them in circuit with the power off. It doesn't take but a few extra minutes.
Resistors for value and diodes for forward voltage. If a resistor does not meet the value, desolder one side and recheck.
Revisit assemblies for any signs of damage.
Why does it fail after it was assembled?
I was hoping I was reading it right. Thanks Zeb. Also, I probably should wait till install new parts to "tickle the dragon", correct?
Yes, I will definitely look at all the diodes and resistors as well.
Yes, and why did it fail after reassembly.
Also, whats the best way to test the rail voltage off the filter caps to make sure both filter caps are good since they are in series?
Thanks.
EvilDingo
Active Member
Ok, so I have my parts list for Digi...
Should I go with the KSC2073TU's or the MJE15032G's for q1 and q5? Not sure if anyone has used the later MJE's ?
Also, I am wondering which heatsink compund is best. Is there a piece of mica in there between the sink and tran? Also, anyone now a part number for the black finned heatsinks that can be added to stock aluminum ones on Q1 Q4 and Q5?
I think this is what I want: ? https://www.digikey.com/product-detail/en/4724/36-4724-ND/109792/?itemSeq=327376339
compound ? https://www.digikey.com/product-detail/en/chip-quik-inc/TC1-10G/TC1-10G-ND/9681980
Thanks!
Should I go with the KSC2073TU's or the MJE15032G's for q1 and q5? Not sure if anyone has used the later MJE's ?
Also, I am wondering which heatsink compund is best. Is there a piece of mica in there between the sink and tran? Also, anyone now a part number for the black finned heatsinks that can be added to stock aluminum ones on Q1 Q4 and Q5?
I think this is what I want: ? https://www.digikey.com/product-detail/en/4724/36-4724-ND/109792/?itemSeq=327376339
compound ? https://www.digikey.com/product-detail/en/chip-quik-inc/TC1-10G/TC1-10G-ND/9681980
Thanks!
Last edited:

merlynski
Curmudgeon Electronicist
This is easier to use than a small syringe:
https://www.digikey.com/product-det...sion-of-boyd-corporation/249G/249G-ND/1625420
https://www.digikey.com/product-det...sion-of-boyd-corporation/249G/249G-ND/1625420
merlynski
Curmudgeon Electronicist
Tickle the Dragon is the last thing I do, after all repairs are made and parts changed, before going off the DBT to test function of bias circuit adjustability, then reduce to minimum as Zeb noted. Then, when you go to full mains, you can do the final setting.I was hoping I was reading it right. Thanks Zeb. Also, I probably should wait till install new parts to "tickle the dragon", correct?
Yes, I will definitely look at all the diodes and resistors as well.
Yes, and why did it fail after reassembly.
Also, whats the best way to test the rail voltage off the filter caps to make sure both filter caps are good since they are in series?
Thanks.
The main power supply filter caps are not in series, though they do look that way on some schematics, because they are drawn in line with each other. The common ground point is between them, so you can clip your black voltmeter lead to the chassis and measure the rail voltage on the + terminal for the + supply cap and the - rail on the - terminal of the - supply cap, with the red lead.
EvilDingo
Active Member
Tickle the Dragon is the last thing I do, after all repairs are made and parts changed, before going off the DBT to test function of bias circuit adjustability, then reduce to minimum as Zeb noted. Then, when you go to full mains, you can do the final setting.
The main power supply filter caps are not in series, though they do look that way on some schematics, because they are drawn in line with each other. The common ground point is between them, so you can clip your black voltmeter lead to the chassis and measure the rail voltage on the + terminal for the + supply cap and the - rail on the - terminal of the - supply cap, with the red lead.
Oh wow...yeah that is confusing (the schematics). I thought they were in series. Your instructions make sense! Can you take a look at this pic and confirm my install looks good.

Last edited:
merlynski
Curmudgeon Electronicist
If there is more than one transistor on the heatsink, or it is chassis mounted, you need an insulator between the transistor and the heatsink. If it is a single transistor on a a single heatsink you do not NEED an insulator. The benefit is a slightly better thermal coupling, the downside is the collector voltage is on the heatsink body. Also some transistors have all plastic bodies (many TO-126) and do not need an insulator.
I bought some of these small heatsinks from Mouser, looks like Digikey carries them also: https://www.digikey.com/products/en?keywords=274-3AB
I use them to 'upgrade' TO-220 and TO-126 transistors that do not have 'sinks originally, but I feel would benefit from them. I have not tried them as an addition to the silver aluminum originals, they may be too small, but you could mount them back to back if there is room.
The bar between the caps is the common ground, with multiple connections. It is correct. Components that are truly 'in series' do not have any other connections between them, so the current that flows through one must flow through the other.
The components in the red box are in series, there is no connection to any other component between them, current that flows through one must flow through the other. The components in the blue box are in parallel, both ends of both components are connected together, current can flow through either one. The components in the green box are neither series nor parallel (just like your filter caps). Study Kirchhoff's Laws for more detail, if you are interested (maybe TMI ).
).
I bought some of these small heatsinks from Mouser, looks like Digikey carries them also: https://www.digikey.com/products/en?keywords=274-3AB
I use them to 'upgrade' TO-220 and TO-126 transistors that do not have 'sinks originally, but I feel would benefit from them. I have not tried them as an addition to the silver aluminum originals, they may be too small, but you could mount them back to back if there is room.
Oh wow...yeah that is confusing, I thought they were in series. Can you take a look at this pic and confirm my install looks good.
View media item 22225
The bar between the caps is the common ground, with multiple connections. It is correct. Components that are truly 'in series' do not have any other connections between them, so the current that flows through one must flow through the other.
The components in the red box are in series, there is no connection to any other component between them, current that flows through one must flow through the other. The components in the blue box are in parallel, both ends of both components are connected together, current can flow through either one. The components in the green box are neither series nor parallel (just like your filter caps). Study Kirchhoff's Laws for more detail, if you are interested (maybe TMI
).
Last edited:
EvilDingo
Active Member
If there is more than one transistor on the heatsink, or it is chassis mounted, you need an insulator between the transistor and the heatsink. If it is a single transistor on a a single heatsink you do not NEED an insulator. The benefit is a slightly better thermal coupling, the downside is the collector voltage is on the heatsink body. Also some transistors have all plastic bodies (many TO-126) and do not need an insulator.
I bought some of these small heatsinks from Mouser, looks like Digikey carries them also: https://www.digikey.com/products/en?keywords=274-3AB
I use them to 'upgrade' TO-220 and TO-126 transistors that do not have 'sinks originally, but I feel would benefit from them. I have not tried them as an addition to the silver aluminum originals, they may be too small, but you could mount them back to back if there is room.
The bar between the caps is the common ground, with multiple connections. It is correct. Components that are truly 'in series' do not have any other connections between them, so the current that flows through one must flow through the other.
View attachment 1878039
The components in the red box are in series, there is no connection to any other component between them, current that flows through one must flow through the other. The components in the blue box are in parallel, both ends of both components are connected together, current can flow through either one. The components in the green box are neither series nor parallel (just like your filter caps). Study Kirchhoff's Laws for more detail, if you are interested (maybe TMI
Thanks Merlinski! I appreciate the explanation. Def not TMI. I find it very helpful. Thanks!
EvilDingo
Active Member
So my parts should be here Thursday...yay. I ordered some extra components in case I mess something. I also ordered both the KSC2073TU's and MJE15032G's as replacements for q1 and q5 since I wasn't sure which one I was going to use. I found the data sheet for the original 2sd712 and it states 4 amp as max current.... this is confusing to me since it seems many people are using the KSC2073TU's as a replacement, but looking at the datasheet it says its only handles up to 1.5 amps....I cant find anything in the service manual about how many amps are actually applied at the transistor. So I think I am going to use the MJE15032G's (npn) since they are rated at 8 amps. I'm also going to use MJE15033G(pnp) for q4 to keep things constant. Am I overthinking this or am I on the right track.
Also all of these are orientated the same as the originals,..so thats nice!
Let me know...thanks
Also, I got 46.2 v on cap 7 and 46.5v on cap 8. Does that sound the norm? If I am reading it right, Pin 7 from the PS is going to the positive lead on Filter Cap 7 and Power Supply pin 8 is going to the negative lead on Filter Cap 8? I got 48 volts at both pins 7 and 8 on the poser supply. Does this sound good?

Also all of these are orientated the same as the originals,..so thats nice!
Let me know...thanks
Also, I got 46.2 v on cap 7 and 46.5v on cap 8. Does that sound the norm? If I am reading it right, Pin 7 from the PS is going to the positive lead on Filter Cap 7 and Power Supply pin 8 is going to the negative lead on Filter Cap 8? I got 48 volts at both pins 7 and 8 on the poser supply. Does this sound good?
Last edited: