• The move to the new server is done. There are some software and database maintenance updates in process. This has us passing the hat around to help out. We appreciate any donations. Seriously, even a dollar helps. The payment page may be found here - https://www.audiokarma.org/support.html

Desperate Cry for HELP with a Kenwood KA6004

Those backside resistors look to be in the protection circuit. Kenwoods in that era it was common to see these protection revisions mid production. The circuit design must have gave them problems. I believe there is a service bulletin recently uploaded for this unit regarding revisions on HiFiEngine.
I do not have an account for hifiengine and I get this when I attempt to register: Sorry, but registration is currently closed to new members.
Would appreciate someone verifying a service bulletin upload for the KA6004 to hifiengine and what that bulletin shows.
 
I do not have an account for hifiengine and I get this when I attempt to register: Sorry, but registration is currently closed to new members.
Would appreciate someone verifying a service bulletin upload for the KA6004 to hifiengine and what that bulletin shows.
My memory served me wrong, its was a 7002, and there is no bulletin for that model posted to HiFiEngine.
 
I do not have an account for hifiengine and I get this when I attempt to register: Sorry, but registration is currently closed to new members.
Would appreciate someone verifying a service bulletin upload for the KA6004 to hifiengine and what that bulletin shows.
I had already hunted the entire internet for ya the last time I replied. There aren't any updates to the SM or schematic published, and nothing referencing the rear side resistors like on your unit.

I will say that I agree that they look factory, though.
 
I redrew that part of the schematic with the added resistors inside circles. The section I am looking at is now drawn with one part above the other. Looking at the schematic redrawn I am reluctant to say i can see how, just from this section, the added resistors balance the two parts. Pins 11 and 13 go to their own 47 ohm 3 watt resistor before going to the "+" of the speakers, and 12 and 14 do the same to different 47 ohm 3 watt resistors.
Since you say those are seen on another one which is working, I am going to solder them back in.
Am attaching the drawing just so you can have a look. Wonder why the factory would not have de-soldered the originals where they could, and then replaced those with the updated resistors to keep up the appearance, and the clutter down on the backside.
Thanks again for all input.
 

Attachments

  • RedrawnPreAmp.jpg
    RedrawnPreAmp.jpg
    40.4 KB · Views: 22
The diagram you drew up resembles a “Baker Clamp”. The diodes will hold the collector at around 0.6v, relative to ground. ie: Vce is held (clamped) at 0.6v.
This prevents the transistor from saturating and ensures faster switching. I hold no EE degree, i could be terribly wrong.

Here is an example of Baker Clamp circuit
Baker_clamp.png
 
Just an update. I built a DBT. Using available 40, 75 and 100 watt bulbs all give momentary light, the 100 watt is just a bright filament, then they dim. The KA-6004 lights are on, and I hear the relay click - after a few seconds I power it off. I removed the DBT and connected the unit to a Variac (max 3.3 amps), ran the output voltage to 117 and powered on the KA6004. Again, the lights came on and the relay clicked.
No smoke!
Next step is a small set of speakers and an old turntable to provide an input and test for sound.
Thanks again for all of your input.
Once I have run it for a few minutes with no burning smell, flashes of light, sizzling, popping, etc. I will start taking a few voltage measurements to see how they match against what is on the schematic.
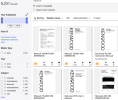
Also, if this is a violation of one of the rules, let me know so I can try to remove this: I do not know how many people are looking for Kenwood manuals, but at the Archive.org site I did find the user manual and schematic for the KA6004. These were a free download. Search was not intuitive, but after a few failed attempts I found what I had been looking for. Anyway, here is the main part of the URL, and I do not say this site is virus free, but, I did not get any popups nor any notifications for spyware, adware, etc. I am hoping since it is a .org that it is a safe site. It is an https. archive.org/details/manuals_kenwood
AttachedArchive_Kenwood_Partial.png is a screenshot.
 
Wonder why the factory would not have de-soldered the originals where they could, and then replaced those with the updated resistors to keep up the appearance, and the clutter down on the backside.
Count the work steps for each method. Select the one that has an acceptable outcome with the fewest steps. Then see if the through holes would support the fix. That’s the way a manufacturer would approach it.

Also, removing components risks lifting traces. Just adding a few components is the most efficient.

Finally, it would probably blow the mind of the design engineer that someone would be trying to recondition this after 50 years. They were built well, what is the likelihood of someone asking about these resistors after so long?
 
Last edited:
I can see where, if the procedure were a service bulletin to the techs in the field - there it would save time to remove the board and add those to the back, of course you then have to have included how to check the resistance and voltages with the board back in place. However, while still in the factory it would be better to desolder those and solder in the new ones, of the few boards built while in the factory and before the change was in place, then place that board in the factory tester built to test that board. For any of the boards built after the change there would be no need to add the additional resistors.
I now have three copies of the schematic, from different sources, and none of them reflect the additional resistors. If anyone knows of a change, or changes to the schematic, I would really appreciate a copy, or copies.
Here is a new question, or curiosity. On the three copies of the schematic I have, capacitor C303 is shown as an Electrolytic, 1000uF, 50WV. However, when I look at C303 in the unit, the Elam capacitor is marked as 100uF, 85 Volts.
The math I have read supports the 50WV as 85Volts, but how does 1000uF become 100uF in the unit?
 
Help: ensuring I have a comparable replacement. The Cap in the pic marked C9 and the one like it, to the right of the C9, with the hardened gunk on one lead, I want to replace. It is marked 181K TDK. And the manual says it is 180pF, ceramic, =-10%.
Any ceramic 180pf? What about the voltage?
 

Attachments

  • 1000001796.jpg
    1000001796.jpg
    95.1 KB · Views: 17
Go with whatever's in your unit. I wish there was an updated SM or service bulletin for you, but at this point it'll probably never surface.


As far as the 180pF cap, what I'd do as a relative newbie is just measure the lead spacing, and buy whichever 180pF with the highest voltage rating fits. Maybe even a film cap.
 
Not to sound offensive, but, the reason I posted is because I have been away from electronics for over 30 years, and I have forgotten more than I knew. I posted because I am not confident in picking a GOOD replacement and do not want to cause damage by rushing into anything. That is why i am asking about the 180pF TDK capacitor. I am leaning toward this cap from TDK (Digikey): CAP CER 180PF 3KV SL RADIAL. The lead spacing is 0.295" , and a basic ruler showed the leads of the existing cap to be approx a quarter of an inch. The leads are "Formed Leads - Kinked" which should work?
As an aside, the unit stays powered on, and the voltage measurements from the power board are close to what the schematic shows. The right channel has good sound, but no sound from the left side.
The caps I am looking at are on the pre-amp and I would want to replace these even if they tested good.
If you look at the pic in my previous post, the caps behind these two are looking like they need to be replaced. I thought I would be replacing a lot of Electrolytics, but, so far, I have not found any with the equivalency resistance way off.
And, the board I have in the schematic is labeled "PRE AMP (X08-0015-14) Section" but the physical board is X08-0015-10.
 

Attachments

  • 1000001811.jpg
    1000001811.jpg
    80.8 KB · Views: 6
Not to sound offensive
No offense taken at all. I understand wanting to do the best you can and being meticulous about a repair. I can appreciate that. I may be a newbie, but I have read a LOT in a short amount of time, and continue to do so every day. I want to help out the best that I'm able to, even if that means searching something up before I answer questions.

I am leaning toward this cap from TDK (Digikey): CAP CER 180PF 3KV SL RADIAL. The lead spacing is 0.295" , and a basic ruler showed the leads of the existing cap to be approx a quarter of an inch. The leads are "Formed Leads - Kinked" which should work?
Seems like this part will work just fine!

If you look at the pic in my previous post, the caps behind these two are looking like they need to be replaced. I thought I would be replacing a lot of Electrolytics, but, so far, I have not found any with the equivalency resistance way off.
I know there are a lot of camps of thought in the vintage audio world, and wanting to keep things original is certainly a valid stance to have (if it ain't broke, don't fix it!) With the reading I've done about capacitors in journals/books, on posts here and other places, and videos I've watched, though, I'm of the "replace all electrolytics" camp. To me, even if a 50 year old electrolytic measures well, it's still 50 years old and it's just a ticking time bomb. When, not if, is the question of failure. You're inside of the unit and have it disassembled anyway, might as well change them out for longevity + reliability's sake. I personally even go so far as to replace everything 10uF and below with WIMA film caps.

And, the board I have in the schematic is labeled "PRE AMP (X08-0015-14) Section" but the physical board is X08-0015-10.
I'm not surprised by the discrepancy there. It was common for a lot of Kenwood units to share board layouts, with different board "part numbers" and different values of components. Sometimes, since they have the same layouts, it seems that units would use boards from other units. A quick Google of "X08-0015-10" shows that it's the preamp board from the KR-6160 receiver. Same exact layout, just with different part values in the KA-6004. I also searched around and the KA-7002 uses "X08-0015-11", KA-5002 uses "X08-0015-12", and the KA-6004 is supposed to use "X08-0015-14". I compared them all to the best of my ability and I'm fairly sure they all have the exact same board layout. My KA-7300, from a slightly later generation of Kenwood amps, is supposed to have "X07-1420-11" as the two power amp boards, but actually has "X07-1420-10" in the unit, which is the part # for the KA-8300's power amps.
 
re: schematic is labeled "PRE AMP (X08-0015-14) Section" but the physical board is X08-0015-10
Looks like the factory converted the -10 board into a -14 by adding two 390 ohm resistors (Rd7 and Rd8) to the back of the board but did not change the labeling on the board. The other resistors, and all the caps match the schematic.
As to the Main Amp board, there is a 100 Ohm resistor (Re48) which has two visible (under a magnifying glass) cracks in it. I have not attempted to check the resistance, voltage, or voltage drop - I need to get test leads with small hooks before I do that. That resistor is between the emitter of NPN transistors Qe17 and Qe18 and chassis ground near the power board.
I took apart the speaker relay and the points on one side were really bad with a lot of buildup on one side - waiting for what is supposed to be an exact replacement for it from a shop somewhere in Germany.
The Balance knob was literally frozen in place. Looks like someone crushed the lower half of the shaft for the thread for the retaining nut onto the balance shaft. Took a lot of work with an Exacto blade and a little silicone grease and I can finally rotate it - still stiff but not frozen.
The Treble clicks, I think, like it should when rotated, but the Bass is almost as bad as that Balance knob - and no audible clicks when rotating.
Have a Great Day!
 
You are referring to reforming. Here is a link if you want to learn a little more.

The thin aluminum sheets used in electrolytic caps form a layer of aluminum oxide when they are exposed to current in the presence of electrolyte. The layer must be in place for the cap to perform as engineered. It can work without, but just not as designed.

Over time of disuse the layer dissipates and the unit can perform in unexpected manners and sometimes fail. Caps older than the ones in 70s vintage equipment had worse failure modes, and that’s where some of the horror stories come from.

A cap must be exposed to electricity to form and keep the layer. If it dissipates, often it can be reformed. Some say that starting at a low voltage and working up to full voltage is the best way, and I have no reason to doubt this wisdom. I’d guess that doing caps out of circuit is probably optimal, but difficult. If I owned a Variac, I might indulge my rescued devices to this lab bench spa treatment, I dunno. That said, I have bought many vintage devices. Most have been tested before I ever see them (i.e., pulled out of the closet by the owner or heir after years, and plugged in by the seller to see if it works). I’ve not experienced a catastrophe failure because of an unformed cap. Since I don’t have a variac, I hook a new amp up to the DBT and turn it on, ready to turn it off at a sign of trouble.

To reform a cap in place, connect the unit to a Variac, add a resistor in series and turn it in. Then slowly (very) ramp up the voltage once it gets to full voltage, then let it sit for five mins plus 1 minute for each month in storage. So, if it’s been in storage for 10 years, a little over two hours should get you going. Or just let run on the DBT for a while.

Personally, I think looking for leaking caps is a better use of time. And I never leave a new piece of equipment alone until I’m sure it’s not going to burst into flame. I know of old radio restorers who have pretty serious little fires on units they are working on.

Once potential danger has passed, you can see if the protection relay clicks. If it does, you can check DC offset. It should be as close to zero as possible. If it’s under 50 to 90 milliamperes, it’s OK to hook junker speakers up to see how it sounds, although it is advisable to replace the differential pair transistors with a matched pair it it’s over 25 mv.

Then it’s time to listen and let us know how it’s doing.

Re: To reform a cap in place, connect the unit to a Variac, add a resistor in series... i am missing something here. When you say to add a resistor in series, what exactly are you telling me to do? If this is reforming a cap in place, and the unit is running off a Variac, where do you place the series resistor; solder it between one lead of an electrolytic and what?
 
I think I have, for replacements, all of the electrolytic caps, some mylar, oil filled, one tantalum, etc.. for the main amp, pre amp, and power supply boards. Also, the speaker relay, and a couple of suspect resistors, including the one with obvious cracks. I plan to start re-capping in early May - thinking I will have the time to work on it then. Will update after. Any suggestions on the best spray cleaner to attempt to clean a sticky potentiometer?
 
Re: To reform a cap in place, connect the unit to a Variac, add a resistor in series... i am missing something here. When you say to add a resistor in series, what exactly are you telling me to do? If this is reforming a cap in place, and the unit is running off a Variac, where do you place the series resistor; solder it between one lead of an electrolytic and what?

Corrected above. I conflated in-circuit and out-of-circuit reforming.

Since you have successfully turned it on without smoke, fire, or other catastrophe, just letting it run for a couple of hours will do the trick.
 
Back
Top Bottom