• The move to the new server is done. There are some software and database maintenance updates in process. This has us passing the hat around to help out. We appreciate any donations. Seriously, even a dollar helps. The payment page may be found here - https://www.audiokarma.org/support.html

DIY High or Low Ouput Moving Coil Phono Stage

Where'd you source the transformers and swxd IEC? I just ordered a single 35VA from DigiKey for $43.10!! At that price I'd consider a do-over and let the 35 be a spare.
PS: very nice dual power supply-worth copying.

http://www.alliedelec.com/search/productdetail.aspx?SKU=5090271#tab=Specs

http://www.antekinc.com/details.php?p=643 Shielded all for $17.50

Don't forget to order the fuse drawer for the IEC inlet. I had to place a separate order for one. I'll try and find the link for that.
 
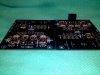
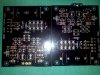
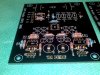
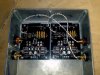
Soldered resistors in the VSPS last night. I used sockets at R2 and R3 so I can change resistors without desoldering and resoldering. Hope that works OK. Those boards from RJM took a little getting used to since they are thick and gold plated. They heated up a lot slower than the component legs so adjustments to my soldering style was in ordered. Finally got it sorted I think.
 

Attachments

  • 2011-10-28_09-38-17_582(1).jpg
    2011-10-28_09-38-17_582(1).jpg
    102 KB · Views: 58
  • 2011-10-28_09-38-38_634(2).jpg
    2011-10-28_09-38-38_634(2).jpg
    125.4 KB · Views: 45
  • 2011-10-28_09-37-53_331(3).jpg
    2011-10-28_09-37-53_331(3).jpg
    107 KB · Views: 55
  • 2011-10-28_09-36-53_965(4).jpg
    2011-10-28_09-36-53_965(4).jpg
    134.5 KB · Views: 62
You too??

I assembled my boards last night also, and confronted the same problem.
I quickly realized that with such small "eyelets" on the board, the only way to be sure of a good solder was to ensure that it flowed through the eyelet and puddled a little on the top as I clearly see we both were able to do.
However, it wasn't pretty-the only tip that I have on my iron (Weller WTCP station) was a little big for the job-too big for the eyelet- so I filed it down after a little while.
They don't behave like the old only copper tips I'm used to. Seems like the silver outer layer is much easier to flow solder with! I was able to do OK with it (done @1:30am) but I wish I'd have had a better tip.
Should be auditioning soon.
Regards, Phil

 
. . . . However, it wasn't pretty-the only tip that I have on my iron (Weller WTCP station) was a little big for the job-too big for the eyelet- so I filed it down after a little while. . . .

Funny, I, too, have an old Weller WTCP from the 70s. I added a power switch way back when. I did, 2 years ago, replace the tip.

I love it since it puts a lot of heat in fast. I have never burned up a SS device.

I didn't know there were many out there. Terry DeWick (At the bottom of the page) prefers them. I just lucked up!
 
Last edited:
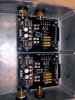
Finished the boards and have begun mounting and wiring stuff up. Drilled a few holes in the wrong spot, but other than that, things are moving along. Still have to mount the IC chips and select resistors for R2 and R3.
 

Attachments

  • 2011-10-30_17-06-24_648.jpg
    2011-10-30_17-06-24_648.jpg
    103.6 KB · Views: 75
  • 2011-10-30_17-06-59_858.jpg
    2011-10-30_17-06-59_858.jpg
    60.9 KB · Views: 45
  • 2011-10-30_17-07-15_650.jpg
    2011-10-30_17-07-15_650.jpg
    64.5 KB · Views: 70
  • 2011-10-30_17-45-27_614.jpg
    2011-10-30_17-45-27_614.jpg
    95.8 KB · Views: 95
I assembled my boards last night also, and confronted the same problem.
I quickly realized that with such small "eyelets" on the board, the only way to be sure of a good solder was to ensure that it flowed through the eyelet and puddled a little on the top as I clearly see we both were able to do.
However, it wasn't pretty-the only tip that I have on my iron (Weller WTCP station) was a little big for the job-too big for the eyelet- so I filed it down after a little while.
They don't behave like the old only copper tips I'm used to. Seems like the silver outer layer is much easier to flow solder with! I was able to do OK with it (done @1:30am) but I wish I'd have had a better tip.
Should be auditioning soon.
Regards, Phil
Weller soldering instruments have patented "Iron-Clad" lifetime tips, they caution against scraping or filing the tips which removes the unique coating and permanently ruins them. There is a variety of replacement tip types and styles for most models.
 
Last edited:
Point taken-however it's hard to source them at 1:30am in the middle of the biggest power outage in 40yrs.
I'm ready for an even bigger one now-bring it on!
 
Point taken-however it's hard to source them at 1:30am in the middle of the biggest power outage in 40yrs.
I'm ready for an even bigger one now-bring it on!

Should be hard to solder during that power outage too unless you have a butane soldering iron for a back up.
 
I think this was suggested before but how about a dual op amp battery powered version, I think OP2134's would work fine?

It would simplify the whole thing and cut down on current draw.

Also a version with the Super Simple Preamp on the same board, I would remove the output caps on the PC3 as it's doubling up.
 
Last edited:
Finished the boards and have begun mounting and wiring stuff up. Drilled a few holes in the wrong spot, but other than that, things are moving along. Still have to mount the IC chips and select resistors for R2 and R3.

Fantastic work!

Where did you get the 2.2uf cap from?
 
I think this was suggested before but how about a dual op amp battery powered version, I think OP2134's would work fine?

It would simplify the whole thing and cut down on current draw.

Also a version with the Super Simple Preamp on the same board, I would remove the output caps on the PC3 as it's doubling up.

That was I, me want!
 
What is the approximate cost for all the necessary parts to complete the preamp? I know the items from RJM run $125, but what are the additional costs for chassis, non-included electronic components and battery supply?

Also, is the completion process fairly straightforward for someone that doesn't spend his days with a soldering iron in hand?

Scott
 
What is the approximate cost for all the necessary parts to complete the preamp? I know the items from RJM run $125, but what are the additional costs for chassis, non-included electronic components and battery supply?

Also, is the completion process fairly straightforward for someone that doesn't spend his days with a soldering iron in hand?

Scott

It cost me around $75.00 sans PCB's to build one to run on batteries including case and connectors. You would need a bigger case for two boards so that would put the cost up a little.

It's pretty straight forward if you are methodical, do it bit by bit and check and recheck each part. Only you can decide if you can solder the components and wire it up correctly.
 
That's a fair point. I am always pretty comfortable working with my hands and understand the basic principles of soldering. But I haven't ever done a circuit board like this. That was the premise of my curiosity regarding level
of difficulty. I am excited by the challenge.

Hopefully I can garner some assistance here if I get stuck.
 
Yeah I wasn't trying to be harsh, I will offer any assistance I can. You need a decent soldering iron for a start.
 
Back
Top Bottom