

You are using an out of date browser. It may not display this or other websites correctly.
You should upgrade or use an alternative browser.
You should upgrade or use an alternative browser.
Dynaco PAS 2 or 3 static with nothing connected and independent of volume
- Thread starter davesnothome
- Start date
-
- Tags
- dynaco pas2 dynaco static
davesnothome
New Member
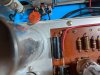
So looks like it reads
EKC
.O2
20%
Not sure if the symbol is a % symbol or not, kind of blurry
EKC
.O2
20%
Not sure if the symbol is a % symbol or not, kind of blurry
davesnothome
New Member
The underneath of the switch reads
11A AC
5A DC
125V
Also did some voltage checks. Not sure I'm doing it right.
The 12x4 numbers are listed below. The right side is the manual reference, the left is what I found. I did not have this hooked up to an amp but did have an input. I'm thinking I might need to put this under load because the numbers from the underside of the board for both PC-5 and PC-6 were not even close. The 12x4 were at least in the ballpark.
1. 335V AC -- 337.6V AC
2. 0V -- 1.6V AC ( My reader is reading 1.5V AC when just the ground clip is connected. If I touch the red lead to the chassis it goes to 0)
3. Same reading as pin 4, read across these pins
4. 10.5V AC -- 10.7V AC
5. 0V -- 2.2V AC
6. 335V AC -- 337.6V AC
7. 405V DC -- 409.6V DC
11A AC
5A DC
125V
Also did some voltage checks. Not sure I'm doing it right.
The 12x4 numbers are listed below. The right side is the manual reference, the left is what I found. I did not have this hooked up to an amp but did have an input. I'm thinking I might need to put this under load because the numbers from the underside of the board for both PC-5 and PC-6 were not even close. The 12x4 were at least in the ballpark.
1. 335V AC -- 337.6V AC
2. 0V -- 1.6V AC ( My reader is reading 1.5V AC when just the ground clip is connected. If I touch the red lead to the chassis it goes to 0)
3. Same reading as pin 4, read across these pins
4. 10.5V AC -- 10.7V AC
5. 0V -- 2.2V AC
6. 335V AC -- 337.6V AC
7. 405V DC -- 409.6V DC
davesnothome
New Member
Just checked the mains again, now showing 122.3 VAC. Honestly it might be a newer power transformer, this unit has had some mods.
PC - 5
1. 175V DC -- 9.5V DC
2. 0 -- 0
3. 1.45 V DC -- 1.5V DC
4. <1V DC -- .3V DC
5. 11V DC -- 11.7V DC
6. 200V DC - 14.3V DC
7. 0 -- 0
8.1.25V DC -- 1.2V DC
9. 5.5V DC -- 5.5V DC
So Pin 1 and Pin 6 make no sense to me.
PC - 5
1. 175V DC -- 9.5V DC
2. 0 -- 0
3. 1.45 V DC -- 1.5V DC
4. <1V DC -- .3V DC
5. 11V DC -- 11.7V DC
6. 200V DC - 14.3V DC
7. 0 -- 0
8.1.25V DC -- 1.2V DC
9. 5.5V DC -- 5.5V DC
So Pin 1 and Pin 6 make no sense to me.
davesnothome
New Member
So just changed the batteries and reset my DMM
Pin 1 - 175 V DC new reading
Pin 6 - 226V DC new reading
Pin 1 - 175 V DC new reading
Pin 6 - 226V DC new reading
davesnothome
New Member
PC - 6
1. 115 DC -- 121.1V DC
2. 0 -- .1V DC
3. .7V DC -- .6V DC
4. 0V DC -- .1V DC
5. 11V DC -- 12.3 V DC
6. 135V DC -- 140.6V DC
7. 0 -- .1V DC
8. .8V DC -- .8V DC
9. 5.5V DC -- 6.1V DC
Mains showing 122.5
1. 115 DC -- 121.1V DC
2. 0 -- .1V DC
3. .7V DC -- .6V DC
4. 0V DC -- .1V DC
5. 11V DC -- 12.3 V DC
6. 135V DC -- 140.6V DC
7. 0 -- .1V DC
8. .8V DC -- .8V DC
9. 5.5V DC -- 6.1V DC
Mains showing 122.5

adnick
Addicted Member
Would tend to agree with Peter, only caveat to that is, not knowing all the possible changes that have been introduced over the years, both parts, and possibly mistakes....
Out of curiosity, how is that Alps volume control grounded?
If you don’t have the ability to check the signal path, you could do things like, bypass the balance control, disconnect the phono board, and/or disconnect one channel at a time etc, and note if there’s any changes after each.
For instance, it would be simple to bypass the stereo/mono switch, and see if that changes anything....
I’m about to start working on a PAS in which I’ll also install the Erhard power control, just not sure what all has been changed on it either, but it does have original boards.
Haven’t really looked at it very closely yet, It will be interesting to see how it turns out....
Not sure any of the above will help, I’m just sorta thinking out loud, may not be prudent to listen (-;
Andy
Out of curiosity, how is that Alps volume control grounded?
If you don’t have the ability to check the signal path, you could do things like, bypass the balance control, disconnect the phono board, and/or disconnect one channel at a time etc, and note if there’s any changes after each.
For instance, it would be simple to bypass the stereo/mono switch, and see if that changes anything....
I’m about to start working on a PAS in which I’ll also install the Erhard power control, just not sure what all has been changed on it either, but it does have original boards.
Haven’t really looked at it very closely yet, It will be interesting to see how it turns out....
Not sure any of the above will help, I’m just sorta thinking out loud, may not be prudent to listen (-;
Andy

Does your PAS have any solid state components that may be overheating?
The reason I ask is because I had a SoundValves preamp that used a 12 volt D.C. regulator for the heater supply. The regulator needed a heat sink, otherwise it would overheat causing pops and crackles in the output signal.
The reason I ask is because I had a SoundValves preamp that used a 12 volt D.C. regulator for the heater supply. The regulator needed a heat sink, otherwise it would overheat causing pops and crackles in the output signal.
davesnothome
New Member
So I don't think it has any solid state components but will look further. I made sure each PC-board ground eyelets were cleaned of flux and resoldered. I've now introduced a hum... Popping is still there. The volume control is grounded to eyelet 1 of PC-5 and from there to an ear tab from the can capacitor. I would gladly bypass the stereo/mono switch and balance if that can eliminate the problems. What would I need to do to make that happen?
davesnothome
New Member
It is just physically there. It is no longer apart of the circuit with the Erhard power board no longer needing it. It does have the ear tabs used as ground points.It's a good technique to try to narrow down the problem. But, any action taken could have other consequences. For instance, disconnecting the phono board will cause both the B+ and filament voltage to significantly increase, which might cause problems in an already shaky situation.
@davesnothome you mentioned the quad section capacitor. It's still hooked into the circuit?
adnick
Addicted Member
The introduction of a hum after some re-soldering, is another indication to me, that this is indeed cold solder joints or something similar, ....others with more experience with the PAS might differ.
Is the Alps box also grounded against the front panel? This can be confirm just by setting your multi meter to check for audible continuity and touching one probe to chassis ground and the other to the front of the Alps. I'm assuming it has a metal front
You really don't need anything to bypass the stereo or the balance control it's just removing and reconnecting the left and right channels, and I only suggested it because I'm assuming you don't have an O scope to check signal path?
Just consider what the balance and/or stereo control does, then look at the old Dynaco diagram related to these and the right and left channels, believe it might become self evident? The Stereo control would be my first choice.
Is the Alps box also grounded against the front panel? This can be confirm just by setting your multi meter to check for audible continuity and touching one probe to chassis ground and the other to the front of the Alps. I'm assuming it has a metal front
You really don't need anything to bypass the stereo or the balance control it's just removing and reconnecting the left and right channels, and I only suggested it because I'm assuming you don't have an O scope to check signal path?
Just consider what the balance and/or stereo control does, then look at the old Dynaco diagram related to these and the right and left channels, believe it might become self evident? The Stereo control would be my first choice.

The ear tabs is no reliable ground. ( it's Al that is bent to create some pressure, this may beIt is just physically there. It is no longer apart of the circuit with the Erhard power board no longer needing it. It does have the ear tabs used as ground points.
shaky after some time. A proper grounding is better)
Redo with a screw + tagged washer + solder ears somewhere in the chassies. Remove the can cap if not used.
Last edited:
I made sure each PC-board ground eyelets were cleaned of flux and resoldered. I've now introduced a hum
Hum in both channels?
Cleaning flux spatter off before soldering is good practice, but it's not enough before re-flowing solder.
Even though solder conducts electricity, it's purpose is to seal a good, physical connection between two or more conductors from the atmosphere and to prevent wires from being pulled out.
All surfaces (including the wire) must be clean and be well physically connected before soldering. All the solder in the world won't fix a bad connection...all it does is cover things up. All surfaces should be shiny before soldering, including the wires.
Before I install components (caps, resistors, etc.) I clean the wires with a little steel wool and make them shiny.
I'm not familiar with the printed circuit boards in your unit. I'm assuming it's modern and has traces on both sides. "VIAs" are like little tubes that connect a topside (component side) trace to a bottom side trace. Some boards don't have VIA's, meaning both sides need to be soldered. Even with VIA's both sides should be soldered. Any possibility there's a cold solder joint on the component side under a component (capacitor) that you can't see?
I would check to make sure you didn't suck the solder away when you re-flowed the solder. That you created a hum makes me wonder about this.
Perhaps a solid core wire has broken inside of the insulation during manipulation.
adnick
Addicted Member
The ear tabs is no reliable ground. ( it's Al that is bent to create some pressure, this may be
shaky after some time. A proper grounding is better)
Redo with a screw + tagged washer + solder ears somewhere in the chassies. Remove the can cap if not used.
That's a great point, even seem to recall it may be specified in the Erhard instructions, but that's just a vague memory....
It could be called Dynaco's weak point, relying on weak ground connections.That's a great point, even seem to recall it may be specified in the Erhard instructions, but that's just a vague memory....
/PS
experienced "Dynacoers" automatically and subconscious will give the tabs a twist and
also shakes the cancaps while online listening for scratches and humming. The real fix
is to create a permanent ground post.
/DS
Last edited:

45rpmspinner
Super Member
Interesting.
I've been staring at the replacement can in my modified PAS 3 for a couple of days.
Ground tab is simply soldered to the case. No sign that the paint/coating on the chassis was cleaned away.
The ground lug connected to the nut securing the 12x4 socket is literally an inch away.
And yes, I have a problem with the unit....which I suspect is ground related.
I've been staring at the replacement can in my modified PAS 3 for a couple of days.
Ground tab is simply soldered to the case. No sign that the paint/coating on the chassis was cleaned away.
The ground lug connected to the nut securing the 12x4 socket is literally an inch away.
And yes, I have a problem with the unit....which I suspect is ground related.
Last edited:

the can in my PAS2 is also soldered to case. Soldering aluminum is extremely difficult, steel isn't a joy either, and you need a good amount of heat to get a good connection on a chassis. In a production environment with big irons this isn't a big deal but Harry Homeowner may not have a hot enough iron to get the job done, which leads to crappy ground connections.
davesnothome
New Member
So to further clarify the grounding of this unit. It has a short jumper from the quad cap ears that some wires were grounded to that goes to a solder lug that is bolted in place by the 12x4 mount. I cleaned and resoldered all those connections previously. I did just order some more solid strand wire and additional solder lugs. I will replace all ground wires and install solder lugs and skip the quad can altogether to hopefully have better ground points. I'm hoping the wire and lugs arrive by the weekend so I can knock that part out. Also waiting on that wire to bypass the balance and blend pots.