• The move to the new server is done. There are some software and database maintenance updates in process. This has us passing the hat around to help out. We appreciate any donations. Seriously, even a dollar helps. The payment page may be found here - https://www.audiokarma.org/support.html

ELAC Miracord TT -share all about 'em

I was able to download service manuals for 10/10H and 600-series, but not 50H/50HII. I will look at 10H and see if I can find anything.
No pictures? The thing has to come off or you wouldn't be able to service the table. Does the table lift out of the base when the shipping screws are loosened? Maybe that's how you do it.
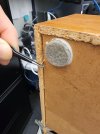
The shipping screws are completely loosened and they turn freely but that's not allowing me to lift the chassis up off the plinth. I'm going to have to take the bottom panel off. I think it's stapled to the plinth somehow. There are no screws, unless they are hidden under the felt markers at each corner.

Really no one here knows how to take the bottom panel off???
 
When the screws are turned all the way down, they have a smooth portion of the shank, which when you lift the screw just a bit, you can tilt it out of the cutout in the base plate so you can lift the table out of the plinth.
its easy to do, once you know how the screws move.
 
I'm still not sure how to take the shipping screws out of the chassis. As someone mentioned before, from the looks of it, they (Elac) didn't really want you to take them out completely.

@CT Jim , thank you for your insight on how to remove the screws, I'm still confused on your explanation, please bear with me: So, to take out the shipping screws, I need to first tighten it down, then find a part where it's smooth and tilt it out of the base plate somehow?
 
Not exactly.
First, I am not trying to help you remove the shipping screws. If that was the case, then you would have two or three HOLES in the TT structure, vs the chrome screw heads of the shipping screws. Why create that cosmetic result?

What Idid say is when the screws are turned until they drop flush with the table, inn order to remove the unit from the plinth, you can TILT the screws so they disengage from the mounting base therefore allowing one to lift out the TT from the base. Sometimes you have to lift one side of the TT, and then tilt the other screw so it is released from the plinth, then you can lift the unit and remove it.
I sold Miracord TTs back in the 70s, and assembled I don’t know how many for customers, perhaps I’m not explaining it succinctly but just sit back and interpret how I’m saying it.
The screws remain in place but are not tightened. Once the screws are threaded down flush with the base, they can be tilted about 30-45 degrees so they disengagefrom the slot in the baseplate. They do not tilt and stay tilted, they will be loose and floppy, but the intent is to tilt the screw so that it is not able to tighten the TT down BECAUSE the screw is tilted out of the baseplate slot.
The two Miracord TTs I have now are both mounted in custom woodworking plinths, one Bloodwood, and one is Red Grandis, which is similar to Mahogany. The screws are still in play, but I did not create the slots for tie down. Why? I’m not transporting them, and if I did, I would secure them in a manner sufficient for the ride.
See a few pics from another thread!
 
Looking at the pics of your plinth, I don't see any slot cuts, so you should be able to just lift the unit up out of the base because I think its an after market one without the slot cuts.
 
I'm still not sure how to take the shipping screws out of the chassis. As someone mentioned before, from the looks of it, they (Elac) didn't really want you to take them out completely.

@CT Jim , thank you for your insight on how to remove the screws, I'm still confused on your explanation, please bear with me: So, to take out the shipping screws, I need to first tighten it down, then find a part where it's smooth and tilt it out of the base plate somehow?

I have never seen that setup before, but it sure looks like there is a nut on both of the posts I pointed to with a red arrow. Have you tried removing the nuts and lifting it out? Not to be a jerk, but based on your difficulty in getting this out of the plinth, I have to ask what are you intending to do? There's a lot that can go wrong when you start messing with stuff.

Screenshot_20240212-190559~2.png
 
Not exactly.
First, I am not trying to help you remove the shipping screws. If that was the case, then you would have two or three HOLES in the TT structure, vs the chrome screw heads of the shipping screws. Why create that cosmetic result?
Looks like the shipping screws are under the platter
 
I don't think the plinth was meant to be taken apart to gain access to the shipping screws, but who knows for sure?

My guess is the the shipping screws, whether meant to be removed or not during use, should still allow the chassis to be removed from the plinth for servicing, again without having to remove staples from the plinth bottom.
 
I have never seen that setup before, but it sure looks like there is a nut on both of the posts I pointed to with a red arrow. Have you tried removing the nuts and lifting it out? Not to be a jerk, but based on your difficulty in getting this out of the plinth, I have to ask what are you intending to do? There's a lot that can go wrong when you start messing with stuff.

View attachment 3117026
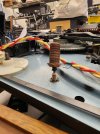
yes there is a nut on both posts and yes I tried to turn the nut, it's really tight and after a few turns, it gets to the point where it turns the post itself. The purpose of trying to lift the chassis off the plinth is to replace the sponges in the springs. It drives me nuts because it has so much "boinginess" every time I touch the controls.
 
yes there is a nut on both posts and yes I tried to turn the nut, it's really tight and after a few turns, it gets to the point where it turns the post itself. The purpose of trying to lift the chassis off the plinth is to replace the sponges in the springs. It drives me nuts because it has so much "boinginess" every time I touch the controls.
When you loosen the shipping screws topside, under the platter, does the post with the nut turn and not allow the screw to be fully loosened? I mean, it would seem that you should be able to just remove the shipping screws completely from inside those posts and just lift the turntable out. I'm with Malden that removing staples to get the bottom off is too much.
 
Here are the mounting instructions for the 50H II. Sounds like you need to release the transport lock so the table floats on the springs by unscrewing the upper threads. You then need to pull up on the chassis and engage the lower threads to unscrew (counterclockwise) the screws. It should then pull out of the base.
Screenshot_20240212-202912.png
 
Last edited:
Here are the mounting instructions for the 50H II. Sounds like you need to release the transport lock so the table floats on the springs by unscrewing the upper threads. You then need to pull up on the chassis and engage the lower threads to unscrew (counterclockwise) the screws. It should then pull out of the base.
:thumbsup:
 
Here are the mounting instructions for the 50H II. Sounds like you need to release the transport lock so the table floats on the springs by unscrewing the upper threads. You then need to pull up on the chassis and engage the lower threads to unscrew (counterclockwise) the screws. It should then pull out of the base.
View attachment 3117100
Ok, so I have to loosen the top screws first and then loosen the bottom threaded copper posts with nuts while pulling up the chassis?
 
Ok, so I have to loosen the top screws first and then loosen the bottom threaded copper posts with nuts while pulling up the chassis?
It was designed so that you don't have to pull staples and bottom off to access the nuts under the chassis, it is done from above

as @likebike23 stated......."Here are the mounting instructions for the 50H II. Sounds like you need to release the transport lock so the table floats on the springs by unscrewing the upper threads. You then need to pull up on the chassis and engage the lower threads to unscrew (counterclockwise) the screws. It should then pull out of the base."
 
The shipping screws are most likely long and containing an upper threaded portion to lock it down, a middle unthreaded portion where the chassis floats, and a lower portion that when unscrewed will allow removal of chassis from base.
IMG_20240214_083950657.jpg

I have never personally had a 50H II, but this is how I read it. My advice is to tread lightly if you get it out of the base. This is the most basic of operations that you are having difficulty with. Mess around too much and find out. Good luck.
 
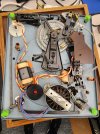
Thanks to @CT Jim and @likebike23 , I was able to get the chassis off the plinth. The nuts under the top needed to be unscrewed competely off the copper shanks. You have to remove the bottom panel to do so. There's no workaround, can't do it from the top only. Cannot be done, unless you have a super power and can manipulate objects with your mind.
20240214_114015.jpg20240214_114022.jpg20240214_114040.jpg20240214_114051.jpg20240214_114203.jpg
 
Sorry about the puke green sponges, couldn't locate yellow ones... With new sponges in the springs, much better stability, I can push the control buttons and the damn chassis no longer moves up/down or side-to-side. I think SQ also improved, but could be a placebo effect...
 
I have to press the control buttons (on the lower right side, labeled Stop, 12"/30, 10"/25, 7"/17) all the way down before it "catches" and starts operating it on my 50H II. Do these controls wear out over long usage?

On my 50H (non-II), these buttons catch easily, don't need to be pressed all the way, in fact, a slight push down "clicks" whatever the mechanism underneath and starts operating the turntable.

I only have one each of 50H and 50H II, so I can't tell if it's normal.

UPDATE:

I tested it again on my 50H II, it's random, sometimes when I press the button labeled 12"/30, it "catches" immediately; other times, I have to press it all the down.

So far, I have reset the auto cycle by arresting the tonearm down and cycling the auto start, made no difference.

What do you say?
 
Back
Top Bottom