• The move to the new server is done. There are some software and database maintenance updates in process. This has us passing the hat around to help out. We appreciate any donations. Seriously, even a dollar helps. The payment page may be found here - https://www.audiokarma.org/support.html

Full Recap or Partial ??

Ok thanks so it seems like a decent kit i bought, i think i will just use it. I have 3 zip lock bags of parts, 400s, 600s 700s are the labes on the bags, when i look at the schematic of the SA-300 i see stuff labeled 701, 702, and i see 6 stuff and 4. I guess the confusing part is looking athe service manual i need to just up 6800 uf 50v is the 2 i took out tonight, i guess i just follow the uf and v of what i have with whats on the schematic. I was hoping for a more detailed plan of attack from this ebay seller but i think i got it figured out. The kit i bought has no tuner parts, its amp, pre amp, phono, just tuner is left out which i could care less about.. Thanks for all the help guys, going full bore on it tomorrow and see what happens.

I acually thought it sounded pretty decent straight away, i just bought off somebody off ebay for 170 dollars and it sounds pretty darn good, but dont know the history and its 45 years old so im recapping it.

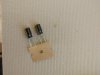
After looking and pulling all the parts out, those greenish blue caps, there is alot of those,i would say more than any other brand, but i dont know the brand. There is a fair amount of Nichicon, i wish i knew this mystery brand, but they have no name at all, im a bit suspect.
 
Last edited:
Replace one capacitor at a time: mark the capacitor with a dot or any mark pointing to the front of the unit, then desolder it, check value, choose the replacement, check orientation again, fit the new capacitor, bend a bit the leads so it stay in place, check orientation again checking with the mark on the old capacitor. You can solder later when a few were replaced. But don"t desolder several capacitors at the same time trusting your memory. Do one at a time and save time and money.
 
Replace one capacitor at a time: mark the capacitor with a dot or any mark pointing to the front of the unit, then desolder it, check value, choose the replacement, check orientation again, fit the new capacitor, bend a bit the leads so it stay in place, check orientation again checking with the mark on the old capacitor. You can solder later when a few were replaced. But don"t desolder several capacitors at the same time trusting your memory. Do one at a time and save time and money.
Also, better to match capacitance and voltage to the caps you take out, and not rely on the service manual or board markings, which may have errors.

If you can post clear closeups of the greenish caps, showing all the markings, someone may be able to ID them.
 
Here's some more shots maybe somebody can identify it.0313222117a.jpg0313222117a.jpg 0313222116.jpg


Sorry there's no other markings on it so unless you know that colors I don't see how you can tell who makes it because it doesn't say anything.
 
Well that just shows how stupid I am and I just talked to the seller Marblehead on eBay and he just told me they're Panasonic so the kit is good quality and I'm going to use it.

And I appreciate everybody's help.

Now to try and start putting parts in.
 
Last edited:
Yup, it like a decent cap kit. You may find a few voltage differences with the new caps. It's fine to go up a little in voltage, and sometimes that makes it easier to find a good replacement. Example would be using a 35v to replace a 25v cap, 63v to replace a 50v, etc. 63v are more common now than 50v. I just ran into a problem trying to find 50uf, 450-500v radial caps at a 20mm-35mm diameter I needed. Plenty of dual caps to choose from, but not single caps. I found a few at crazy prices and finely a couple that were affordable since I needed four total. I could have gone 47uf at 500v, but I wanted the power supply to be as close to original as possible.
 
Yeah for my understanding as long as the uf is the same the voltage can be higher but not lower. I feel a lot better now that I know I got a decent kit and I'm going to start working on it today section by section take my time tell me my first recap.
 
Well that just shows how stupid I am and I just talked to the seller Marblehead on eBay and he just told me they're Panasonic so the kit is good quality and I'm going to use it.

And I appreciate everybody's help.

Now to try and start putting parts in.
Marblehead Audio? He's a member here, so you're in good hands.
 
The reason for not having caps or other parts for the tuner section is once you replace caps and or other parts, it can throw the tuner out of alignment.
It may be a bit out of alignment after all these years, but it could wind up being far worse if you go mucking about in the tuner section. As a general rule I don't touch anything in the tuner section of a receiver unless something has failed.
With stand alone tuners I usually will only refresh the power supply only.
I did make a slight asjustment with one tuner I have that has an auto lock circuit. But but before finding out exactly what slug to tune, touched nothing else. Without alignment equipment and experiance in alignment, I just don't mass with tuners.
 
Yeah I'm not messing with the tuner section. I've decided I want to put a little bit of glue on those big caps in the power supply area just to reduce vibration and make sure they stay down what would I use I meant home Depot I have no idea what to use?
 
I hit a road block,i have a 47uf 50v panasonic cap and i cant find where it goes, looked all over the schematic, only things close is 47uf 10v behind the treble dial.
 
Yes of course, i believe that 752 on the board is a 47uf 16v, i have a 47uf 50v, im assuming this goes in spot 752. There is only 1 listed on the service manual, so it must be right.
 
Well bad new i wont play now, i think i over heated the board with solder and burned the tracer, of put the cap backwards, now it turns on but only humms wont play music, im screwed.
 
If you are new always start with cheap item or some random $5 thift store item to practice soldering on. Getting a LCR meter that measures DF and ESR is the best thing anyone interested in repairing audio can own next to multimeter that gives accurate readings. Cheap meters are fine reading 1k ohm and 40v but cheap meters like at harborfreight for example are awful in the low ohm and DC readings (example known good 2 ohm resistor reads 5.2 ohms and 10mv will read 17mv so not useful at all for setting bias and checking DC offset) .

I always test caps for DF and ESR before replacing unless its obviously bulged or leaking. Some 40 year old caps test better for ESR and DF than new ones I receive from digikey and mouser. Blindly replacing every cap is a waste as some of those old Elna and Nichicons made in 70s and early 80s are still in better shape then what people are replacing them with. I find its usually the old caps below 10uf or 16v that test the worse from my experience. Also look at schematic and replace those 50v caps that are on 47v supply.
 
Last edited:
It was going fine as i changed caps i plugged it in and it worked fine until this last one and now no sound. I have a multi meter but still learning how to use it. I know the problem is with the last cap i put in.
 
Dont give up. A lifted trace is easy fix and part of the learning curve. Power supplies that see a lot of heat is easy to lift a pad, you can use a capacitor lead you cut off to jump over to solid part of the trace after scraping off the coating covering the PCB. When removing old caps be sure to put a little solder on tip as it makes old solder melt faster.

And be sure to put tip on both the pad and lead to get good solder joints. Everyone has had to reflow solder a few times after their work, lifting iron off sometimes causes a gap if not heated properly as sometimes the solder is on component leads but not bonded to pad.
 
Last edited:
Dont give up. A lifted trace is easy fix and part of the learning curve. Power supplies that see a lot of heat is easy to lift a pad, you can use a capacitor lead you cut off to jump over to solid part of the trace after scraping off the coating covering the PCB. When removing old caps be sure to put a little solder on tip as it makes old solder melt faster.
^^this. Most people have had a solder pad blow out or lift at some point. Just jump the bad spot.
 
Back
Top Bottom