• The move to the new server is done. There are some software and database maintenance updates in process. This has us passing the hat around to help out. We appreciate any donations. Seriously, even a dollar helps. The payment page may be found here - https://www.audiokarma.org/support.html

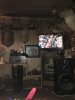
Gear rack/stands

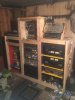
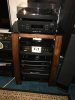
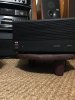
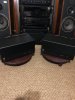
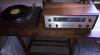
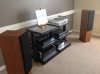
Built this..then went to filling it up.
Soon I’m putting all my silver faced units in the left side.
I built it in the living room..and will have to dismantle it if I need to move it.
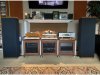
My old stand got wobbly..so I went big,
Used a chainsaw to cut up the old couch to make room.

I did all this with the wife’s approval still got to stain it.been experimenting with burning the wood then staining.
 

Attachments

  • 5B654356-67F2-4678-B84B-27F3B8F5AA24.jpeg
    5B654356-67F2-4678-B84B-27F3B8F5AA24.jpeg
    69.5 KB · Views: 182
  • 4CA49B9B-D156-4701-9D99-CD04D27A3C5A.jpeg
    4CA49B9B-D156-4701-9D99-CD04D27A3C5A.jpeg
    80.1 KB · Views: 177
  • 20174C47-F96A-4545-85EA-71FCF871EFE4.jpeg
    20174C47-F96A-4545-85EA-71FCF871EFE4.jpeg
    121.5 KB · Views: 176
  • 5F2BC7C3-7045-432A-969C-3BDE8BBEF962.jpeg
    5F2BC7C3-7045-432A-969C-3BDE8BBEF962.jpeg
    83.9 KB · Views: 178
  • 1FCA6548-F424-401F-9CD8-3970FE034A5E.jpeg
    1FCA6548-F424-401F-9CD8-3970FE034A5E.jpeg
    101.2 KB · Views: 187
Looking for a rack that has a 20” shelf depth. Got another receiver recently and my current cabinet shelves aren’t deep enough. Want either a cabinet or a large tv stand that could hold all my stuff
 
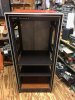
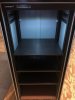
I had forgotten about this ongoing thread. Just finished building a new stand from an old computer rack I picked up for free several years ago. It is much wider than what I am using now, but, unfortunately, still not wide enough for some of my largest receivers. This will replace the one in my office and have two more shelves, but with enough room to accommodate a turntable as well.

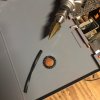
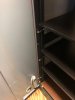
It had some rust pitting, sanded those smooth and did most of it in black/gray, but had some red in a can, so used that for the top piece that drops into place. Also added wheels so I can roll it out for easy access to swap gear. Didn't have quite enough of the black material for another shelf using what I had on hand, so the bottom shelf is brown. Overall, very happy with the result.

IMG_2612 copy.jpg IMG_5701.jpg IMG_5705.jpg IMG_5708.jpg IMG_5711 2.jpg
 
I had forgotten about this ongoing thread. Just finished building a new stand from an old computer rack I picked up for free several years ago. It is much wider than what I am using now, but, unfortunately, still not wide enough for some of my largest receivers. This will replace the one in my office and have two more shelves, but with enough room to accommodate a turntable as well.

It had some rust pitting, sanded those smooth and did most of it in black/gray, but had some red in a can, so used that for the top piece that drops into place. Also added wheels so I can roll it out for easy access to swap gear. Didn't have quite enough of the black material for another shelf using what I had on hand, so the bottom shelf is brown. Overall, very happy with the result.

View attachment 2004957 View attachment 2004958 View attachment 2004959 View attachment 2004960 View attachment 2004961

Nice job, but if running a few heat generating receivers, other warm running power type equipment at the same time, make sure to be aware of ventilating restrictions with the closed back, shelf spacing & a "quality" surge/spike power strip would be my strong suggestion !
Just a thought, Audio Fan.
 
5F564811-A738-4DF6-A60C-032FEFDD4AC9.jpeg So many creative and talented people here repurposing or building their own stands and racks. I clearly do not possess those skills but I can hunt thrift stores which is where all my racks have come from including this one that I found a couple of months ago for my 5.1 system.

Also including my very basic amp stands that I put together from a tabletop and legs that I got at Home Depot.
 

Attachments

  • 9332F8E1-30D9-4528-A9DA-334A6B5F0EEA.jpeg
    9332F8E1-30D9-4528-A9DA-334A6B5F0EEA.jpeg
    124.8 KB · Views: 37
  • 3D0A10FE-6134-47E6-86C0-29927F7B0E51.jpeg
    3D0A10FE-6134-47E6-86C0-29927F7B0E51.jpeg
    136 KB · Views: 39
Nice job, but if running a few heat generating receivers, other warm running power type equipment at the same time, make sure to be aware of ventilating restrictions with the closed back, shelf spacing & a "quality" surge/spike power strip would be my strong suggestion !
Just a thought, Audio Fan.

Yes indeed, all points I have considered. The shelves have about 2" of space around them to allow air to move, plus, the top is not attached. So, my plan is to prop up the back of the top for additional venting when using SS amps and, if the amps produce extreme heat (like tube amps), I will place those on TOP of the unit.

As well, given this is so modular, if it seems too much heat is being generated, I can always easily remove the sides and back door. Or, add some small fans, etc.
 
Yes indeed, all points I have considered. The shelves have about 2" of space around them to allow air to move, plus, the top is not attached. So, my plan is to prop up the back of the top for additional venting when using SS amps and, if the amps produce extreme heat (like tube amps), I will place those on TOP of the unit.

As well, given this is so modular, if it seems too much heat is being generated, I can always easily remove the sides and back door. Or, add some small fans, etc.

Well then, very good, Sir. I see you`re on top of it all.

Enjoy, and good luck with everything.
 
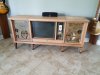
I shared this in another thread, but what the heck, this thread is full of great ideas so here it goes. Mid-60's Westinghouse console TV was my starting point. I gutted it, built some inserts to house my equipment and made some lighted compartments under the lids where the radio and turntable used to be. I love the way it turned out!
20180509_155310.jpg
Starting point. All electronics were dead except for the Gerrard TT.
20200805_090733.jpg
Stripped and inserts built. One thing I like about using an old console like this is that it is plenty deep enough for big amplifiers.
20200805_090733.jpg
20200805_090749 1.jpg
storage under each lid. I ran some strip led lights with a plunger switch that turns them on when the lid is raised.
20201003_054415.jpg
I built the front panels out of pegboard and covered them with black grill cloth. The side panels are held on with magnets, the center panels slide open along a track. I removed the trim moulding from the old speaker housing in order to give the front a 'seamless' look. I really love the way it turned out. I thought about changing out the legs, but it's probably more of a PITA than it would be worth.
 
That is a GREAT reference for repurposing an old console. I run across MANY of them, but sadly, most end up in the dump.
 
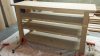
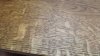
Still under construction... Have the first stain/tone coat on waiting for materials at moment. Some close ups of the medullary rays that are present in the quartersawn pieces.Last picture is the top it is flat sawn no no rays but will be covered with equipment anyway...20201113_222343.jpg 20201128_123900.jpg 20201128_125305.jpg 20201128_123928.jpg 20201128_133033.jpg
 

Attachments

  • 20201128_123908.jpg
    20201128_123908.jpg
    99.8 KB · Views: 5
I think it is having resurgence lately. I have noticed a few speaker mfg. using a white oak veneers.
True , the cost of wood has really shot up its still not to bad. I was lucky to buy it green and dried it in a solar kiln several years ago ...
 
Back
Top Bottom