

You are using an out of date browser. It may not display this or other websites correctly.
You should upgrade or use an alternative browser.
You should upgrade or use an alternative browser.
How to clean a tuner (analog)
- Thread starter dr*audio
- Start date

It's Napa CRC Brakleen Brake Parts Cleaner. Acetone 67-64-1, Heptane isomers 142-82-5 and Carbon Dioxide 124-38-9. The can's small print claims "Safe on most automotive plastics", and "Leaves no residue".
CRC is definitely a good brand, so you made out good
on the price, but don't use any more on electronics.
Acetone will damage most all plastics used in electronics.
It will also strip the insulating varnish on coils present in the
tuning section. I've used the Brakleen for removing oil and gunk
on various metal parts when working around the mower other
mechanical devices.
Last edited:
Tom Anderson
Member
The Rawn contact cleaner comes in a spray can. How do you apply it sparingly enough to the contacts so it doesn't get all over the capacitor plates?

dr*audio
Fish fingers and custard!
The Rawn contact cleaner comes in a spray can. How do you apply it sparingly enough to the contacts so it doesn't get all over the capacitor plates?
It comes with a snorkel tube. Use the tube, place it on the contacts and gently press the spray button so just a little dribbles out. It takes a little practice but you can spray it into the waste basket to try it out. It won't hurt the capacitor plates, as it is non - residue anyway.
Tom Anderson
Member
Thanks, that's what I needed to know. dr* audio comes through again!

KingBubba
"Too Much Stuff"
I have been on AK for quite some time now and this is the first time I have read this sticky. I learned a lot and I have to offer kudos to the doctor not only for the thread, but for the patience applied for people who found this thread in the middle and did not go back and read it from the start.
I am a receiver guy but the radio stations in my area suck badly so I hardly ever flip my receivers over to radio. I, at least, now know how to do the basic service on the capacitors and can apply this technique as necessary. Up till today I knew enough to not touch the tuner gangs or put anything on them; so it is probably a good bet that most of my receiver will now get a decent start at reception. If they don't receive, I am not all that worried about it. Thanks again for a great thread and helping me build my own personal knowledge base.
I am a receiver guy but the radio stations in my area suck badly so I hardly ever flip my receivers over to radio. I, at least, now know how to do the basic service on the capacitors and can apply this technique as necessary. Up till today I knew enough to not touch the tuner gangs or put anything on them; so it is probably a good bet that most of my receiver will now get a decent start at reception. If they don't receive, I am not all that worried about it. Thanks again for a great thread and helping me build my own personal knowledge base.
Note first post, step 2.
I have a Kenwood KR-7400 that had all the classic symptoms -- it was noisy and erratic at the low end of the FM band, had trouble tuning in stations, and was hyper finicky to tune below 95 MHz.
I got motivated by this thread and pulled it apart with cleaner at the ready... only to find the ganged capacitors in an RF shielded box and nearly inaccessible. The outer shield is electrically bonded to an inner shield with a wire that reaches up from within and is soldered to the outer box. I settled my mind around the prospect of a longer job than I'd hoped for... but decided to shoot some air throughout the capacitors with the plates in various positions.
I could work the snorkel tube of my canned air through the openings provided in the RF shield to get the air onto the capacitor plates. For me, that was all that was needed this time - the 7400 is as clear and clean as new, and I can enjoy NPR again. (I may have an angry spider to deal with.)
Moral of the story and my point here is to try and get away with as simple a solution as possible. Sometimes you'll get away with it.
I have a Kenwood KR-7400 that had all the classic symptoms -- it was noisy and erratic at the low end of the FM band, had trouble tuning in stations, and was hyper finicky to tune below 95 MHz.
I got motivated by this thread and pulled it apart with cleaner at the ready... only to find the ganged capacitors in an RF shielded box and nearly inaccessible. The outer shield is electrically bonded to an inner shield with a wire that reaches up from within and is soldered to the outer box. I settled my mind around the prospect of a longer job than I'd hoped for... but decided to shoot some air throughout the capacitors with the plates in various positions.
I could work the snorkel tube of my canned air through the openings provided in the RF shield to get the air onto the capacitor plates. For me, that was all that was needed this time - the 7400 is as clear and clean as new, and I can enjoy NPR again. (I may have an angry spider to deal with.)
Moral of the story and my point here is to try and get away with as simple a solution as possible. Sometimes you'll get away with it.
dr*audio
Fish fingers and custard!
On some tuners the shield de -solders. On others it is held on only with clips. On some tuners, the shield is an integral part of the tuning cap and can't be removed without removing the entire tuning cap and restringing the dial cord. On those, you can try shooting the cleaner into the cap by sticking the snorkel on the cleaner into any holes in the shield, PROVIDED you can see the contacts and inject the cleaner there. Blindly shooting cleaner into the tuning cap will not likely do much. In a case like that, shooting air into the cap could work and won't hurt anything to try it.

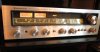
Hello, Im totally new to vintage Hi Fi. I had a sansui AU 7500 when i was 13 and i loved it. Today I listen to a lot of LP's with a Linn LP12 with YBA 2 pre and amp and Martin Logan Ascent. I don't like cds so I stream using an apple TV and a Rega DAC. I just purchased an old Pioneer TX 6200 Tuner which needs a little restoring and I'm looking for some spare parts like feet (did it actually have any?) and the power button which is missing. Can any one help and tell me where I can find stuff like that? I live in Paris, France.
All the best
Mark
All the best
Mark

goodolpg
Just an old fart trying to help.
Hi!
It's my first time in the tuner section (sorry).
I have a can of CRC QD Contact Cleaner..."quick drying...and...leaves no residue" written on the label. Would this be ok to use as cleaner for my FM tuner section?
Is there any way to use the spray fader lube for the second step...for example, spraying it on a q-tip or dipping a toothpick into it? I only have the spray version. I do have small tubes of deoxit gold and shield if either of those would work for lubrication.
Thanks.
It's my first time in the tuner section (sorry).
I have a can of CRC QD Contact Cleaner..."quick drying...and...leaves no residue" written on the label. Would this be ok to use as cleaner for my FM tuner section?
Is there any way to use the spray fader lube for the second step...for example, spraying it on a q-tip or dipping a toothpick into it? I only have the spray version. I do have small tubes of deoxit gold and shield if either of those would work for lubrication.
Thanks.


Just had to say "Did as the good doctor ordered", and the results on my Marantz 2250, though not night and day, is are least dawn and high noon.
1. No more rumbly sound when tuning
2. Signal strength and tuning meters sync'd with the audible strength of signal (and stereo light)
3. Cleaner signals
4. Inter-station silence
Thanks for the walk-through!
Tyler
1. No more rumbly sound when tuning
2. Signal strength and tuning meters sync'd with the audible strength of signal (and stereo light)
3. Cleaner signals
4. Inter-station silence
Thanks for the walk-through!
Tyler
dr*audio
Fish fingers and custard!
Hi!
It's my first time in the tuner section (sorry).
I have a can of CRC QD Contact Cleaner..."quick drying...and...leaves no residue" written on the label. Would this be ok to use as cleaner for my FM tuner section?
Is there any way to use the spray fader lube for the second step...for example, spraying it on a q-tip or dipping a toothpick into it? I only have the spray version. I do have small tubes of deoxit gold and shield if either of those would work for lubrication.
Thanks.
The CRC stuff should work. Test on plastic if it doesn't say it's safe for plastics. It could drip on plastic components.
The toothpick should work. Never spray the Faderlube directly on the tuner as this will apply too much and detune the rf circuits.

Lynnster
New Member
how do I clean under the glass of my Zenith tuner?
This ia a 1968 Zenith YT960 with the "studio" tuner. It was recently refurbished after spending several months at the repair shop. All is working perfectly but there's a lot of dirt & dust under the tuner glass. There are metal strips that frame the glass, with some sort of black material used to seal it. Maybe I should just leave well enough alone and overlook this, but if I can safely get under that glass, I'd sure like to use my mini vac on it.
This ia a 1968 Zenith YT960 with the "studio" tuner. It was recently refurbished after spending several months at the repair shop. All is working perfectly but there's a lot of dirt & dust under the tuner glass. There are metal strips that frame the glass, with some sort of black material used to seal it. Maybe I should just leave well enough alone and overlook this, but if I can safely get under that glass, I'd sure like to use my mini vac on it.
Attachments

Last edited:
Seems Ruined: Sony ST-A30 AM section
Hi friends,
I bought this under non aligned state and looked like its easy to fix as RF sections were intact and other tuning sections in manual referred as voltage settings. Somehow AM FM was not tracking to the dial. FM were offset at lower end of dial and AM was centred in middle means all lower freq were drifted +100kHz and higher were drifted -100KHz.
Then I put some evaporating non residue pcb cleaner (IPO) into shaft of big tuning cap and into trimmers of Front End. After drying up I could get FM in place but AM got silent and trimmer are unresponsive for change. When I touch antenna wire of AM section I get all stations of unknown frequency playing together. No change of tuning. Those trimmer seems antenna trimmer 7 and oscillator trimmer 24 marking which means equal pF? There is no mention in service manual.
Now I am looking what's missing.
1. AM IF of 450KHz
What's next,
are those trimmer gone wrong forever?
Thanks
Hi friends,
I bought this under non aligned state and looked like its easy to fix as RF sections were intact and other tuning sections in manual referred as voltage settings. Somehow AM FM was not tracking to the dial. FM were offset at lower end of dial and AM was centred in middle means all lower freq were drifted +100kHz and higher were drifted -100KHz.
Then I put some evaporating non residue pcb cleaner (IPO) into shaft of big tuning cap and into trimmers of Front End. After drying up I could get FM in place but AM got silent and trimmer are unresponsive for change. When I touch antenna wire of AM section I get all stations of unknown frequency playing together. No change of tuning. Those trimmer seems antenna trimmer 7 and oscillator trimmer 24 marking which means equal pF? There is no mention in service manual.
Now I am looking what's missing.
1. AM IF of 450KHz
What's next,
are those trimmer gone wrong forever?
Thanks
dr*audio
Fish fingers and custard!
It is possible you ruined the trim caps. Often if you try to clean them it ruins them. You can replace them with other trim caps and solder the new ones in. I don't know if Digikey ships to India, but they have trim caps. It sounds like the AM local oscillator is not working. It is possible that due to the trim caps being ruined, the oscillator is massively de-tuned.
It is possible you ruined the trim caps. Often if you try to clean them it ruins them. You can replace them with other trim caps and solder the new ones in. I don't know if Digikey ships to India, but they have trim caps. It sounds like the AM local oscillator is not working. It is possible that due to the trim caps being ruined, the oscillator is massively de-tuned.
Thank you, you are right. I need look out for that trimmer. I may have few but different shape. Still job of getting front end out an stringing again is massive for me.
dr*audio
Fish fingers and custard!
Thank you, you are right. I need look out for that trimmer. I may have few but different shape. Still job of getting front end out an stringing again is massive for me.
You shouldn't have to remove the frontend to replace the trim caps, unless they are on the pcb and not mounted on the tuning cap. Take pictures of the routing of the dial cord. The service manual should have a diagram as well. Another trick is to remove the wheel on the tuning cap and use a wire to hold the wheel unde tension, keeping the string wound.