

You are using an out of date browser. It may not display this or other websites correctly.
You should upgrade or use an alternative browser.
You should upgrade or use an alternative browser.
JBL L200 Studio Masters-Pics
- Thread starter GD70
- Start date

Congrats Glenn, those fantastic speakers will be a great reward for your labor. My L200Bs are keepers.
As to working on the LE85's here is what I did, and learned the hard way on what not to do concerning those magnets and loose screws flying into the diaphragms..
The open cell foam backs on the LE85 drivers starts to fall to pieces after 40 years or so..
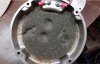
Here is what it looked like after removal:
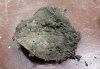
You can see bits of the rotting foam just starting to stick to the diaphragm.. ..
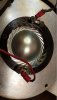
Cleaning the gap on the LE85 with masking take, sticky side out.. Note the bronze screw driver these magnets are freakin strong!

As for recapping the LX16, that crossover is entombed in some sort of gunk, and I had to heat this one up on the woodstove to get it out of the can..
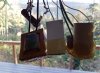
Not sure the best route for a recap. Instead of trying to recap this mess I just built a new crossover, mounted to plywood under the speaker.. Won't win any trophy's but it did sound better after..

Hope you found some of this worthwhile!
The open cell foam backs on the LE85 drivers starts to fall to pieces after 40 years or so..
Here is what it looked like after removal:
You can see bits of the rotting foam just starting to stick to the diaphragm.. ..
Cleaning the gap on the LE85 with masking take, sticky side out.. Note the bronze screw driver these magnets are freakin strong!
As for recapping the LX16, that crossover is entombed in some sort of gunk, and I had to heat this one up on the woodstove to get it out of the can..
Not sure the best route for a recap. Instead of trying to recap this mess I just built a new crossover, mounted to plywood under the speaker.. Won't win any trophy's but it did sound better after..
Hope you found some of this worthwhile!

y2keglide
Super Member
Yes I should have mentioned bleach as a last resort after cleaning with something or a few things to see what might work on it.Great approach and your results look fantastic! I think I'll try the acetone wipe down approach first and see what it removes before I do any sanding. Luckily, there's no deep scratches that I've noticed so far.
Cheers, Glenn
Always remove whatever you can before sanding and I again suggest some steam to raise the grain some before sanding.
That also opens the pores in the wood grain so you can do that let it dry and attempt more cleaning.
Whatever is left will not be as deep in the veneer before sanding when the grain has been raised and dried so you have a better chance of sanding it out
without sanding through to the core material.


MJB1959
Super Member
Well, well, Glen, it seems while most other folks are rescuing dogs, you have started your own speaker rescue home, that is a perfect marriage for you, as you seem to take the time to do things the right way, this hobby has been a great blessing for you, as the speakers seem to be dropping from the sky. Amazing! Good luck.


GD70
Lunatic Member
This is perfect and extremely helpful! So that foam disk was on top of the silver dome correct? And what kind of foam did you use for replacement?As to working on the LE85's here is what I did, and learned the hard way on what not to do concerning those magnets and loose screws flying into the diaphragms..
The open cell foam backs on the LE85 drivers starts to fall to pieces after 40 years or so..
View attachment 1248192
Here is what it looked like after removal:
View attachment 1248199
You can see bits of the rotting foam just starting to stick to the diaphragm.. ..
View attachment 1248205
Cleaning the gap on the LE85 with masking take, sticky side out.. Note the bronze screw driver these magnets are freakin strong!
View attachment 1248206
As for recapping the LX16, that crossover is entombed in some sort of gunk, and I had to heat this one up on the woodstove to get it out of the can..
View attachment 1248207
Not sure the best route for a recap. Instead of trying to recap this mess I just built a new crossover, mounted to plywood under the speaker.. Won't win any trophy's but it did sound better after..
View attachment 1248208
Hope you found some of this worthwhile!
The brass screw driver is a great tip!
Cheers, Glenn
This is perfect and extremely helpful! So that foam disk was on top of the silver dome correct? And what kind of foam did you use for replacement?
The brass screw driver is a great tip!
Cheers, Glenn
That foam is not supposed to contact the diaphragm ( silver dome ) just in case you're wondering ( unlike some JBL tweeters where foam is deliberately put inside the dome contacting the diaphragm's dome > damping extraneous ringing ).
The foam ( here ) is supposed to remain suspended/glued up inside the back-cap ( as seen below ).
GD70
Lunatic Member
Hey Earl!That foam is not supposed to contact the diaphragm ( silver dome ) just in case you're wondering ( unlike some JBL tweeters where foam is deliberately put inside the dome contacting the diaphragm's dome > damping extraneous ringing ).
The foam ( here ) is supposed to remain suspended/glued up inside the back-cap ( as seen below ).

Thanks, but I don't see your image, just
Hey Earl!
Thanks, but I don't see your image, just
That's odd because it's an image link ( to a pic within a post ) that's attached to this thread.
And of course I still see it.
I'll see what I can do about that sometime before my editing time expires.
EDIT:


Yes Earl is right, the foam is attached to a thin piece of felt which is glued to the back cap of the driver and doesn't touch the diaphragm. The foam is supposed to be open cell of which I had difficulty finding so I made my own from a sponge like the tile guys use for cleaning grout. I cut a half inch of the sponge off with a sharp knife and then cut a circle pattern and glued it to the sponge. Then glued that to the back cap.
I know this sounds a bit backwoodsy but it did the trick and I couldn't hear any difference. I heard where the original foam may still be available from JBL so if you are doing this, and I think you probably should at some point, then I would definitely try to source the OEM stuff.
Using a very sharp kitchen knife.. (wife does NOT know!)

I used felt from a turntable mat I wasn't going to ever use, but should be able to find this stuff easily..
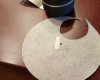
Felt/foam glues to inside of the back cap of the driver, felt to the back...
Be cautious as can be about both the screws and the crimp on forks as those are ferrous and will want to jump right onto that fragile diaphragm! Hence why I replaced both diaphragms with new ones (Radian 16 ohm). I only dinged one but I decided to change both diaphragms out so as to be a matched pair.. I got lucky that these Radians sound great, perhaps even better than the OEM and go for only $80 instead of $160 ish for original LE85 diaphragms on eBay..

I know this sounds a bit backwoodsy but it did the trick and I couldn't hear any difference. I heard where the original foam may still be available from JBL so if you are doing this, and I think you probably should at some point, then I would definitely try to source the OEM stuff.
Using a very sharp kitchen knife.. (wife does NOT know!)
I used felt from a turntable mat I wasn't going to ever use, but should be able to find this stuff easily..
Felt/foam glues to inside of the back cap of the driver, felt to the back...
Be cautious as can be about both the screws and the crimp on forks as those are ferrous and will want to jump right onto that fragile diaphragm! Hence why I replaced both diaphragms with new ones (Radian 16 ohm). I only dinged one but I decided to change both diaphragms out so as to be a matched pair.. I got lucky that these Radians sound great, perhaps even better than the OEM and go for only $80 instead of $160 ish for original LE85 diaphragms on eBay..
Last edited:

This is good info!
I have one question. When you do the foam replacement , do you have to remove the wax seals on the back of the drivers to get the back cover off?
I am asking because it seems everyone freaks out when they are removed. Original diaphragms and all.
I am sure my foam on my LE 85s are toast in my c50s..
Does replacing the foam help with the sound of the horn?
Congrats Glenn on the 200s. You do seem to have good Karma.
J.T.
As long as the foam is still intact and not crumbling off I doubt changing the foam will change the sound. It is more about fixing a problem before it becomes one...This is good info!
I have one question. When you do the foam replacement , do you have to remove the wax seals on the back of the drivers to get the back cover off?
I am asking because it seems everyone freaks out when they are removed. Original diaphragms and all.
I am sure my foam on my LE 85s are toast in my c50s..
Does replacing the foam help with the sound of the horn?
Congrats Glenn on the 200s. You do seem to have good Karma.
J.T.
Yes the red wax has gotta go! But that only matters to the folks on eBay...

teal'c
Nuclear Cardiac Parent
Open cell foam is used in fish keeping as a filter material. For example.The foam is supposed to be open cell of which I had difficulty finding
Maybe look in a local pet store or two.

GD70
Lunatic Member
Awesome! Appreciate your tutorial.Yes Earl is right, the foam is attached to a thin piece of felt which is glued to the back cap of the driver and doesn't touch the diaphragm. The foam is supposed to be open cell of which I had difficulty finding so I made my own from a sponge like the tile guys use for cleaning grout. I cut a half inch of the sponge off with a sharp knife and then cut a circle pattern and glued it to the sponge. Then glued that to the back cap.
I know this sounds a bit backwoodsy but it did the trick and I couldn't hear any difference. I heard where the original foam may still be available from JBL so if you are doing this, and I think you probably should at some point, then I would definitely try to source the OEM stuff.
Using a very sharp kitchen knife.. (wife does NOT know!)
View attachment 1248699
I used felt from a turntable mat I wasn't going to ever use, but should be able to find this stuff easily..
View attachment 1248700
Felt/foam glues to inside of the back cap of the driver, felt to the back...
Be cautious as can be about both the screws and the crimp on forks as those are ferrous and will want to jump right onto that fragile diaphragm! Hence why I replaced both diaphragms with new ones (Radian 16 ohm). I only dinged one but I decided to change both diaphragms out so as to be a matched pair.. I got lucky that these Radians sound great, perhaps even better than the OEM and go for only $80 instead of $160 ish on eBay..
View attachment 1248701
Cheers, Glenn