• The move to the new server is done. There are some software and database maintenance updates in process. This has us passing the hat around to help out. We appreciate any donations. Seriously, even a dollar helps. The payment page may be found here - https://www.audiokarma.org/support.html

Leestereo's Restoration/Upgrade of a Sansui AU-719

PART 5: MAIN POWER SUPPLY CAPACITORS

index.php


index.php


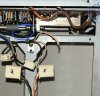
The stock main power supply capacitors (12,000µF/63V) were upgraded to 15,000µF/63V Kemet ALT22A capacitors.

index.php


index.php
 
Looking good.
So this is the CSA version. I had the EU model where you have a rail voltage of 63 V which makes it a lot more difficult to find replacements. I went with 10000 uF-100V F&T. (Original where 10000uF-71V)
 
...I had the EU model where you have a rail voltage of 63 V which makes it a lot more difficult to find replacements. I went with 10000 uF-100V F&T. (Original where 10000uF-71V)

Other possible replacements for the EU model would be the Nichicon KG 10,000µF/80V capacitor: https://www.mouser.ca/ProductDetail...wFf0viD3Y3TGBqvvFdz90BJNDn0VZ8QbWudE0fXTMPg== or the 15,000µF/80V CDE 383LX: https://www.mouser.ca/ProductDetail...wFf0viD3Y3drIvUsxvMtY2AiAiHFN57oGMmbNZ4TtKA==
 
Yes, good choices. At that time, and being my first restoration, I opted for the F&T LFA I found in Germany, which I think they priced wrongly. At that time they were €6,50 each and I do think they are high quality.
And I liked they had the soldertabs (lug) like the Nichicon LKG.
 
Last edited:
That looks like really tight quarters. I assume you have everything soldered while it is laying loose. Any tricks for keeping the solder joints to the solid jumpers from getting stressed before you get everything in place?
 
I assume you have everything soldered while it is laying loose. Any tricks for keeping the solder joints to the solid jumpers from getting stressed before you get everything in place?
No, the 4 main filter capacitors should be fixed in place before soldering, first the jumpers and then the wires - there is plenty of room for that. I did one of these not long ago so it is fresh in my mind. ;)
 
Last edited:
Thank you for the great post! I’m working on my new AU-719, and was wondering how you removed F-3095? When I slide mine all the way towards back of the unit, one of the switch arms disengages, but the other is still solidly on there. I tried sliding it towards the front of the amp, but it feels glued on. Is there a trick to this? I searched the forums with no luck. I attached a picture showing the board all the way to the right and the two switch arms (you can see the disconnected one in the background).

Edited because I forgot I’m not the only one working on this.
 

Attachments

  • EFADFE8C-A8AB-4B93-8742-B127A60B6DFD.jpeg
    EFADFE8C-A8AB-4B93-8742-B127A60B6DFD.jpeg
    146.2 KB · Views: 63
When I slide mine all the way towards back of the unit, one of the switch arms disengages, but the other is still solidly on there. I tried sliding it towards the front of the amp, but it feels glued on. Is there a trick to this?
Loosen (or remove) the two Philips screws holding the switch arm. They are at the front of the unit. You would then be able to pull the switch arm away.
 
Last edited:
...wondering how you removed F-3095? When I slide mine all the way towards back of the unit, one of the switch arms disengages, but the other is still solidly on there. I tried sliding it towards the front of the amp, but it feels glued on...

The switch arms/shafts on the F-3095 can be disengaged by removing the c-clips on each shaft (near the front of the unit) and then the shafts can be extended forward and out of the way. It is the same configuration in the AU-717 for the F-2723 board, as described in this post
 
The 68ohm 0.5W voltage dropping resistors at R634 and R635, which run hot (slight board discoloration), were upgraded to 68ohm/2W metal film types.
there seems to be more than a few "hot" spots with the 719 circuit design after doing some thermal imaging, idle vs medium volume.

The bipolar capacitors (C17/C18) were upgraded with 105°C variants.
other than cost, availability and possibly physical size was there any particular reason 125c or 135c electrolytics were not utilized near high heat sources?

in regards to board f-2926 (left amp) are there any recommended transistors vs average drop in replacements for the following:
tr13, 14, 15, 16

i am contemplating some alternative output transistors as well (tr701: 2sc2581 and tr703: 2sa1106) should the need arise. although a collector-emitter max of 140v has some safety padding (better than some recent nad/proton amps) it still seems problematic when the rail-to-rail exposure can hit around 130v and thats before factoring in thermal derating of the 150c maximum (junction vs ambient might be worlds apart).

https://www.mouser.com/c/semiconduc...VCEO Max|~Pd - Power Dissipation&sort=pricing

the 2sc5359 looks promising (pnp complement 2sa1987) although the emitter-base max is 5v, not sure if that would be an issue since 2sc2581 is rated for 6v.
https://www.mouser.com/datasheet/2/408/2SC5359_datasheet_en_20131101-1916394.pdf

using electrolytic capacitors in a filter, its value should be ≥10x that of the film capacitor needed to achieve the target F3
useful info for future design mods not to mention improved thermal stability, depending on heat intensity of component placement.
 
Hi there! I'm doing the restoration right now of my AU719 and for the control amp I bought for c05 and c06 0.47uf Polyethylene Terephthalate (PET) not the polypropylene (PP) you used. Leaving the PET there will make the same performance as the PP? or should I just order PP? Thank you so much for your guidance!
PART 2: CONTROL AMP CIRCUIT BOARD (F-3098)

index.php


index.php


Signal Path Components:

The capacitors (C03, C04) for the "Loudness" function were 22nF polyester film types and these were upgraded to same capacity polypropylene film types. Similarly, the capacitors (C05,C06) in the high pass filter for the differential input stage were upgraded to 0.47µF polypropylene types. The garden-variety ceramic capacitors (C07, C08) in the input low-pass filter were upgraded to C0G types. The high-pass filter capacitors (C11, C12,), and their film by-passes (C09, C10), for tone control output were upgraded to 10µF bi-polar types and 0.1µF polypropylene film types, respectively. The feedback phase compensation capacitors (C13, C14) were upgraded to C0G types. The paired high-pass filter capacitors (C17+C19, C18+C20) were replaced with single 4.7µF polyester film types. Consequently, the 0.047µF film by-passes (C21, C22) for the paired capacitors were no longer necessary and were removed. The polyester capacitors (C23, C24) for the Subsonic Filter were upgraded to polypropylene types. The feedback resistors at R19, R20 were upgraded to metal film types.

Non-signal Path Components:
The local decoupling capacitors (C25-C28) were upgraded to 100µF low ESR types.

index.php
 
other than cost, availability and possibly physical size was there any particular reason 125c or 135c electrolytics were not utilized near high heat sources?

By replacing an original 85 degC cap with a new 105 degC rated cap, the nominal lifetime of the new 105 degC cap will be 4 times the life compared to a comparable 85 degC cap.

i am contemplating some alternative output transistors as well (tr701: 2sc2581 and tr703: 2sa1106) should the need arise. although a collector-emitter max of 140v has some safety padding (better than some recent nad/proton amps) it still seems problematic when the rail-to-rail exposure can hit around 130v and thats before factoring in thermal derating of the 150c maximum (junction vs ambient might be worlds apart).

the 2sc5359 looks promising (pnp complement 2sa1987) .

The Sanken recommended replacements for the 2SA1106/2SC2581 are 2SA1695/2SC4468

https://www.digikey.com.au/en/products/detail/sanken/2SA1695/3929407

Cheers
John
 
...for the control amp I bought for c05 and c06 0.47uf Polyethylene Terephthalate (PET) not the polypropylene (PP) you used. Leaving the PET there will make the same performance as the PP? or should I just order PP?...

A polypropylene (PP) film capacitor type is superior to a Polyester (PET) type, but if you have already installed the PET replacement capacitor, I would just leave it in. Further, in the AU-719 the C05/C06 capacitors are not in the signal path when the tone control is set to "defeat".
 
A polypropylene (PP) film capacitor type is superior to a Polyester (PET) type, but if you have already installed the PET replacement capacitor, I would just leave it in. Further, in the AU-719 the C05/C06 capacitors are not in the signal path when the tone control is set to "defeat".
Thank you for your reply! I'm about to finish the restoration of my AU719 following your approach in some of the boards. I will create a new thread soon to show you all what I did with my Sansui!
 
Hi all,
I have recently completed my restoration following this guide and BOM. I am working on my startup, but cannot get the amp to come out of protection mode. Per the service manual, I was able to set the bias current to 23mV using VR02 on the 2926/2927 boards. However, VR01 on those boards does nothing to change the DC offset. I am showing around 30-50mV sitting on the speaker terminals, but the full range of adjustment on VR01 doesn't change the DC offset at all. Anyone have any good ideas on where I can start? It's not my first recap, but definitely the most involved I've done yet. Thanks! Jaybird
 
If the amplifier stays in Protection Mode, the relay will not close, and the speaker outputs are not connected the driver boards, i.e., the DC offset cannot be measured at the speaker outputs. In this case, the DC offset has to be measured before the relay. A quick work around is to measure the DC offset with on a DMM probe on the +ve bias test point and the other probe on ground.; this should allow adjustment for the relay to close. A final DC offset adjustment will still need to be done at the speaker outputs when the unit is out of Protection Mode.
 
Back
Top Bottom
