• The move to the new server is done. There are some software and database maintenance updates in process. This has us passing the hat around to help out. We appreciate any donations. Seriously, even a dollar helps. The payment page may be found here - https://www.audiokarma.org/support.html

Magnepan MG-IIA Rebuild

Ditto! I have MG IIa's also that I will be replacing the tweeter wires and probably the crossover this winter and have the kits already. Hopefully not the bass wire. Trying to figure out the crossover options now and have some posts on the MUG board pertaining to it. We are all in this together!

When you get the crossover options worked-out please let me know.

My crossover has four 10uf poly caps and a single 17uf electrolytic. I would think the poly's would be OK but probably will remove and check just to make sure they are still in spec. The 'lytic has to go though. The narrow nature of the panel may make finding a poly that will fit difficult. Could parallel a few together to get the 17uf shoe-horned in there I suppose.

Don't really see any tweaks for the IIA's. Did I just miss them?
 
Yeah, no there are no good tweak examples so I'm seeing what the group has to say for it with questions. They all say the new stuff wont fit in the existing area so an external is probably needed. Sounds like it wont be cheap if you replace the inductors so i am trying to determine if and why those would need replacement.
 
Yeah, no there are no good tweak examples so I'm seeing what the group has to say for it with questions. They all say the new stuff wont fit in the existing area so an external is probably needed. Sounds like it wont be cheap if you replace the inductors so i am trying to determine if and why those would need replacement.

I purchased electrical housing with access doors from radio Shack I drilled to the bottom of the backs the frames to house the new much larger caps. Also obviously upgraded the binding posts while I had them apart. The housings worked great.

Note: I have read that over applying the factory glue can have negative effects on the sound. Dulling their output. I was generous but found no ill effects. Also most likely the factory glue will not be strong enough to secure the ends of the loops. Well documented by Peter Gun. It was not in my case either. I forget what he suggested but it worked dead red for me. I used the heads of large bolts to hold them in place while drying. Easy to locate and remove.
 
Stripped about 4 inches off the bottom of the first panel tonight. Took almost 2 hours! Something is not right here.

I am almost positive that all but the very ends of the panels are factory Magnepan. So why is the acetone not removing the glue?? Magnepan says it is a very messy process but the glue will come right off with acetone.

Is it possible that I have a bad can of acetone??? :scratch2:

As a result of this failure to remove the glue, I have to be pretty aggresive trying to get the junk off. The payoff for this is several small rips in the mylar. Not a good thing. I have to stop the current method of removal or there will not be anything left to string new wires on.

Per thread suggestions I also tried Isopropyl Alcohol, Goo Gone and Ooops. Nothing removes this stuff.

Need to stop for the night and regroup.
 
Yeah, that ain't superglue. Acetone should not have a problem with it if it was. Yikes. Maybe try soaking it by placing a wet soapy towel over the area for several hours? Not sure if that would be a no no or not. Time to hit google search for ideas.

Thoughts on reaching out to Peter Gunn? He might have some insight on your predicament? As I understand it he is pretty responsive.
 
yuck. did you get a rewire kit from Magnepan or are you reusing the old ones somehow?

Rewire kits for both tweet and bass section are winging their way down from White Bear Lake as we speak. Should touch-down Friday. Could not get the Milloxane from them (too cold) but I can get it somewhat local through Amazon. Waiting for the weather to warm a little and I will order. It will come from the warehouse in SC so should be little chance of freezing.

Magnepan has been super-helpful but they did not have a clue about removing the crap on my panels. They said acetone should do the trick.

I tried some additional tests last night that are documented below.
 
Tests performed last night

As mentioned, I did try Goo Gone and Ooops and they too had little effect on the stubborn gunk that remains on my panel.

One thing I did try was to soak 3 layers of paper towels in acetone and lay them on an area of the panel that I had not worked on. I covered that with a sheet of thick saran wrap (so it would not dry-out) and then covered that with a towel. Let all this sit overnight.

This morning I uncovered everything and the paper towels were still moist with acetone. Took a cotton ball and rubbed; the gunk will not budge still!

Going to go by Lowes on the way home and pickup a new can of acetone. I don't know what else to try to chemically strip the panel.

On a positive note: I decided to use a razor blade to see what it would do.

I know what you are thinking: "A razon and mylar?? Are you effin' insane??" :screwy:

Well maybe, but honestly I did MUCH less damage with the razor than I did with the scrubbing and rubbing using the acetone.

Before starting, I counted 4 small spots that I had to put tape on before starting with the razor. I added 1 to that and it COULD have been there already and I failed to notice it. And, using the razor method I cleaned about 3 times as much of the panel in less than 1 hour!

The key to using a razor is:

* Put tape around the top of the razor so it will not stick to the magnets (fully at least). If it does get stuck, it is very difficult to pull it off.
* Take a file and ease the sharp edge at the corner of the razor so that it does not accidentally dig into the mylar as you work.
* Hold it at an angle that is as close to parallel to the mylar as possible. Work on small areas and try to chisel-off only one wire run at a time. Don't get greedy!

If the new can of acetone does not have better results, I don't see any other option than to strip this panel than mechanically (with the razor).

No way I can continue just using my fingernail. A little flick here and there? Sure, no problem. An entire panel? Nope - just too painful.
 
Thoughts on reaching out to Peter Gunn? He might have some insight on your predicament? As I understand it he is pretty responsive.

Not a bad idea. If no luck with the new acetone, I may give him a jingle and see what he thinks. Thanks!
 
-reverb- I really feel you got about the rawest bad intro to Maggies I have heard. I sure hope that at the end of this process there is a sweet sounding pair of Mg IIA waiting for you. You've earned it!

If you ever figure out what the mystery evil goop on your speakers is please let us know so we can stay away from it...
 
Well, I do remember two phrases toss around early in this thread: "March of death" and "go down in flames trying". Turns out they both may be quite prophetic.

Here is the latest. I am now positive that someone has re-strung this entire panel.

Reason 1: Magnepan says acetone WILL remove any glue they utilize. I tried a fresh can of acetone last night with the same results. Whatever is on there now is not a sanctioned Magnepan bonding agent.

Reason 2: In the first pic, you will see a dark brown area. This is where the mylar is bonded to the magnets underneath. What I surmise happened is that there was a hole in the mylar and during the previous restringing, some glue seeped through and bonded the two parts. I don't think Magnepan would EVER let this pass QC (I would hope not, at least).

Next photo shows one of the worst tears I had to deal with. After some clean-up, it was patched with thick packing tape. Seems to be a solid repair.

The last photo is the panel somewhat cleaned. I still have a few areas to work a little more on but basically I have done about as much cleaning as I am going to. Although it doesn't look that pretty, it is fairly smooth, clean and ready for rewire.

What's odd about all this is, even in the condition the panel was in when I got it, it still made decent bass and sounded pretty good. Surely a testament to the robustness of the Magnetic Planar design.

I do plan to continue. As stated earlier, parts are already procured so, in for a penny, in for a pound. I am very curious what sort of sound these things will make with all the damage they have incurred both from the previous rewire and from my attempts to revive.

The wife is out of town for a few days this weekend. May be a good time to commandeer the dinning room table for the restring. The temperature in garage will not likely be in the optimal working range for the glues to do their thing.

This has been quite the rollercoaster. Regardless of outcome, I am not sure I will work on Maggies again unless they are VERY cheap. On this build, it isn't going to take too many more roadblocks for me to toss in the towel. I am almost out of Altitude, Airspeed and Ideas - certainly short of motivation.

However, if they do sing... I know it is because I MADE them sing. We will see how it all unfolds. Thanks all for the kind words and collective sympathetic ear.
 

Attachments

  • mgii_bonded.jpg
    mgii_bonded.jpg
    65.2 KB · Views: 97
  • mgii_tear.jpg
    mgii_tear.jpg
    96 KB · Views: 92
  • mgii_cleaned.jpg
    mgii_cleaned.jpg
    58.6 KB · Views: 99
Your at the edge with your toes hanging over the abyss....

Time to face the beast.

Good Luck, God's Speed and Steady Hands!! :)
 
Head on over to the MUG site and maybe there will be more specific wisdom to tap into there?

Also, look into heat maybe. It sounds like Mylar can take quite a bit. You can run it through laser printers for instance and it is used as an insulator etc. It's real only weak point is punctures and pricks.
 
.... It's real only weak point is punctures and pricks.

Who you callin' a prick? :D

Good idea about looking over at MUG - there is a pretty good body of knowledge over there.

Like I say, panel 1 is all but complete as far as cleaning goes. If it survives the rewire and sounds OK I'll do panel #2. If it is a bust, I may cry uncle and move on.

Guess I could part-out the crossovers, wood and socks. That's what's a killer about all this - cosmetically they are fantastic!
 
I was wondering if you would pick up on that prick thing.

I've been racking my brain and using google to look up what the deal is with that glue and ended up looking up Mylar to see what you can get away with. I used the stuff for years to draft on so I am aware of how it is to deal with although the stuff on these maggies is fairly small mil stuff.
It almost sounds like you are dealing with an epoxy since the acetone wont cut it. I can see someone using that to get those damn ends to stay down unfortunately. It's all chemistry so the solution is out there if you can just narrow it down to the proper category of adhesive. Over at MUG maybe you can inquire about just replacing the Mylar too. It's not like the stuff is expensive.

I have a few small holes in mine where the guys over at MUG thought it was from the wires burning holes in it. I will just use a little tape over them before re-gluing the wires. Of course I have not cleaned mine off yet though either. (Working on my AR 3's for now)
 
Happy Post-Thanksgiving Holiday All~! Hope everyone had a fun and safe time with friends and/or family.

As part of my few days off, I did have a chance to spend some quality time with the first panel.

First picture is of the two types of wire provided by Magnepan in the kits to rebuild the panels. The bronze color wire is the 22 gauge for the bass panel. It is coated so remember the clean the ends with some fine-grit sandpaper before you solder!

The silver color wire is the 32 gauge used for the tweeter section. It is NOT coated so be sure you get it completely covered with the 3M FastBond so it will not corrode.

I did use the recommended procedure to affix the wire to the mylar; 3m Super 77 spray adhesive to "stick" the wires to the panel long enough to hold until the 3m FastBond locks everything together. I must say that timing is critical using the 77. Too little time for it to tack and the wires will not stick; too much time for it to tack and the wires will not stick. If you are in the magical "Goldilocks" time frame, it works quite well.

I did the bass panel first and I must tell you that once you start, it's all or nothing. Be prepared to spend about 30-45 minutes hunched over the panel in an uncomfortable position pulling wire back and forth. The only real break I got was occasionally going over to the bowl of acetone to clean the build-up of Super 77 off my fingers. btw: that's one thing that 77 sticks to amazingly well - your skin~!

Once the bass wire was complete, I began on the tweeter section. A word of caution here - the tweeter wire can be broken quite easily in the process of stringing it so be a little less heavy-handed than you were with the bass wire. I got about 3/4 of the way finished on mine and popped the wire while pulling it. I don't think I need more wire for the second panel however. The amount Mangepan sent seems to be very generous.

Once the wires were strung, I checked for continuity and then coated everything with the 3M FastBond adhesive. I was right at the edge of being in the proper temperature zone (68 degrees or above) but I managed to keep everything warm enough by using 2 halogen work lights that put off gobs of heat.

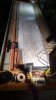
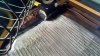
I did have a couple of spots that the end wires wanted to lift a little before the FastBond could cure. I used baco99's trick of toothpicks to hold the loops in place while everything bonded. Worked pretty well, but it will remove a chunk adhesive when the toothpick is taken out. I just spot filled with more FastBond later. Seems OK. The last 2 pics show the panel, coated with FastBond, drying.

One thing I did learn, don't shake the FastBond before application. This will introduced very small bubbles into the adhesive turning it foamy. I think it will be OK, but I think it would be better without all the bubbles.

Late last night after 4 or 5 hours of dry time, I gave the panel a very small signal as it lay on the bench. Although critical listening will be needed to make a full assessment, I DID clearly hear both bass and treble coming from the panel. It also seemed very clean and clear - again at low volume.

Fingers-crossed - but so far, so good. :yes:
 

Attachments

  • wire.jpg
    wire.jpg
    28.6 KB · Views: 99
  • 77.jpg
    77.jpg
    61.3 KB · Views: 87
  • fast.jpg
    fast.jpg
    56.9 KB · Views: 90
  • bond.jpg
    bond.jpg
    68.6 KB · Views: 108
  • more_bond.jpg
    more_bond.jpg
    95.8 KB · Views: 110
Last edited:
Happy Post-Thanksgiving Holiday All~! Hope everyone had a fun and safe time with friends and/or family.

As part of my few days off, I did have a chance to spend some quality time with the first panel.

First picture is of the two types of wire provided by Magnepan in the kits to rebuild the panels. The bronze color wire is the 22 gauge for the bass panel. It is coated so remember the clean the ends with some fine-grit sandpaper before you solder!

The silver color wire is the 32 gauge used for the tweeter section. It is NOT coated so be sure you get it completely covered with the 3M FastBond so it will not corrode.

I did use the recommended procedure to affix the wire to the mylar; 3m Super 77 spray adhesive to "stick" the wires to the panel long enough to hold until the 3m FastBond locks everything together. I must say that timing is critical using the 77. Too little time for it to tack and the wires will not stick; too much time for it to tack and the wires will not stick. If you are in the magical "Goldilocks" time frame, it works quite well.

I did the bass panel first and I must tell you that once you start, it's all or nothing. Be prepared to spend about 30-45 minutes hunched over the panel in an uncomfortable position pulling wire back and forth. The only real break I got was occasionally going over to the bowl of acetone to clean the build-up of Super 77 off my fingers. btw: that's one thing that 77 sticks to amazingly well - your skin~!

Once the bass wire was complete, I began on the tweeter section. A word of caution here - the tweeter wire can be broken quite easily in the process of stringing it so be a little less heavy-handed than you were with the bass wire. I got about 3/4 of the way finished on mine and popped the wire while pulling it. I don't think I need more wire for the second panel however. The amount Mangepan sent seems to be very generous.

Once the wires were strung, I checked for continuity and then coated everything with the 3M FastBond adhesive. I was right at the edge of being in the proper temperature zone (68 degrees or above) but I managed to keep everything warm enough by using 2 halogen work lights that put off gobs of heat.

I did have a couple of spots that the end wires wanted to lift a little before the FastBond could cure. I used baco99's trick of toothpicks to hold the loops in place while everything bonded. Worked pretty well, but it will remove a chunk adhesive when the toothpick is taken out. I just spot filled with more FastBond later. Seems OK. The last 2 pics show the panel, coated with FastBond, drying.

One thing I did learn, don't shake the FastBond before application. This will introduced very small bubbles into the adhesive turning it foamy. I think it will be OK, but I think it would be better without all the bubbles.

Late last night after 4 or 5 hours of dry time, I gave the panel a very small signal as it lay on the bench. Although critical listening will be needed to make a full assessment, I DID clearly hear both bass and treble coming from the panel. It also seemed very clean and clear - again at low volume.

Fingers-crossed - but so far, so good. :yes:


Looking good! Good luck with the second one!
 
Thanks for the encouragement guys. I appreciate it.

Got a chance to pull panel #1 into the listening area last night. I realize there is only 1 panel so I am not hearing any of the imaging magic they are known for and all.... but so far, my impression is "hum, interesting". Walking around the room, it is neat how the sound floats around. I was sort-of beside the panel at one point and really could not figure out where the music was coming from. The sound is kind-of neat, but didn't knock my socks off or anything.

I have no basis of comparison so I'm not sure if I am hearing the "MG IIA Sound" or not. What I am hearing seems to be just somewhat dull. What did surprise me is the amount of bass. I suspected it would be lacking and, while not really reaching down low, what is there is very pronounced and full.

Mids are smooth, but very laid-back. Highs are not that high and need a good bit of augmentation with the equalizer to stand out at all (which you guys told me early on). One great point is NO BUZZING OR RATTLES! :D

The biggest surprise to be is just how power-hungry these things are - and you are talking to a guy that has DQ-10's as daily drivers! I had to push the panel with my Yamaha MX-1000 with 3/4 of everything it had to get a full sound. Again, 1 channel so that will be better with, 2 but still.

Not making complete judgement on them until both panels are installed, positioned and a suitable number of sources are auditioned. I have a feeling the planar design will be in my future, just not sure if it will be this model.

One thing that completely shocked me is I have this guy in the middle of the den with no sock, right? The wife comes in the room and says "those are not bad looking. I don't mind if you set them up in here".

Go figure?? She hates the little Snell E II's but doesn't mind these huge monoliths!

Women..... you just never know :dunno:
 
Last edited:
Back
Top Bottom