• The move to the new server is done. There are some software and database maintenance updates in process. This has us passing the hat around to help out. We appreciate any donations. Seriously, even a dollar helps. The payment page may be found here - https://www.audiokarma.org/support.html

Mitsubishi LT-30 restoration

Cheers, I promise that I have read both. I've gone from page 1 to 25 (now 25) several times already.
And the manual too. Some things are problematic, eg when I try to set the tonearm height, I can't because once the stylus hits the vinyl, the tonearm assemby will move by itself. Similarly when I try to follow instructions for the tracking angle adjustment, the arm angle doesn't change no matter how much I turn the screw in either direction.
 
I think the turntable is significantly damaged. It was an ebay buy and packed reasonably well, but the seller used packing peanuts to support the turntable that was wrapped in big bubble wrap (arm immobilized and platter taken off) in a big box (probably too big in retrospect). The shippers were still able to drop it with sufficient force to break one corner and loosen the metal cable - this seems to require significant force. I've tried my best to set up the tonearm based on reading this and the manual several times. I'm going to see about getting some money back and pay a professional to sort it out.
 
I never realized anything was wrong with my LT-30 until reading this thread in its entirety lol. Thanks to kotofei and the other main contributors for such a wealth of information.

So, for mine, the tonearm doesn't return after the record is done playing, and the tracking error light stays on the whole time it's being played. Are these two related? I get that the tonearm doesn't return most likely because one of the bulbs is out or there's an issue with the sensor. Is this also why the tracking error light is on?

It tracks well, plays well, and sounds amazing the way it is. Having to return the tonearm after listening to an album is but a minor nuisance. Another question, since I'm no good with a soldering iron, is should I have someone try to repair it or am I risking something else going wrong with it?
 
Only one way you’re going to learn to maintain this yourself and that is to educate yourself, which it sounds like you are doing and dig in. It’s incredibly rewarding to fix this yourself and know every time you play an LP that you made it work. All that being said, you issue sounds like a tonearm screw adjustment. From time to time I need to recalibrate the perpendicular adjustment to engage auto pick up and return.
 
Only one way you’re going to learn to maintain this yourself and that is to educate yourself, which it sounds like you are doing and dig in. It’s incredibly rewarding to fix this yourself and know every time you play an LP that you made it work. All that being said, you issue sounds like a tonearm screw adjustment. From time to time I need to recalibrate the perpendicular adjustment to engage auto pick up and return.

Thanks. I'll definitely dig in and look at the screw adjustment. Don't think I'll be picking up the soldering iron though; I've ruined enough projects to know my weaknesses. lol
 
Okay, adjusted the tracking arm angle, so all good there. TA still won't return after record is done, so I guess I'll either need to brave opening up the box and looking at the lights someday, or taking it to the local shop to get them to do it. I totally appreciate everyone's help in this thread.
 
Okay, adjusted the tracking arm angle, so all good there. TA still won't return after record is done, so I guess I'll either need to brave opening up the box and looking at the lights someday, or taking it to the local shop to get them to do it. I totally appreciate everyone's help in this thread.
Look for end of play carriage return trigger adjustment, Iirc, it's a microswitch, not a light gate.
 
Update:

Got two pairs of bulbs from Rat Shack. They did not have 12 V 0.05 A, only 0.04A and 0.06A; I got 0.06A. Bulbs are a little bit longer that the original ones but they fit. Soldering two in tonearm positioning circuit was very easy, no need to remove or unscrew anything. Another one went in the bulbholder but it was easy to replace it too.

Started the turntable; the tonearm moved to the beginning of the record , went down...and jumped back up. Oops! It appeared that the tonearm was elevated all the way up and needs to be lowered. Lowering it fixed the problem. The liftup at the end of the record worked too. The Mitsubishi is up and running!

Look for end of play carriage return trigger adjustment, Iirc, it's a microswitch, not a light gate.

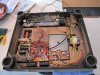
@Pio1980 I feel like kotofei's post above might be the fix. Just need to see if I can actually make sense of it and the SM. Did I mention I know nothing about electronics? lol
 
Correct, the switch is at the rest position, return is via the light gate. I like how my photo keeps popping up, brings back memories as I let go of mine a while back. Fortunately I sold another one to my neighbor so I get to hear it regularly.
 
Curious. I had disconnected the unit and moved it to a different spot. Then I thought I'd have another try. This time when I rotated the tonearm rest switch to switch on the unit, the tonearm assemby moved by itself all the way to end and then all the way back. I then went through all the steps of setting tracking force, tonearm height, stylus height, arm rest height etc. I press 'start' and it would start playing, but the tonearm assembly wasn't moving. I decided to adjust the tracking angle, I had the printed gauge, and then went through all the steps but just as I began to turn the tracking angle adjustment screw, it made the tonearm assembly move back to the rest again. I tried to turn the screw back, then more back and forth, trial and error. But no, same problem - stylus hits vinyl then tonearm will decide to go back.

I read the manual again, and then the service manual and I notice the bit about the 'on-off adjustment of tracking servo' and I see that I don't have a screw there. There's a screw hole, next to a larger rubber pad. So I'm guessing finding this screw would help. I decide to gently tilt the turntable to see if I can hear anything loose inside, but no. I connect it up again, power up and the tonearm assemby does this thing of going all the way and back again. Now pressing 'start' moves the tonearm to play, stylus drops down and it plays. Tonearm doesn't move back anymore, but stil doesn't move. I guess this screw is important. I'll need to find a suitable substitute. This is the same screw that rdt_kc had missing too. When I first read his posts, I thought he was talking about the tracking angle adjustment screw. I had seen this 'empty' screwhole before, but I thought it was for the shipping clamps that I don't have.

Question- is this some sort of 'reset' when the tonearm goes all the forward and all the way back please?
 

Attachments

  • 20200718_114519.jpg
    20200718_114519.jpg
    38.7 KB · Views: 29
Last edited:
ALL the tone arm motions are triggered by light bulbs shining through slits in metal and that illumination being detected by a photo detector opposite. The record size selection works the same way. There are 7 main bulbs that do the most work. 2 hidden deep inside the moving tone arm base, 3 easily located in a row underneath on the underside of the moving tonearm, and then 2 accessible underneath as well at the base of the prism that shines through the slots on the turntable platter mat.

On top of the base of the tonearm are two chrome steel slotted screws. These are explained in the SM. The right hand one adjusts the horizontal angle of the TA to the record. That screw is simply adjusting a cam within the base that pivots the gate that blocks the 2 photo detectors from their associated bulbs. Every time the arm swings enough from the record grooves to rotate that gate so light from a bulb is detected, the electronics nudge the base until the bulb is blocked again. So if your arm is being dragged across the record, then a bulb is uncovered the whole time, whether the arm is pivoted of not. I believe it is possible to rotate that screw past its point of return and back again. It takes less than a quarter turn align, and probably less than a half a turn to set it so it it never works right.

The left hand screw is the stylus height adjustment for raised up. It is the one that is usually seized a bit. The screw itself is not seized, but the spring loaded pin that it screws in to is. The pins total movement up and down is perhaps 3/16”. Its motion is limited by a set screw in side the TA assembly that screws in to a machined groove in the pin. The internal spring pulls the pin down, and how far down is limited by the screw head. If you notice no height adjustment from EASILY turning the screw, then it is seized. The height adjustment is huge for a few easy turns. If it is seized, you can try a drop or 2 of penetrating oil in the opening after the screw is removed. After a day or two you should be able to use the screw to pull the pin up and when you remove the screw it drops back down. If when you remove the screw it is still up, try pushing with light force on the pin and see if the pin pushes down a bit. On one of mine that was “slightly” seized, that worked perfectly to just get enough lubrication in there so it works fine again. On my other one, like Aerobats, it was seized solid and required the entire TA be disassembled to work it with Penetrating oil (I use Kroil, but PBBlaster is good too) and a vise grip after removing the pull down spring. That one I greased, and it will never seize again!!
 
The tonearm has 3 “locations”, hence the 3 bulbs, which are 1: where it rests at the power switch base, also called REST, 2: where it sets down on the lead in groove also called SOR (start of record) and 3: where it detects end of record and lifts to return, also called EOR.

These are set by fixed machined grooves in a spring loaded metal plate that the TA rides over. When you set SOR, the EOR is automatically fixed because the slot is a fixed length. When you are adjusting the SOR, the adjustment screw is located at the far right in the slotted guide that the TA rides over. The TA has to be in the play position over the platter to set SOR and REST. The two screws are adjacent to each other. When you adjust either of those screws, you are rotating a cam that has the pivot pin for a T shaped arm underneath that simply pushes that T left or right a small amount. For the SOR, the T pushes the spring loaded slotted plate left or right so the start of the groove lines up with the correct bulb to tell the TA to drop. If you rotate the screw 360 degrees, you are right back where you started. So either CW OR CCW can adjust the direction you want depending on what side of the cam lobe you are on. The REST adjustment pushed the T closer or farther from a microswitch that tells the TA to drop and turn off the platter.

I hope this clarifies the operation somewhat.
 
I should also note that we have found that if the arm is not adjusted properly squared to the record, then it is not possible to adjust the SOR (& therefore EOR) correctly. Do not trust your eyes to get it square. Print out the template to scale and adjust it to that. Afterwards, all the other settings fall easily in to place. To keep the information consistent in the same thread, the template is to scale when the center of the spindle to contact point at the TA rest under the arrow is 224mm. You double check this by also measuring the square distance from platter (& spindle) centerline to the arrow point is 205mm. If you cut out the template exactly as photoed in stiff paper stock, the distance from the left edge of the template to the arrow point will also be 224mm.
 
Last edited:
One more thing. It was mentioned that the “on-off tracking adjustment screw” was missing. It is not. It is UNDER what looks like the large rubber pad. That pad is nothing more than a cosmetic black metalized sticker covering the screw so that you don’t mess with it. The screw and internal bracket it is connected to is lock painted in place. If you were to loosen that screw, there is NO way to get the bracket back in place without total TA disassembly. It is NOT an adjustment. The threaded screw hole you see next to it is indeed just a shipping clamp bracket screw hole. Same for the screw holes in the rear of the TA. I wish someone that miraculously still has those brackets would post pics and some dimensions.
 
Here you go!

y4mcSoKKLgwf90obnZKYMRZcDcmEcnTAVo_u6b-AX51xQ7csBoiA01CztlMSH7s8X2zim0XEG9b8JywPPiI61As6PSMB2iUgrdHmTKigsujuHY_PfmBmGmFBTPHzMP5qvBKSSYxfKO81Nv8a5dVxRmCkHLDgb2pivHbq7RS5w9Wm-BmByRxx45hZFmNypW5OPEeFmAgdPlXTWtrrUVeOFIwDg
 
@perryinva Many thanks for the very enlightening information!

"I believe it is possible to rotate that screw past its point of return and back again. It takes less than a quarter turn align, and probably less than a half a turn to set it so it it never works right."

So how to recover from the situation of not knowing where the hell the cam system is please? Just keep turning in minute steps unless it goes a complete cycle? The screw in my deck doesn't seem to show any tendency to tighten or loosen, which makes sense if it's driving a cam. Weird thing is that I never see any change in the tracking angle (using a printed out alignment template).
 
Last edited:
Your first assumption that something is damaged may well be correct. But yes, relatively small adjustments is all you can do at this point. If that doesn’t work, then disassembly is required. The internal shutter that is adjusted to block the bulb light and set the angle is spring loaded deep inside the TA, and the cam works against that spring. If the spring has slipped off its mount or broke, then that could explain your random results, as when you moved it, the shutter might have simply fallen to nearly the right place, and then when operated a few times, it was pushed out of place again. Sadly, Mitsubishi could have easily designed the TA block to have a removable rear access panel to give easy access to the TA bulbs (which WILL eventually age and fail) and that mechanism.

Thanks for the bracket pic, Aerobat. That unit (your old one?) appears to be missing the sticker that covers the “on-off” adjustment. Maybe the early units (thats a low S/N) didn’t have it, and users mistakenly undid the screw while setting up the TA. Yikes!

That unit was in amazing shape, probably due to the original packing and bracket ! Finding one without damaged corners is almost impossible otherwise. There is another bracket, implied in the manual, on the side where the sticker would be, that somehow sticks a cushion pad under the TA (to get the nylon wheels off the rails, I assume). When last I moved, I cushioned the bejesus out of that area. Did that unit (if yours) also have the transformer immobilizing screw?
 
Last edited:
Back
Top Bottom