• Please note that Audiokarma will be offline briefly for updates early on Monday morning, September 28th.

NAD 1300 Recap/Restoration

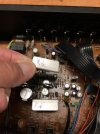
I have the preamp now- works fine looks fine. Ordered the op amps, sockets and zeners. I also got the power supply caps- same value higher voltage- as I’ll have to remove some anyway to do the zeners. Then I may move onto the rest of the caps.

I’d like to take my time with it and specify film for all the audio paths.
 
I have the preamp now- works fine looks fine. Ordered the op amps, sockets and zeners. I also got the power supply caps- same value higher voltage- as I’ll have to remove some anyway to do the zeners. Then I may move onto the rest of the caps.

I’d like to take my time with it and specify film for all the audio paths.
How did it go. I have one of these on my cue.
 
Not done yet!

Other stuff got in the way- NAD 6300 and 5300; now an Alesis HD24XD... Soon!
 
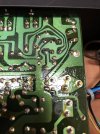
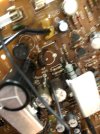
Starting today… need to positively identify the Zeeners as it was a while ago I was last in here…
 
Just measured 37.33 (+/-18.665) so voltage is a bit over max for the new opamps.

Changing zeeners is mandatory (on mine at least).
 
Went for low hanging fruit first… relay replaced (old one is fine but why not?)

IMG_2840.jpegIMG_2841.jpeg
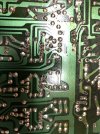
Boards are filthy by the way. Old flux I guess. I scrubbed the hoard where the relay mounts after I removed it… while board will get a bath when I’m done here.
 
All done with the sockets. Taking a break… I had to repair a few lifted pads on the last couple. All went well and I’m just going to check voltage before I jam the new opamps in.IMG_2843.jpegIMG_2844.jpegIMG_2845.jpegIMG_2846.jpegIMG_2847.jpegIMG_2848.jpeg

I also saw the board was warm around the voltage regulators. Knee jerk was I should have ordered them but it was just that the pads had lifted and the regulator (and heat sink) were sort of floating above the board. I fixed that too and made my first retrace repair here too.

I think it might even work!
 
Verified 32v on all sockets (+/- 16v) near the top of the range but good.

I’m happy.
 
Burn in all day today. I checked all the inputs except the phono and all good.

Discovered slight noise on the tone pots so a dose of F5 cleared those right up. Seems to be working well!
 
Thanks for sharing all the details on this. I just purchased a 1300 on the 'bay and eager to start down the road on this as my next project. This thread has been helpful as the 1300 is the most complicated one I've taken on yet. Few questions come up:

1. The main power supply caps you upped to 2200 uF? If I'm reading correctly those are C605/606 in the service manual? (listed as 470uF/50V stock) - Did you up capacitance of those secondary caps (C607/608)?
2. Looks like you went with brackets and modern snap in version of the LM4562? No other changes in terms of the caps, resistors, etc needed in your experience to use those?
3. Not familiar with term zeners?

N
 
1. I only increased voltage, not capacitance.
2. I used sockets for the op amps yes.
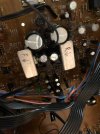
3. Zener diodes limit voltage. They must be changed as the new op amps operate at lower voltage. Power supply caps are in the way of the zeners, so it makes sense to swap them since you’re pulling them anyway for access.
 
1. I only increased voltage, not capacitance.
2. I used sockets for the op amps yes.
3. Zener diodes limit voltage. They must be changed as the new op amps operate at lower voltage. Power supply caps are in the way of the zeners, so it makes sense to swap them since you’re pulling them anyway for access.
Thanks for this - but for C605/606 you upped capacitance to 2200uf from 440 and stayed with stock on all others? In my past projects I've upped capacitance on the main power supply caps by rec of some experience forum members.

I'm hoping my 1300 arrives today so I can see what's already in there. Supposedly a hum coming from the phono stage...
 
Curious folks thoughts on the main and secondary power supply caps. I'm trying to use what I have and not make any changes too radical until I better understand the circuits, how to read schematics, etc.

C605&606 came with 470uF 50V caps and C607/608 came with 220uF 35V. I have a bunch of 680uF 50V Nichicon UPW caps leftover from previous recaps where I upped the power supply caps to 680uF from the stock 220. Any reason that should be avoided in this case? Any negative to upping the secondary power supply caps (607/8) to the same? It's been recommended by many here to go up much further but not totally clear the logic/advantages, particularly if I stick with the same values on the other caps in the power supply.
 
I personally do not increase capacitance, only voltage, unless I have clear direction to do so.

Some power supplies use the capacitors to alter the supply voltage, and changing their value will change the voltage.

The zener diode changes are necessary if you plan to update the op amps anyway, and this may take care of that.

But remember this is a preamp and therefore low gain, so not much demand on a PS...
 
The zener diode changes are necessary if you plan to update the op amps anyway, and this may take care of that.

But remember this is a preamp and therefore low gain, so not much demand on a PS...
Curious what you mean by 'take care of that'? As in needed if one is to later pursue changes to the opamps? In my previous recaps on NAD preamps I've just done upped the primary power supply caps to 680uF and left everything else at spec found in the unit (other than increasing voltage depending on what I have on hand/can source).

I do think I'll eventually follow suit of others and do the zener diodes + opamp upgrade but given there are 9 of them at ~$7 a pop I'll hold on the clean up + recap and see what's up from there. It's kinda nice to do things in stages and see if noticeable attributes change.
 
I didn't design the power supply so I'm not in a position to offer advice on what is, or is not a good idea, other than knowing once I tested it that the voltage was too high at the old op amps to support the new ones. So, the zeners had to change. Voltage at the new (sockets in my case) was verified to be acceptable before the new op amps were installed.

to get the zeners out, you need to pull caps out of the way anyway, and I didn't see much value in re-installing the old ones. I replaced all caps in the power supply with like capacitance but increased voltage over the originals.

I think the next logical step would be to upgrade the coupling caps at each op amp- they appear to be ceramic so new films should be a worthwhile upgrade. But the op amps alone bumps this thing way op in the cost:performance ratio, and it was already pretty good out of the box.
 
Any idea what the difference LM4562MA and LM4562MAX is? One is designated MA and the other MAX. Only different in specs I see is in the packaging perhaps.

Are these the SMD to through hole adapters I'd need?

Finally, I assume any through hole zener diode of 16v will do? A few options from Vishay & Microchip (only manufacturer names I recognized). It looks like there are just two (D602 & 603) but there is a zener at D601 as well. Does that need to be swapped for a 16v?
 
Last edited:
My post number 66 in this thread shows the op amps I used and their spec sheet. You have to compare the details of the spec sheets of different chip makers to make an informed decision. But that is marked as (designed for) "high performance audio amplifier" And the referenced chips I used are through-hole. They could be soldered direct to the board, but I chose to put the sockets in. That doesn't have to happen. If the chips you decide on are SMDs then you will need an SMD to through hole adapter for them. Personally, I don't like SMD as they can be difficult to work with, but I have worked with the successfully on the Wyn Palmer designs.

But I would say the "worst" 4562 will be significantly better than the "best" 2043 due to so much evolution in between them.

I don't have the list of what specific zeners I bought but they are sold by voltage. I ended up with +/- 16V at the chip socket (as stated above) in my case, and it could be a bit lower still. Again, check the ratings of the specific chips you plan to use and adjust the power supply to make it happy.

I feel like an EE right now trying to explain this, but (first of all, I'm not an EE), if it seems too daunting, perhaps step back and having a qualified repair center do the upgrades for you is the right answer.

 
Back
Top Bottom