• The move to the new server is done. There are some software and database maintenance updates in process. This has us passing the hat around to help out. We appreciate any donations. Seriously, even a dollar helps. The payment page may be found here - https://www.audiokarma.org/support.html

Nelson Pass F5 build, Part Trois...

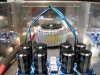
I thought I would have some really impressive progress shots for the thread, tonight. My small parts order from Digikey arrived this afternoon and the box was waiting for me when I returned from work. Unfortunately, I am under the grip of some kind of malaise. I stayed upright until about 6:30 and just woke up to another bout of swineness. Here's a couple of pics to tide us over until tomorrow.

Oh, BTW, a big thanks to Avionic for posting about his source for chassis jacks in the "Just a couple of watts" thread. The Vampire jacks are very nice and were an incredible deal. Thanks, Dave. I mounted a set of the jacks for the pics, they will be coming back out for paint.

Looking good..:thmbsp: cdfac is the one that brought the ebay source to my attention on the vampirewire stuff.
 
Last edited:
Unfortunately, I am under the grip of some kind of malaise. I stayed upright until about 6:30 and just woke up to another bout of swineness. Here's a couple of pics to tide us over until tomorrow.

Lance, I succumbed to the piggy for about a week. I missed work Tuesday through yesterday - first illness related absence in about 5 years I guess. I went through a large box of tissues in a day and a half and sported a 102 fever. Lots of sleep, liquids, and vitamin D. Try to keep the fever knocked down with Tylenol.

I like those Vampires. My binding posts were backordered so I started with the generic Parts Express offerings but about a month ago installed some nice ones from Cardas.

rest up and get well my friend.
 
Looking good..:thmbsp: cdfac is the one that brought the ebay source to my attention on the vampirewire stuff.
Well, you both done good, the Vampirewire jacks are good quality. I even picked up some interconnect ends that were a steal, IMO. I believe the seller has sold off most of the jacks but still has listed some good deals on wire products.

Lance, I succumbed to the piggy for about a week. I missed work Tuesday through yesterday - first illness related absence in about 5 years I guess. I went through a large box of tissues in a day and a half and sported a 102 fever. Lots of sleep, liquids, and vitamin D. Try to keep the fever knocked down with Tylenol.

I like those Vampires. My binding posts were backordered so I started with the generic Parts Express offerings but about a month ago installed some nice ones from Cardas.

rest up and get well my friend.
Thanks for the sympathy, Jeff. I haven't been sick for so long, I forgot what it was like. I'm guessing that we are experiencing new strains of virus, here. I've got to rethink my attitude on flu shots :D.

I did do some amp-building-therapy, put the rectifiers in, powered up the transformer, and voltages look good. I was going to start populating the boards but I am missing the resistors for the PS board (back order from Digikey) and my kits from Tech-DIY had the wrong resistor count and values. I sniffled around and went back to bed.:sigh:
 
Wow Lance, this project is looking really great! I'm definitely appreciating the metal working tips, too.
 
Thanks, Nate, the metal work is the fun part of this.

I made some progress in the last couple of days, populating the boards, making the standoffs, and mocking up the locations. Pics are attached.

I did have a bit of confusion with the Tech-DIY kits. I'm thinking that Jack had a newbie on the packaging line. I should have carded the components, entirely, when I received them and that would have eliminated a lot of confusion, reordering, and waiting for parts to arrive. Jack has sent me all the missing and different values of parts in a very timely manner. I'm sure my level of frustration is well below his. The guy ships good small parts and is doing the DIY community a tremendous favor by assembling all that is necesary for a quality build. At this time, I'm waiting for the last few resistors to arrive from Digikey to populate the last few spaces on the boards and looking forward to firing up this badboy :yes:.

I will post a BOM when I have received everything, in hand. I ordered all the small parts from Digikey so other builders may benefit from a one-shipment/one-vendor order.
 

Attachments

  • IMG_0001.JPG
    IMG_0001.JPG
    139.7 KB · Views: 150
  • IMG_0002.jpg
    IMG_0002.jpg
    69.2 KB · Views: 124
  • IMG_0003.jpg
    IMG_0003.jpg
    64.8 KB · Views: 94
  • IMG_0004.JPG
    IMG_0004.JPG
    125.4 KB · Views: 125
Does this incorporate a softstart or speaker protect circuit? Anything more than 300VA transformer,I would use a softstart..
 
Last edited:
Does this incorporate a softstart or speaker protect circuit? Anything more than 300VA transformer,I would use a softstart..
The design calls for two NTC thermistors to be placed on the AC circuit. I have them on hand and will be connecting them on the transformer primaries. I believe I should mount them on some sort of terminal for safety concerns. I had thought about soldering them onto the transformer leads. What do you think?

The amp boards have current limiting and feedback circuits that protect against any DC to the outputs.

Thermistors have been installed on the primary transformer lines for a softer start. I'm really tickled with this particular piece, using part of the plastic display hanger of a Craftsman ratchet for the terminal cover.
 

Attachments

  • IMG_0001.JPG
    IMG_0001.JPG
    141.5 KB · Views: 134
Last edited:
got my Tech-DIY package yesterday, missing two pots, everything else is fine, time to populate a board or two. A few of the resistors are a little long for the
Paul Daniels board, I'll either order some caddock that fit, or stand them up soldier style.

Russellc
 
Here's my first few parts installed, I was missing to pots in one of the kits, but I've emailed and all should be well. These cards are really tiny, actually smaller than a business card.

Question: Are you guys using the standard values for R11 and R12, R5 and R8,
R1 and R2, or going with the modified feedback, 1 ohm for R11 and R12, 100 ohm for R5 and R8, 22 ohm for R1 and R2 suggested by Nelson Pass?

Allegedly makes the amp a little more full and warm. Some posters think it may go a little to far....

Russellc
 

Attachments

  • IMG_2261.jpg
    IMG_2261.jpg
    59.9 KB · Views: 100
  • IMG_2262.jpg
    IMG_2262.jpg
    89.3 KB · Views: 96
got my Tech-DIY package yesterday, missing two pots, everything else is fine, time to populate a board or two. A few of the resistors are a little long for the
Paul Daniels board, I'll either order some caddock that fit, or stand them up soldier style.

Russellc
I bought a few of these when i ordered parts for my f5, they are certainly cool and 'might' just be the ticket for your board... check them out!
here they are.@ 1/16 thick if you are interested.


resistor001.jpg

resistor002.jpg

resistor005.jpg


this project looks great!!!
cheers,
tal
 
The design calls for two NTC thermistors to be placed on the AC circuit. I have them on hand and will be connecting them on the transformer primaries. I believe I should mount them on some sort of terminal for safety concerns. I had thought about soldering them onto the transformer leads. What do you think?

The amp boards have current limiting and feedback circuits that protect against any DC to the outputs.

Who am I to second guess Nelson..:D
 
If you'd like to second guess Nelson, he shows in explicit detail how to remove the protection circuits...
 
Here's my first few parts installed, I was missing to pots in one of the kits, but I've emailed and all should be well. These cards are really tiny, actually smaller than a business card.

Question: Are you guys using the standard values for R11 and R12, R5 and R8,
R1 and R2, or going with the modified feedback, 1 ohm for R11 and R12, 100 ohm for R5 and R8, 22 ohm for R1 and R2 suggested by Nelson Pass?

Allegedly makes the amp a little more full and warm. Some posters think it may go a little to far....

Russellc
I'm going with the original design values. I had forgotten about the 10 ohm to 22 ohm conversion. I might give that a whirl.

Who am I to second guess Nelson..:D
No problem with reworking his designs. My take is that he likes different ideas and implementaions using his designs.

If you'd like to second guess Nelson, he shows in explicit detail how to remove the protection circuits...
Exactly, the F5 is so easy to rework. There is basically nothing in the way to prevent tweaking the circuits at a future time. If the sound is not what you like, change a few things and experiment. I'm thinking that the original design is going to work out well.
 
Nice work Lance. I'm looking forward to you getting it done and having a listen.

Build away so I can commission you to build me a F1.
 
Nice work Lance. I'm looking forward to you getting it done and having a listen.

Build away so I can commission you to build me a F1.
Thanks, Gary.

It sounds like I might be able to get ahold of some of that "stimulus" money after all, then.:D
 
Last edited:
Here's my first few parts installed, I was missing to pots in one of the kits, but I've emailed and all should be well. These cards are really tiny, actually smaller than a business card.

Question: Are you guys using the standard values for R11 and R12, R5 and R8,
R1 and R2, or going with the modified feedback, 1 ohm for R11 and R12, 100 ohm for R5 and R8, 22 ohm for R1 and R2 suggested by Nelson Pass?

Allegedly makes the amp a little more full and warm. Some posters think it may go a little to far....

Russellc

Aren't R11 and R12 the mosfet source resistors? I think going to 1 ohm would lower damping and provide less output power.

I stuck to stock values for the feedback stuff, I changed the values R21 and R22 to 22k. I haven't tested to see if my protection actually works though - testing it might cause some damage if it doesn't. I am pretty careful not to short the outputs.

I haven't seen the suggestions to change the feedback except by people trying to get a little more gain; though I have read all 550 pages of the F5 thread I could easily have missed it. If you know the post number (or general range) where it was discussed, I would like to take a look at it.

If you are using the PDaniels board like I did, make sure you install R5 - R8 into the correct holes or you will end up with no feedback like I had. Use the holes outside the resistor outline.


Ask Nelson, it was his idea, he says to make the amp a little less clinical and a little more warmth. You must have missed it. Others comment it goes to far in the other direction.

Russellc
 
If you are using the PDaniels board like I did, make sure you install R5 - R8 into the correct holes or you will end up with no feedback like I had. Use the holes outside the resistor outline.


With the 100 ohm 3 watt blue panasonics, I had no choice but to go with the
"longer" holes.... What resistors did you use, or did you stand them up? I would have assumed the "shorter" hole would have worked, did you ask Peter about that?

I'll try to locate the post by Nelson about the feedback, I took notes during my read to try to simplify finding things during construction. I'll post pics of the stuffed boards.....

Russellc
 
Back
Top Bottom