

You are using an out of date browser. It may not display this or other websites correctly.
You should upgrade or use an alternative browser.
You should upgrade or use an alternative browser.
New Project Very Early TD 124


adnick
Addicted Member
Ooooh, looks pretty. Love the grain in that wood. Is this getting the same inside treatments as the Russco tables?
BillWojo
Bill, thanks buddy, it will even look better with some oil and wax

Yes essentially the same as the Russco’s , layered material to dampen and attenuate, but I’m adding to the attenuation material which was mostly plywood in the past. Have some mdf type material with a thermal reflective material glued to one side so thought I’d try that. I’ll take some pictures when the layers are getting put together…
Andy
adnick
Addicted Member
Was tied up with other things today, but yesterday I’d made some progress just didn’t get around to posting photos until now…keep in mind this is just the dry fitting, nothing is glued together. Big problem, I’m running out of my special Bubinga gonna have to figure a work around…
Maybe I’ll get back to it tomorrow afternoon…
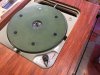

Maybe I’ll get back to it tomorrow afternoon…

The speed selection ribbon came in from the UK today, probably the most complicated little part to replace…great tutorial here: https://www.theanalogdept.com/59805.htm
The two separate ends require some disassembly for the install, she’s working at all speeds again now
View attachment 2449272 View attachment 2449273
Very nice work. Enjoying your thread. Could you please share the vendor for the speed selection ribbon? Thanks.
adnick
Addicted Member
Very nice work. Enjoying your thread. Could you please share the vendor for the speed selection ribbon? Thanks.
Thanks, glad you’re enjoying it…Got the part on the suggestion of @musiqlovr (Steve) couldn’t find one at any of my known parts suppliers, so Steve recommended Ray at https://www.classichifi-shop.co.uk/ and sure enough he had one for about 1/5 the cost of Hanze, if Hanze had one
VR
Andy

adnick
Addicted Member
Andy - you’re making great progress in short order. You have some great skill here. Curious about a couple of things. Is the open space on the back of the table for a second armboard? Second, appears the left side is a bit wider than the right. Assume it’s purposeful?
It's marvelous but aren't you gonna have a hell of a time trying to level the TT in the plinth using the 4 knurled knobs? I mean you're gonna have to pull the chassis out of the plinth for each tiny adjustment. Am I missing something?
Appreciate the comments
Good questions, I’ll try to answer, the reason for “try” is that I’m still deciding how to accomplish or implement some of this…
The open space at the rear is possible arm board locations, but it’s actually that way in the photo because I was too tired to continue

Need to take a photo of the substrate plywood, there’s circles drawn with a compass/divider at 12”, 10.5”, 10”, & 9” This allows me to visualize possible locations for different tonearms.
Yes in the dry fit there’s more wood on one side than the other, and it’s intentional, but the reason for it isn’t apparent yet.
Regarding table leveling, never liked the look of the TD 124s that have an obvious gap between the table and plinth, setting up in the air. It’s just a personal preference, not knocking anyones table.
Here’s several possible approaches:
If one mounts the table secured against the plinth then there’s no need to level the table separately from the plinth.
The plinth design is really a plinth within a plinth, and the top plate, what I term “show wood” doesn’t have to be permanently attached; this type of approach would allow for the use of the rubber bumpers and leveling with the wheels on the substrate. This could be done with or without the rubber bumpers.
Haven’t decided on which Approach I’ll use, but the internal plinth is of a layered design and incorporates both attenuation and dampening material so the proverbial thing to do is, secure the table against the internal plinth. I’m going to test it both ways, with and without bumpers, with a test record and oscilloscope, we’ll see which is the quieter approach

Questions like these always makes me reflect on my design thoughts….
Andy

tnsilver
Stereo Puppy
Sounds good to me. If you can take off the top, level it, then put it back... All good!The plinth design is really a plinth within a plinth, and the top plate, what I term “show wood” doesn’t have to be permanently attached; this type of approach would allow for the use of the rubber bumpers and leveling with the wheels on the substrate.




Lapslah
Super Member
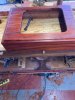
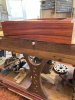
Working off an on the last few days has gotten me closer, but my test fit, didn’t fit
I hate it when that happens! That bubinga is really going to be beautiful, though.
adnick
Addicted Member
I hate it when that happens! That bubinga is really going to be beautiful, though.
Yeah when working in solid lumber and being a little overly concerned with tolerances, there’s always “slight” changes and/or corrections needed.
For those wondering, the wood will naturally expand/contact from front to rear, but not left to right, as viewed in the photos. There’s always little issues with natural wood, and it can do things over time that many consider undesirable, but I still prefer working with it.
Also the yes, the Bubinga is striking, the show wood represents about $200 in semi-rough material and about a week of labor, which could be cut down by probably 1/3 or more by using machines, but the fitting still needs a hands on approach.
The labor involved in a layered plinth construction out of natural wood is generally cost prohibitive for many, as stated somewhere within this post it’s really 2 plinths combined.
Given a existing pattern and equipment the production labor can be drastically reduced especially working in plywood and/or fiber boards and veneer.
I’m also trying a different dampening material in this build, pictures coming soon…..
Lots still to do, but the music is lovely dark and deep as it is
Andy

Nice mitre's.
Have you ever tried dovetail jointery? I love the stability and strength. You'll never see a corner swell and open up.
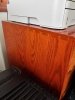
This cabinet is 48"W X 19" D X 28" H. I built it years ago to hold my CD''s.
I glued up smaller boards, alternating the grain to cancel cupping and twisting. I began with long boards, cut so when the carcass was assembled the grain would appear continuous from one side to the next. I aligned the grain for the drawer fronts for the same reason.

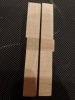
When I had the Garrard 301 I started working on a plinth by gluing up different colors of maple boards. I wanted to create a natural looking stripe in each panel for the plinth.
After I gave the 301 back to my friend I misplaced the panels. The cutoff is all that remains.
My boards will turn up one of these days..
II saw a book years ago titled "All about Wood". I opened it and the first sentence was "Wood comes from trees".
I was amused thinking this book is really going to start from the beginning of the story.
The author explained further: Wood comes from trees and is therefore unpredictable.
That's the challenge. Not insurmountable, it just takes a lot of planning and the right tools.
Keep up the good work!
Have you ever tried dovetail jointery? I love the stability and strength. You'll never see a corner swell and open up.
This cabinet is 48"W X 19" D X 28" H. I built it years ago to hold my CD''s.
I glued up smaller boards, alternating the grain to cancel cupping and twisting. I began with long boards, cut so when the carcass was assembled the grain would appear continuous from one side to the next. I aligned the grain for the drawer fronts for the same reason.
When I had the Garrard 301 I started working on a plinth by gluing up different colors of maple boards. I wanted to create a natural looking stripe in each panel for the plinth.
After I gave the 301 back to my friend I misplaced the panels. The cutoff is all that remains.
My boards will turn up one of these days..
II saw a book years ago titled "All about Wood". I opened it and the first sentence was "Wood comes from trees".
I was amused thinking this book is really going to start from the beginning of the story.
The author explained further: Wood comes from trees and is therefore unpredictable.
That's the challenge. Not insurmountable, it just takes a lot of planning and the right tools.
Keep up the good work!
adnick
Addicted Member
Nice mitre's.
Have you ever tried dovetail jointery? I love the stability and strength. You'll never see a corner swell and open up.
View attachment 2457665
This cabinet is 48"W X 19" D X 28" H. I built it years ago to hold my CD''s.
I glued up smaller boards, alternating the grain to cancel cupping and twisting. I began with long boards, cut so when the carcass was assembled the grain would appear continuous from one side to the next. I aligned the grain for the drawer fronts for the same reason.
View attachment 2457680
When I had the Garrard 301 I started working on a plinth by gluing up different colors of maple boards. I wanted to create a natural looking stripe in each panel for the plinth.
After I gave the 301 back to my friend I misplaced the panels. The cutoff is all that remains.
My boards will turn up one of these days..
View attachment 2457681
II saw a book years ago titled "All about Wood". I opened it and the first sentence was "Wood comes from trees".
I was amused thinking this book is really going to start from the beginning of the story.
The author explained further: Wood comes from trees and is therefore unpredictable.
That's the challenge. Not insurmountable, it just takes a lot of planning and the right tools.
Keep up the good work!
Excellent work, yes dovetails are required aren’t they? I’ll post a few examples, all done by hand….

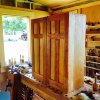

The work bench has a variety, next is a tool cabinet in progress and then my armp/transformer case…

Ilikevinyl
Cool Breeze
Nice plinth, Andy! Excellent craftsmanship! 
Excellent craftsmanship!
adnick
Addicted Member
Beautiful workmanship.
I love dovetails, can't beat the strength of wood.
Rich:
Meant to say that drawers are great practice, and have to be precise, very nicely done!
adnick
Addicted Member
Nice plinth, Andy!
Appreciate the comments
adnick
Addicted Member
Working on the layers now, trying some new dampening and attenuation materials. One is aluminum backed fiber/particle board, and the other is aluminum backed foam. The aluminum backed foam is sold as automotive sound and heat protection, I’ll use it between several layers….we’ll see how they work together.


Thank you.Rich:
Meant to say that drawers are great practice, and have to be precise, very nicely done!