• The move to the new server is done. There are some software and database maintenance updates in process. This has us passing the hat around to help out. We appreciate any donations. Seriously, even a dollar helps. The payment page may be found here - https://www.audiokarma.org/support.html

Official AR Turntable Owners Thread

I believe his method of doing all this changed over time so I'm not sure he continued using the plate to locate and hold the lead pucks.
He continued to experiment with and tweak his design. He continued to us the collector plate, and would use standoffs to put more room between the weight and the sub chassis. This would require a taller plinth. He also switched to flatter biscuits as opposed to the hockey pucks. They were flatter and easier to balance across the chassis. @Hose53 may be able to add more detail. He knows more than I do on this subject.
 
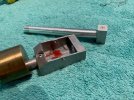
Correct me if I'm wrong but the purpose of mass loading an XA/XB is to lower the vertical center of gravity of the T-bar and both platters so it is at the top of the springs. The original design had the CG of the whole suspension/platter system above the springs so it was more susceptible to (technical term) wobble side-to-side. Also, I believe it is important to locate the mass so it is equally applied to the three springs. Eliminating that wobble was thought, and I think does, improve the sound by reducing later forces on the stylus. When Marc Morin modded my XB he used an acrylic plate that located the three carefully sized lead pucks into the correct vertical and horizontal location to move the CG down and load the springs equally. I believe his method of doing all this changed over time so I'm not sure he continued using the plate to locate and hold the lead pucks. This is my XB's mass loaded T-bar during assembly using the acrylic plate:


I just want to point out the real purpose of mass loading these TTs is to reduce horizontal movement and that the weight added to the T-bar must to be located in the correct horizontal and vertical position otherwise the benefits will not be fully realized or the results even made worse from the original design.

Yes you are right, lowering the CG and adding the proper amount of weight to each spring so they all are set at the same tension is the goal. Adding weight to a tables subchassis and not compressing the springs equally will cause the arm to bounce, or jounce as Marc said, at different frequencies or rates. I set my springs to around 33-35mm of compression which seems about right.
 
The suspended mass should oscillate at a rate of 3.5 Hz. You can check this visually by counting "bounces" with a stopwatch. 7 "bounces" should take two seconds.
 
NOTICE !!! AR XA turntable for sale in barter town for $50 !!!! I have too many so just informing those here .

Its in the Turntables for sale in NYC post.

Hope this sent breaking any rules .

Athanasios
 
View attachment 2907201 How do you take out the white plastic tube from the tonearm? I need to re-wire the head.
I just did this and found good way to do it.

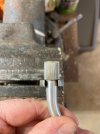
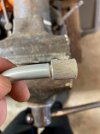
I used a 10mm wrench and put it in a bench vice (pic1). The wrench will fit right over the tone arm but is smaller than the part you turn to tighten. I held the tone arm in the same orientation it's in when it's installed (so, the top is up). Then I slowly pulled back and rocked it side to side. It takes a little while but eventually it will loosen and then come out. Once I got it partially off (pic2) I put a drop or two of isopropyl alcohol hoping it would break the glue bonds a bit. Not sure if that did anything or not.

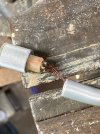
To put it back in after re-wiring I just reassembled everything and placed the plastic part face down on the top of the bench vice and pushed straight down. There are two dimples on the sides of the tone arm tube and they line up with two slots on the side of the plastic piece. I cleaned up any old glue on the plastic part with a tiny screwdriver first and also added a small amount of lubricant (called Lubra-Film that is designed for using on rubber O-rings). It popped back into place with no problem at all.

I had an issue with the connections at the plastic piece end and had to take it apart again and the second time it was very easy to take apart and put back together.

I was using the article on Vinal Nirvana as a guide but I think the way I did it worked better.
 

Attachments

  • pic1.jpg
    pic1.jpg
    60 KB · Views: 33
  • pic2.jpg
    pic2.jpg
    57.5 KB · Views: 33
  • pic3.jpg
    pic3.jpg
    108.8 KB · Views: 33
I followed the vinylnirvana and was a bit too careless and ruined the wand. I like how JamesStevens did his, maybe the IPA helps to loosen the glue? I had the devil of a time loosening it. Just take your time and be careful, don't over do it like I done.
 
After re-wiring the tone arm with the Cardas Tonearm Rewire Kit I've had some issues with the ground wire from the tone arm being too stiff and causing the tone arm to pull to one side. I took a few strands of the shielding wire from an old rca cable twisted it to make the wire.

I'm thinking of trying it again but with fewer strands.

Any suggestions for what would be the best wire to use that won't exert too much resistance in the arm's movement?

Thanks.
 

Attachments

  • tone_arm_ground.jpg
    tone_arm_ground.jpg
    58.6 KB · Views: 36
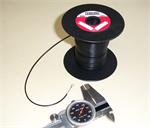
After much searching I've found what I think would be the perfect AR tonearm cable. Only problem is the 200' minimum buy.


We just need to sign up 100 people for a group buy...
 
After much searching I've found what I think would be the perfect AR tonearm cable. Only problem is the 200' minimum buy.


We just need to sign up 100 people for a group buy...
Stuart and I use the tone arm wire Marc used. We purchase it in 25' lengths. it is 36 AWG Ultra from a source I believe in Indiana through the bay site.
If someone needs a set of wires we can work something out
 
I've been offline quite a while, and just jumped back in. Over the winter, I rewired my xa, and put on a technics sl d2 wand as well, after botching the socket removal. I used the cardas kit as well, but I bought an extra couple feet of black, the same gauge, for ground, and braided it all together, the twisted pairs as two of a three way with the ground. It worked out perfectly but that stuff is hard to strip and solder.
 
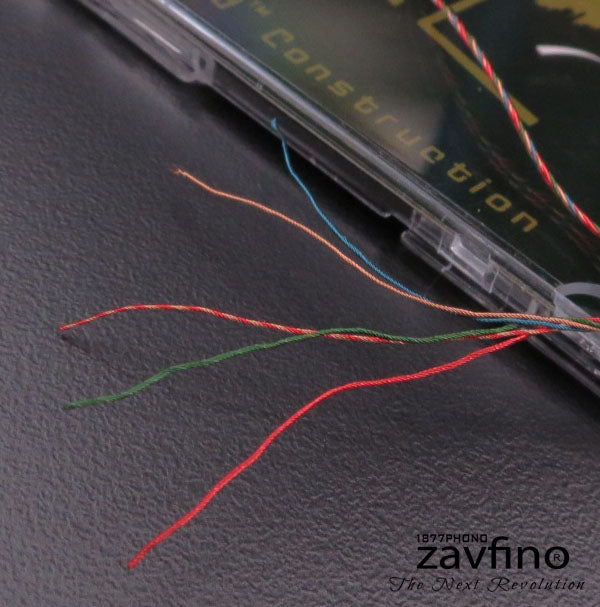
I never liked the Cards wire for the AR, too thick in my opinion. I prefer the Phono 1877 wire.

Nashou
this is the stuff I prefer


5litz1_2048x.jpg
 
I don't know why I didn't think of this originally, but I re-did the ground wire using the original shielding after pulling the wires out of it. I braided it around the Cardas wires so there is only the single group of wires braided together.

Hooked everything back up and it seems to be good now. I can move the arm to any position and it stays there without trying to swing back. :banana:
 

Attachments

  • new_wires.jpg
    new_wires.jpg
    60.6 KB · Views: 38
Here's my official AR XA pics post.

Picked it up on ebay from a seller who said he got it from a storage unit and didn't know much about it. The pics showed it was in it's original box and had a few accessories so I took a chance on it. When I got it I found that the tone are wires were broken off right about where the rubber grommet goes through the plate. The plate was pretty ugly and pitted but the plinth was in good shape except for being loose in two corners. I striped and primed and painted the plate with a gloss black, glued the plinth back together and polished up all the metal parts as well as I could. I had to buy a new belt and the ball bearing for the tone arm and a new diamond stylus for the Shure M91E cartridge that came with the turntable. The motor was making noise at startup so I oiled it and let it run for a couple of days and it's almost silent now. I need to polish up the plinth with some feed and wax and it will look even better.

I think it's from around 1970. You can see in one of the pics that it has the squared off end on the pivot for the tone arm.

I thought one of the receivers I have had phono input but no, so I picked up an ART DJPREII preamp.

After a little tweaking and setting it up it sounds great.
 

Attachments

  • ar9.jpg
    ar9.jpg
    101.4 KB · Views: 69
  • ar8.jpg
    ar8.jpg
    53.3 KB · Views: 67
  • ar7.jpg
    ar7.jpg
    123.3 KB · Views: 65
  • ar6.jpg
    ar6.jpg
    95.3 KB · Views: 62
  • ar5.jpg
    ar5.jpg
    75.9 KB · Views: 61
  • ar3.jpg
    ar3.jpg
    146.2 KB · Views: 59
  • ar2.jpg
    ar2.jpg
    99.2 KB · Views: 58
  • ar1.jpg
    ar1.jpg
    94.6 KB · Views: 65
 
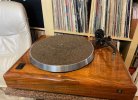
Has anyone tried to do a solid wood plinth for the AR THE TURNTABLE model? I’ve seen a lot of beautifully modded plinths for the AR XAs and XBs here but not so for The Turntabe.
 
I have been using Dave’s (VN) Linn type springs for quite a while on most of my AR rebuilds, problem was the subchassis always needed extra weight to compress the springs to the proper tension rate for proper jounce. Problem is some customers were just looking for an original restoration and no modifications or altering the table from original. In a conversation with Dave I asked if he could make springs similar to the original AR XA springs and he said why not. Fast forward, he know has the springs and I have used them on three tables with very good success, here’s a pic of the last table I am in the middle of building with the new springs.
SZx6uJ4.jpg
 
Back
Top Bottom