

You are using an out of date browser. It may not display this or other websites correctly.
You should upgrade or use an alternative browser.
You should upgrade or use an alternative browser.
Pcb adapter for smd.
- Thread starter Hifibythekg
- Start date

Hifibythekg
Super Member


Hifibythekg
Super Member
If... the specs should match, it’s nice to see the emphasis on ‘ultra low noise’ and ‘precision matching.’
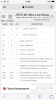
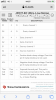
Full info here..
https://www.ti.com/product/JFE2140
Full info here..
https://www.ti.com/product/JFE2140
Hifibythekg
Super Member
From what I’ve gleaned from comments on the internet so far, the JFE2140 looks to be promising. However, if there’s something clearly amiss in the specs it would be good to hear before fitting.
And credit to Nashou for putting in the time and effort for designing an adapter that will hopefully be a more elegant way of fitting it onto the boards.
And credit to Nashou for putting in the time and effort for designing an adapter that will hopefully be a more elegant way of fitting it onto the boards.

Well I ordered some of the 2140's and have some boards coming my way.
I can send you a populated board @Hifibythekg if you want to be the first to try since you have a dead 2sk100 .
My A-1'a are working well and no need to really try the 2140's.
@rottalpha would any damage down steam happen to say the outputs with trying these ?
I looked at the basic specs and it seem they may work .
Also on DIYaudio they talk about using it as replacements . There might need to be some tweaking of the circuit surrounding it, possibly resistors or caps etc .
Athanasios
I can send you a populated board @Hifibythekg if you want to be the first to try since you have a dead 2sk100 .
My A-1'a are working well and no need to really try the 2140's.
@rottalpha would any damage down steam happen to say the outputs with trying these ?
I looked at the basic specs and it seem they may work .
Also on DIYaudio they talk about using it as replacements . There might need to be some tweaking of the circuit surrounding it, possibly resistors or caps etc .
Athanasios
Hifibythekg
Super Member
Thanks Athanasios, that would be great, I’ll DM you.
Any others who could advise, please do so.
My A-1, after a lot of work, is now working beautifully except for the intermittently troublesome 2SK100.
@Nashou66 Please feel free free to post the stuff for adaptation of surrounding circuits in case others can add advice.
Any others who could advise, please do so.
My A-1, after a lot of work, is now working beautifully except for the intermittently troublesome 2SK100.
@Nashou66 Please feel free free to post the stuff for adaptation of surrounding circuits in case others can add advice.
Not sure that is the case with the TI, but it would be interesting to figure out.
Nothing against TI. I look forward for some good uses.
before you guys go down this rabbit hole, has anyone looked at the actual specs of these devices in relation to the SK100? What about rank? would the circuit accept any rank? or work the same with any IDSS? What about transconductance?
Yeah I just looked at the basics but further inspection has me wondering about IG and as you mentioned IDSS .


And the circuit for the A-1 its used in on the Pre amp board. IC 401,2

And in the Drive board IC 701,2 .

Last edited:
Well I made the adapter board for the JFE 2140 . Still need to test it in circuit. Might be next week or the week after.
Here are the pics and the test from my DCA pro75

These are the graphs of #1 board with each half of the 2140 , as you can see they match very well.


And #2 Board


Athanasios
Here are the pics and the test from my DCA pro75
These are the graphs of #1 board with each half of the 2140 , as you can see they match very well.
And #2 Board
Athanasios
Reposted from the yamaha forum
@Hifibythekg
Well its a no go. Installed it in one side of the drive board and relay didn't click and it had 50+ dc on the test pints for dc offset and re installing original now has 50+ DC on the test point for that side of the driver board DC offset adjustment also. Also 50+ dc on both sides of the output emitter transistors and one of the small transistors against the heat sink.
So that chip is a not well suited for this application. The chip survived as it still reads ok on the peak meter. I will need to remove the original 2SK 100 I put back in and see if any damage now to that, but I think not.
So as @rottalpha said , probably a redesign of some of the circuit would need to happen. And there are other J-Fets in the to92 package that would work where you would just need to thermally couple them to each other.
I was willing to use one of my 5 A-1's as a sacrificial lamb for this experiment. I'll put it on the shelf and
figure out which component/s blew . Either on the drive board or main cap board. Since the emitter resistors seem to be ok I assume so are the main output devices.
Oh well , we tried .
Athanasios
@Hifibythekg
Well its a no go. Installed it in one side of the drive board and relay didn't click and it had 50+ dc on the test pints for dc offset and re installing original now has 50+ DC on the test point for that side of the driver board DC offset adjustment also. Also 50+ dc on both sides of the output emitter transistors and one of the small transistors against the heat sink.
So that chip is a not well suited for this application. The chip survived as it still reads ok on the peak meter. I will need to remove the original 2SK 100 I put back in and see if any damage now to that, but I think not.
So as @rottalpha said , probably a redesign of some of the circuit would need to happen. And there are other J-Fets in the to92 package that would work where you would just need to thermally couple them to each other.
I was willing to use one of my 5 A-1's as a sacrificial lamb for this experiment. I'll put it on the shelf and
figure out which component/s blew . Either on the drive board or main cap board. Since the emitter resistors seem to be ok I assume so are the main output devices.
Oh well , we tried .
Athanasios
Ok, new development !!!!!!
After my initial disappoint that it didn't work I had no plans to try to figure out what went wrong.
I did some landscaping work at my restaurant and then came home. I was going to do some more at home yard work but the last three hours at work led me to tire of that.
So I decided to go down to my lab and see if I could do a little trouble shooting.
I could not adjust idle current voltages along with the DC offset on that channel. And I remember that I had the same issue with my JDM A1 a few months back and it was the dirty legs of the 2SK 100 . SO I inspected the chip closely and found that the trace to one of the gate pins was gone , severed !! It must have happened while desoldering the chip from the onset. I must have not noticed it when I soldered int he JFE 2140 board.
Here is the pic, dont mind the crappy solder job it was just to put it back together quickly as not to loose the chip.

So I made a jumper and fired it up and the relays clicked on!!! YES !!!
Next I removed the Sk100 and installed the JFE 2140 and fired it up and hooked up the DMM to the DC offset test point to see what was amiss.
No Relay click !! CRAP!!! HOWEVER I noticed the DC offset was not at 50+ but at about 3.5 vdc, SO I adjusted the trimpot hoping I would have enough range and the relay clicked on!!!! I was able to get it to the 10 mv and hooked up my function generator and fed it a 1khz sine wave at 100mv and turned up the volume to see if the scope showed the wave , and there it was in all its glory!!! Listened with head phones and I never was so happy to hear that annoying 1khz tone , I cranked it !!! lol
Jumper for Gate pin .


And the 1kHz sine waves.

The pins on the adaptor board a little larger than the existing holes and need to be drilled out.
Not sure why Yamaha put the chips on the vertical board but I may try to just remove that board and instal the assembly right to the main board. If its an issue I can alway make a taller board to bring the chips up off the main board like Yammys board. Shouldn't cost more.
Next is testing with music and speakers. On this unit the transistors that feed the relays are loose as I have to tap them to some times get the unit to turn on and get the relays to click .
It has not been worked on so it needs some TLC. this might be a rebuild with the new chips
So good news for now !!!
Athanasios
After my initial disappoint that it didn't work I had no plans to try to figure out what went wrong.
I did some landscaping work at my restaurant and then came home. I was going to do some more at home yard work but the last three hours at work led me to tire of that.
So I decided to go down to my lab and see if I could do a little trouble shooting.
I could not adjust idle current voltages along with the DC offset on that channel. And I remember that I had the same issue with my JDM A1 a few months back and it was the dirty legs of the 2SK 100 . SO I inspected the chip closely and found that the trace to one of the gate pins was gone , severed !! It must have happened while desoldering the chip from the onset. I must have not noticed it when I soldered int he JFE 2140 board.
Here is the pic, dont mind the crappy solder job it was just to put it back together quickly as not to loose the chip.
So I made a jumper and fired it up and the relays clicked on!!! YES !!!
Next I removed the Sk100 and installed the JFE 2140 and fired it up and hooked up the DMM to the DC offset test point to see what was amiss.
No Relay click !! CRAP!!! HOWEVER I noticed the DC offset was not at 50+ but at about 3.5 vdc, SO I adjusted the trimpot hoping I would have enough range and the relay clicked on!!!! I was able to get it to the 10 mv and hooked up my function generator and fed it a 1khz sine wave at 100mv and turned up the volume to see if the scope showed the wave , and there it was in all its glory!!! Listened with head phones and I never was so happy to hear that annoying 1khz tone , I cranked it !!! lol
Jumper for Gate pin .
And the 1kHz sine waves.
The pins on the adaptor board a little larger than the existing holes and need to be drilled out.
Not sure why Yamaha put the chips on the vertical board but I may try to just remove that board and instal the assembly right to the main board. If its an issue I can alway make a taller board to bring the chips up off the main board like Yammys board. Shouldn't cost more.
Next is testing with music and speakers. On this unit the transistors that feed the relays are loose as I have to tap them to some times get the unit to turn on and get the relays to click .
It has not been worked on so it needs some TLC. this might be a rebuild with the new chips
So good news for now !!!
Athanasios
Hifibythekg
Super Member
It’s late here but I just wanted to say that this is very promising.
Wonderful instructive post.
So hoping that this works out.
This ‘game’ is addictive because of the rewards that sometimes occur as the result of concentrated effort, though not always.
Well done, good luck, and look forward to hearing.
Wonderful instructive post.
So hoping that this works out.
This ‘game’ is addictive because of the rewards that sometimes occur as the result of concentrated effort, though not always.
Well done, good luck, and look forward to hearing.
Just played about 45 minutes of music with volume quite loud at about 3 O'Clock !!!! Heat sinks just got a little warm and sound was crisp and clear. Now this is an unmolested unit with no re cap or anything done to it besides using the JFE-2140 on the adaptor board.
As stated earlier the holes need to be drilled out on the Yamaha fet mounting board. I used a 1 mm drill
bit as measured with a caliper . Drill from the solder pad side . The traces are delicate so be slow and careful .
I still want to try these mounted directly to the main drive PCB removing the daughter board NA07046.
Athanasios
As stated earlier the holes need to be drilled out on the Yamaha fet mounting board. I used a 1 mm drill
bit as measured with a caliper . Drill from the solder pad side . The traces are delicate so be slow and careful .
I still want to try these mounted directly to the main drive PCB removing the daughter board NA07046.
Athanasios
Hifibythekg
Super Member
Brilliant news!
Actually, I’m very hopeful that if these JFE2140’s can safely operate as a sub for the 2SK100, they may actually be an upgrade..
I could hear a difference in sound when I swapped 2SK100’s from another unit for a faulty one in the C4. Given the tight matching that’s shown on your testing gear and TI’s spec sheets, maybe they’ll be superb.
A big turnaround in expectations in one day!
Actually, I’m very hopeful that if these JFE2140’s can safely operate as a sub for the 2SK100, they may actually be an upgrade..
I could hear a difference in sound when I swapped 2SK100’s from another unit for a faulty one in the C4. Given the tight matching that’s shown on your testing gear and TI’s spec sheets, maybe they’ll be superb.
A big turnaround in expectations in one day!
Brilliant news!
Actually, I’m very hopeful that if these JFE2140’s can safely operate as a sub for the 2SK100, they may actually be an upgrade..
I could hear a difference in sound when I swapped 2SK100’s from another unit for a faulty one in the C4. Given the tight matching that’s shown on your testing gear and TI’s spec sheets, maybe they’ll be superb.
A big turnaround in expectations in one day!
And this may also work for other similar style dual J-fets out there.
Regarding the scope images , They might be closer if I used the same probes. Ironically I have 6 probes and none are the same !! I need to get two that are equal so I can do a better comparison of channels .
Athanasios
Hifibythekg
Super Member
Ha, yes, worth procuring.
I’m wondering whether the JFE2140 will be equally happy in a C4 as an A-1?
So, at the moment your A-1 has the JFE2140 in only one channel, correct?
Can you hear a difference in the audio quality from each channel? Or is there a means of registering any difference on your testing kit?
Not trying to set you more tasks.. but am curious… main thing is this very encouraging outcome. 3 o’clock volume and crisp and clear is a perfect start, new caps etc and a run in the main system, very exciting.
I’m wondering whether the JFE2140 will be equally happy in a C4 as an A-1?
So, at the moment your A-1 has the JFE2140 in only one channel, correct?
Can you hear a difference in the audio quality from each channel? Or is there a means of registering any difference on your testing kit?
Not trying to set you more tasks.. but am curious… main thing is this very encouraging outcome. 3 o’clock volume and crisp and clear is a perfect start, new caps etc and a run in the main system, very exciting.
Ha, yes, worth procuring.
I’m wondering whether the JFE2140 will be equally happy in a C4 as an A-1?
So, at the moment your A-1 has the JFE2140 in only one channel, correct?
Can you hear a difference in the audio quality from each channel? Or is there a means of registering any difference on your testing kit?
Not trying to set you more tasks.. but am curious… main thing is this very encouraging outcome. 3 o’clock volume and crisp and clear is a perfect start, new caps etc and a run in the main system, very exciting.
Yes only one channel and I really can not tell the difference . I adjust balance at 3 O'Clock and both channels sound good, no distortion etc.
At some point more testing will be done but as of now I think its a very good solution for a faulty 2SK100 in the drive board. There are these also in the Phono Stage , but hat board is a bitch to get to
and the 2SK100 is under a metal shield , and not sure if the new assembly would fit there. You would maybe have to find another way to mount it.
Athanasios
Hifibythekg
Super Member
Thanks for the update.
Just a thought re the 2SK100’s being mounted in pairs on the board..
I think it was because it’s important that these NJFETs are matched!
In the factory they could create a stock of these boards with them matched. (Originals always have a dab of matching coloured paint on them.)
These matched boards are then ready for insertion in the factory at the time of production, and when repairs are undertaken worldwide it avoids mismatching of channels if a Yamaha service centre replaced only one blown 2SK100..
Dadaah…
Open to other suggestions of course.
The tight tolerances and matching of the JFE2140 might, emphasise might, eliminate the need for the dual component board?
I reckon that in a hi end system the JFE2140 will have an audibly different sonic signature to a different component, so I’d want to replace as a pair on that board. But this is just my hunch, so it may be a little controversial..
Just a thought re the 2SK100’s being mounted in pairs on the board..
I think it was because it’s important that these NJFETs are matched!
In the factory they could create a stock of these boards with them matched. (Originals always have a dab of matching coloured paint on them.)
These matched boards are then ready for insertion in the factory at the time of production, and when repairs are undertaken worldwide it avoids mismatching of channels if a Yamaha service centre replaced only one blown 2SK100..
Dadaah…
Open to other suggestions of course.
The tight tolerances and matching of the JFE2140 might, emphasise might, eliminate the need for the dual component board?
I reckon that in a hi end system the JFE2140 will have an audibly different sonic signature to a different component, so I’d want to replace as a pair on that board. But this is just my hunch, so it may be a little controversial..
Hifibythekg
Super Member
“As stated earlier the holes need to be drilled out on the Yamaha fet mounting board. I used a 1 mm drill
bit as measured with a caliper .”
Is there an option of having thinner pins fitted?
We’re these done by your custom pcb manufacturer? Or were they a strip, or individual ones, soldered on by yourself?
bit as measured with a caliper .”
Is there an option of having thinner pins fitted?
We’re these done by your custom pcb manufacturer? Or were they a strip, or individual ones, soldered on by yourself?
“As stated earlier the holes need to be drilled out on the Yamaha fet mounting board. I used a 1 mm drill
bit as measured with a caliper .”
Is there an option of having thinner pins fitted?
We’re these done by your custom pcb manufacturer? Or were they a strip, or individual ones, soldered on by yourself?
There really isn't any thinner pins in a header form I believe , but I'll look. I already have the header pins in a 7 position 1 mm . A finger drill is what I used. They are cheap and many come with drill bits in the shaft.
Athanasios