• The move to the new server is done. There are some software and database maintenance updates in process. This has us passing the hat around to help out. We appreciate any donations. Seriously, even a dollar helps. The payment page may be found here - https://www.audiokarma.org/support.html

Pioneer SA-9500 : Troubleshooting Noise

RICK KING

Nonlinear
Hi,

I bought the SA-9500 new in early 1977, but pretty sure it is a 76. I have never serviced it. It sat from about 1990 until last year (2020) when I brought it out to use with my phono system. So was used almost every day for 16 years.

I opened up and did basic cleaning and once pots and such were cleaned, seemed to be in good shape. I have been using it pretty much every day for a year.

Recently, it has begun to pop when turned off, even if volume is off. Also I noticed a few other things:
Grounding did not seem to be effective for my phono as well as my Pioneer SX-626.
Some "bleed through" noise from other inputs (e.g. if I have the tuner playing I can hear it slightly in the next selector device AUX 1). Also, just yesterday, when turned on there is a noise coming out of the left speaker. It goes away within a few seconds.

I did check DC offset and if I did it correctly both channels are around 20 mV.

I checked all connections one-at-a-time. Removed every device from the same circuit; still has pop when turning off.

It may be time for servicing. I am a novice at repair, but have equipment to service it myself, but would need advice from you guys to walk me through it. I have 70 MHz Oscilloscope, several types of multimeters including Auto RMS with frequency, regulated variable power supply, software driven signal generator, soldering iron etc. Just learning to use scope. I have the original service manual and can somewhat read schematics. I ordered a Engineer SS-02 Solder Sucker. I have one, but it does not suck. Haha.

Also, I found here a list of all parts needed if you advised to go that route.

I can give more info, but this is start. Should I start troubleshooting, or assume it needs complete overhaul?

I would really appreciate your help. I am retired from IT, but was not a tech. I have plenty of time to work on this and have several other amps to use while the SA-9500 is down. A 1973 Pioneer SX-626 (Quad) and 1965 Sherwood S-9500, etc.

Cheers!
Rick
 
Last edited:
Register to hide this ad
I can give more info, but this is start. Should I start troubleshooting, or assume it needs complete overhaul?
Troubleshoot first, then go for the overhaul as it will need it. Check BIAS (idle) current to be sure it isn't too high. A little high (a few mV) isn't a concern at this point. Several mV should be lowered. There are a couple of transistors in the protection circuit known to go rogue and cause the relay to "lag" opening on power down. It's a little tough to get out in the open, but not all that bad. Start there and change the electrolytic caps while you are there, the transistors, and the tantalum caps too replacing them with UKL (low leakage) electrolytic. Check the points in the relay to be sure they aren't burned black or discolored dark from heat stress. The relay points, if bad enough, can also "pop" when opening. The power related caps (larger ones) can be Nichicon UPW types. Also, if you don't have one, build a DBT. It will save you from blowing things up. :yikes: If the protection board doesn't cure the pop, at least it is eliminated from the list, and is already rebuilt.
@markthefixer is the expert :bowdown: so listen to him more than me. :D
Also, to clarify, is this the SA-9500 and NOT the SA-9500II, correct? They are two different units with very little in common.
 
I’ll be watching this thread with great interest. I just acquired a SA-9500 that is in working “stock” condition with a distorted channel. Luckily a good cleaning with Deoxit fixed the bad channel! But now I would like to learn how to fix and update the troublesome original components.
 
Q6 on the AWM-047 Protection PCB is the primary transistor that controls relay drop on AC loss (power switch off), replace with KSC2383.
However, Q5 and Q7 are also significant players in the process, Q7 replacement is KSC2690A, Q5 replacement is KSA992F.
There are also a couple of component value changes (if needed), and one additional diode to protect Q7.
Bad dc offset and a failed protection circuit can also cause pop on power off.
Skywatcher's advice is spot on!
 
Last edited:
@Skywatcher: Thanks for responding. It is a SA-9500.
I will get back here in a bit to respond (with questions) but need to pull it out of my system and get the other amp ready for use.

Cheers!
Rick
 

Attachments

  • IMG_1422_1200.jpg
    IMG_1422_1200.jpg
    109.6 KB · Views: 41
@Skywatcher: Thanks for responding. It is a SA-9500.
I will get back here in a bit to respond (with questions) but need to pull it out of my system and get the other amp ready for use.

Cheers!
Rick
The first thing to do is when it is off the stack and on the operating table :naughty:, remove some covers to access the power switch. Of course with it NOT plugged in. :yikes:. Take your meter and zero out the leads in the Ohm setting. Take note of the reading when you touch both probes together. If it reads say .3 Ohms, that becomes "zero". All readings from there will be minus .3 Ohms. Then turn the power switch on and test the resistance of the points. If they read higher than .5 Ohms, it is possible the points are bad. Ideally you want zero (or .3 in this example). Turn the switch off and on a few times to see if the reading stays the same, or changes a little each time. If it changes, the points are probably getting pretty well pitted and if bad enough, will cause a "pop". This is the easiest first step to do.
 
I actually have an SA-9500 on the bench right now. Although it is nearing completion. The current owner purchased it "on faith" knowing it had a problem. However they did not know someone did a full recap recently. Their workmanship is nice too and no complaints there at all, but they made a couple of fatal mistakes and blew a channel. I am guessing shortly after the recap/repair job and simply threw in the towel and got rid of it. So for the time being if you need "fresh" photos I can supply some. But I am not going to re-disassemble anything. I have the amp out and can take photos of that and whatever else is in the open if it will help.
 
@Skywatcher, Thanks for your offer

I don't want you to go to any trouble. If there are shots that you can get at this stage that you think would help; that would be nice. I don't know enough at the point to know what would be beneficial. Really kind and thoughtful of you though.

Cheers!
Rick
 
Hi,

OK. Had more time than I thought today as I had planned on starting tomorrow.

Got to AWM-047. On Mouser the part numbers given by @merlynski are not "exact" matches and one they do not apparently carry. Haven't tried Digi-Key or anyone else.

@Skywatcher. If I understood you regarding the power switch (I assume the one you push to turn on) is not as easy to get to, or I may be making things to hard. Need to read through the Service Manual anyway to memorize my way around. There are good disassembly instructions it appears.

How do you keep up with all the screws? I think I need to organize a little better too. Tape them to each cover maybe?

Cheers!

Rick
 
Hi,

How do you keep up with all the screws? I think I need to organize a little better too. Tape them to each cover maybe?

Cheers!

Rick

A great way to keep parts organized is to use egg cartons or ice cube trays. Place parts in separate trays as you disassemble then work backwards when re-assembling. I also write notes on small strips of paper and place them in the trays. Notes give some detail of where parts came from such as "top cover", "bottom cover", "front panel", etc.

Thanks,
Joe
 
As of 1916h today:
512-KSC2383YTA: 9,148 in stock
512-KSC2690AYSTU: 4,390 in stock
512-KSA992FBTA: 27,725 in stock
Sometimes the search engine at Mouser needs a little smoozing. Often the last few letters are a packaging code: TA is tape, TU is tube, BU is bulk, etc

For hardware and small parts that go back in, I use the little white coin envelopes, write the description, the location they came from, and how many on the front, then seal it so they cannot get lost. Then I store them in order of removal in a long narrow box. That way they are already organized to reinstall, even months later, when I have forgotten. Every bracket, cover, knob or hardware item that does not fit in an envelope gets a label with a Sharpie for what it is and what model unit it came from. Sharpie labels are placed so they cannot be seen after reassembly to avoid observable cosmetic distraction, or on a piece of removable tape.
I do use old ice trays for small projects that are going back together quickly.
 
Last edited:
Really appreciate the advice. I am enjoying myself. AND learning.

I am new on AK and don't know who runs the place, but because of the friendliness and help; I subscribed a bit ago.

@merlynski. How many should I order of each. They are about .50 each. I guess I'm thinking that while I have it apart there are probably other components that I should go ahead and replace???

I'm getting a better solder sucker Tuesday. I also have a de-solder heat gun, but haven't really learned to wield it well yet. I tried it on a practice solder learning project and melted the plastic on one of the potentiometers trying to get it off and on straight. :yikes:

Cheers
Rick
 
Rick,
Quantity partly depends on whether you are doing a one time repair project or it is becoming habit forming.
I buy TO-92 case transistors 100 (or multiples thereof) at a time, but they run a bit cheaper. I recently bought 2000 of a certain one that was getting hard to find (I know, panic buying). The TO-126 case transistors have higher power dissipation, and are a bit more expensive, but I have been known to buy 100 of them at a time too. I may be just OCD, but it does spread the shipping cost. At the low quantity end, if I (think) I need only one, or up to five, I will buy the first price break quantity, which is usually 10. If I need 10 or more the 100 price is pretty attractive. Small transistors are often matched for Vbe and hFE, so a quantity to choose from is useful. Small diodes are usually priced at 5¢ or less by the 100. Semiconductors are also the most likely to die components, so extras is good. Whenever I install a transistor wrong, and it get powered up, it gets replaced, not reinserted. Unless a semiconductor component is unusual (like an STV), if one comes out a new one goes in. I don't test and reinstall unless there is no other option.
Small electrolytic caps are much the same, if I pull it, it gets replaced. Expensive electrolytics, like big power supply filters, I look at on an individual basis, and buy just what I need, but any electrolytic cap that has been subjected to reverse voltage is out of there, never to be reused.
Resistor are some of the most robust components, unless they have been 'smoked' they often have one end lifted, measure, if in spec reinstalled.
Some film caps are fairly expensive, especially values used to replace small electrolytics. Those I count carefully how many I need and only buy a few extra. Unless you melt one while soldering they are pretty robust.

You can search for a BOM for your SX-1250 here on AK, and read a bunch of SX-1250 threads to get an idea of what some of the more experienced rebuilders use.

My interest on AK is helping repair and learning. I work on my own stuff and do electronics as a hobby (and in the past, as a profession), I don't have the hands on experience, with consumer audio, as some of the active rebuilders here who make money at it, but I do help to troubleshoot to component level, and I don't give up easily.

I also tend to ramble on in posts like this one :rolleyes: . . . Hope that was helpful :biggrin:.
 
I also tend to ramble on in posts like this one :rolleyes: . . . Hope that was helpful :biggrin:.

You're not boring me and very helpful. The more you have to say, the more I learn. Heck, for pleasure I read post here at AK for hours.

I am fortunate that I was given some other equipment that I will start on after I get the SA-9500 going well. I was given a 1963 RCA tube console. A 1963 Sherwood S-2100 tube tuner and a 1965 Sherwood S-9500 solid state amp. Also some tape decks and turntables. I will be busy for awhile.

So...ramble on. :)

Cheers!
Rick
 
Hi,

Is there an updated parts list for AWM-047 board? I can read the parts but was curious if there was an equivalent list. The list here does not include AWM-047 that I could see.

Thanks!
Rick
 
Hi,

Is there an updated parts list for AWM-047 board? I can read the parts but was curious if there was an equivalent list. The list here does not include AWM-047 that I could see.

Thanks!
Rick
Did you mean the AWM-074 Protection PCB? The AWM-074 is listed in your linked thread, second group from the bottom, Post 2, headed "prot". It is a 10 year old thread though, and does not have vendor part numbers.
 
Did you mean the AWM-074 Protection PCB? The AWM-074 is listed in your linked thread, second group from the bottom, Post 2, headed "prot". It is a 10 year old thread though, and does not have vendor part numbers.

Haha. Yes! I was tired and apparently transposed in my head and stuck there. Thank you for pointing that out!

I went ahead and ordered all of the transistors and a few other parts from Mouser. Fairly cheap.

Question: The AWG-32 control amp board has two transistors that are apparently right and left. When I tap on them I can hear the tapping through my headphones. Is this normal? I think these are Q5 & Q7 that you said to replace.
 
Hi,

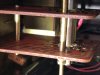
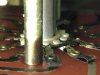
I discovered another problem. I don't think it is the cause of my original issue(s). The Function switch seats with each turn, but there is some play. Enough that if not centered on the contacts, only one channel comes in. In other words it has to be finessed to make full contact. There are two sections; I would assume Right and Left channels. I don't see any way to make it tighter. Any suggestions would be fantastic since the replacement for the whole Function Assembly is hard to come by. I would imagine not cheap either.

Function_Switch_01.jpg Function_Switch_02.jpg
 
Hi,

I discovered another problem. I don't think it is the cause of my original issue(s). The Function switch seats with each turn, but there is some play. Enough that if not centered on the contacts, only one channel comes in. In other words it has to be finessed to make full contact. There are two sections; I would assume Right and Left channels. I don't see any way to make it tighter. Any suggestions would be fantastic since the replacement for the whole Function Assembly is hard to come by. I would imagine not cheap either.

View attachment 2192779 View attachment 2192780
There should be a spring loaded detent ball that locks the switch into each position. Sometimes 2 balls, one opposite the other 180 degrees. There should be no "play" there, but there could be wear in the wafer hub(s) and/or aluminum shaft. You might be able to very carefully squeeze the fingers a little. But first use DeOxit D5 and small make-up applicators to clean the contacts. There may just be a little too much tarnish to make a good contact.
 
Back
Top Bottom