• The move to the new server is done. There are some software and database maintenance updates in process. This has us passing the hat around to help out. We appreciate any donations. Seriously, even a dollar helps. The payment page may be found here - https://www.audiokarma.org/support.html

Preamplifier in progress

KNielsen

Well-Known Member
Hey AK's

Just a short intro into this project I wanna share.
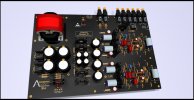
After several protobuilds where all worked, this end-build might be in sight within a few months. I have most of the parts, except chassis/relays and other minor parts, but most I have in my inventory.

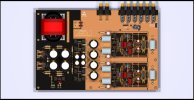
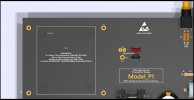
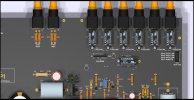
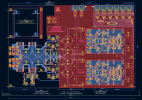
All drawings are made in KiCAD with my own designed footprints to give the "look" I want for this preamp.

The input circuit itself is based on a 90's elektor magazine design, altered a bit due to obsolete parts where I had to find replacements. The original schematic calls for MAT02/03, which I replaced with THAT340. Outputs are upgraded from BC327/337 to TTA/TTC004 or A1381E/C3503E, both work.

The PSU is a zener emitter/follower, powered by a 2x18VAC 30VA R-core transformer with a dual LT4320 active bridge rectifier and a RCRC configuration.
I've been looking at LM317/337 many times, but I have all parts in stock for the emitter/follower, so that's what I went with.

Normally I've been refurbishing Acurus amps, and if you Google Acurus/Aragon it's easy to see a great deal of inspiration from these units.

To be continued:)

Best regards

Preamp_Elektor_Discrete_THAT340_Stereo_1.5.jpgPreamp_Elektor_Discrete_THAT340_Stereo_1.1 (1).jpgPreamp_Elektor_Discrete_THAT340_Stereo_1.2.jpgPreamp_Elektor_Discrete_THAT340_Stereo_1.4.jpgPreamp_Elektor_Discrete_THAT340_Stereo_1.3.jpg
 
Last edited:
Register to hide this ad
Still waiting for the last parts which should arrive this week. I need them to measure the pinout ect ect to make sure that they match the datasheet and thereby also the footprints on the PCB before ordering a circuit..

In the meantime I've turned my attention to the frontpanel design of the chassis.
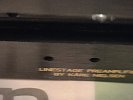
I think this is it, black anodized with my "signature" in black print:
FRONTPANEL~2.jpg
Rotary channel selector to the left, in the center a toggleswitch (Mute on/off) and a few orange diodes, volume to the right

Best regards
 
The boards are to big for a decent pricetag and it was never my intention to begin with. A modular build would have suited much better to keep the price down
 
Small update:
My chassis from Modushop will arrive within a few days, drawn in "Frontpanel Designer" witch worked amazingly well. I'm quite excited to see how the faceplate turned out..... :) And, my parts bin for this particular build is almost full, only need to evaluate which power resistor I'm gonna purchase. Not that critical yet though..

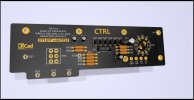
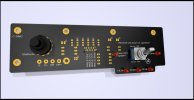
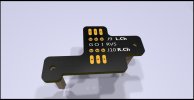
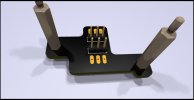
-In the meantime I've finished all the missing details on the main PCB and finished all add-on PCB's: a frontpanel switching control and second PCB on standoff's for the volume pot sitting on the back on the main PCB.

I'm ordering all PCB's when the chassis is assembled and checked the internal measurements to confirm if there are any surprises that might cause adjustments to the PCB's in question. Hopefully there will be none:)
It's a 260€ PCB order, so I'm quite picky getting everything right the first time.

Untill then, here is some pictures of progress:
Outlook-1eav54so.jpgPreamp_Elektor_Discrete_THAT340_Stereo-BACK.jpgOutlook-qurbdnwu.jpgFrontpanel_PCB-BACK.jpgOutlook-uclozxad.jpgVOLUMEPOT PCB_MODEL-P1-BACK.jpg1000005905.jpg1000005904.jpg

Best Regards
 
Last edited:
Looking forward to seeing the finished product!
A very cool project.
Thanks, I'm quite excited too. I spend an awful lot of hours on this project so fingers crossed, hopefully I'll be able to do a first power up within a decent timeframe:)
I'll keep posting when there is something new to write about ;)
Regards
 
Might be of interest to others who order their own faceplates:
-I didn't want the LED in a clip mounted on the front, and didn't bother order some flathead LED's to be solid glued in place, since I would like the frontpanel to be easy to disassembly if some adjustments to the PCB is needed in the future.
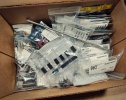
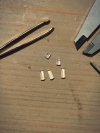
-I bought some diffused light pipes to the front (part.nr: LFB012CTP/LFB025CTP, first photo) and made drilling according to the datasheet, ø3.3mm/0.38mm deep followed by a ø3mm drill all the way through the panel (tried to capture it on the 2nd photo).
Mounted with just the tiniest amount of super glue, and fits perfectly (3rd photo).
Behind the light pipes there is roughly 3mm depth free space for the LED's to sit freely and hold in place by the faceplate and the attached PCB.
1000006009.jpg1000006010.jpg1000006011.jpg
 
Last edited:
That is a lot of work, but very highly rewarding.

Following and looking forward towards your updates.

I am curious about the schematic and also would like to know what made you pick this particular schematic.

Thanks in advance.

Best

Soundork
 
Back
Top Bottom