• The move to the new server is done. There are some software and database maintenance updates in process. This has us passing the hat around to help out. We appreciate any donations. Seriously, even a dollar helps. The payment page may be found here - https://www.audiokarma.org/support.html

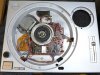
Restoring a pretty old -and dirt- Technics SL-1200Mk2

James this 1000µF/50v is on a different version of my turntable the circuit seams the same, but components are newer. Mine is labeled as mk2 service manual (M/MC) "Vintage Technics" in Vinyl Engine: https://www.vinylengine.com/ve_down...ics/technics_sl-1200_mkii_m_mc_service_en.pdf

I don't know if a bigger cap in my version will be ok. What do you think?


This is wonderful! Thank you for this information James, is new to me.


This is great Steve, I am still trying to make me an idea of how this damping system works and to know what actually is, but I am very interested now, I wll be studying about it.

Today I found the proper paint. I thought I was going to be more difficult to find a matching paint to the original but is as simple as "Aluminum" color. Already did a little test and think match perfect with the original.
View attachment 2175456

Close to the middle I spray a little of the new paint to compare, I think is exactly the same.

View attachment 2175455

This weekend will be for painting and cleaning.
Cheers
Rodolfo

Rodolfo,

Here's what the KAB USA Dampener looks like. Think of it as a shock absorber for the tonearm. Gets rid of tiny micro vibrations that interfere with the stylus tracking. Giving you better music focus. Paddle is attached to tonearm and moves through the silicone oil.

830186-9c0b115f-kab-fluid-damper.jpg
 
It takes a good bit of practice to get a good finish with spray cans. You have to find the optimal distance, too far and you have the problems that you describe, to close and it will make puddles that run. Buy some extra cans and practice on some pieces of cardboard until you find the right distance and overlap.

Also you have to start spraying before you reach the workpiece and don't stop until you are well past the workpiece. I would probably do the edges first and let them dry before doing the upper flat surfaces. You can use some thin cardstock to hold over areas that you do not want to have overspray on.

You will master this, I know it.

Cheers,
James

Key thing to remember is do not spray in an arc - ensure you keep the nozzle / spray at an equal distance throughout your pass across the workpiece. Spraying in an arc will cause runs where you get too close and thin spots when you get too far away.

You could always look into powder coating - not sure if that material is suitable but it would give an awesome finish. Or try vinyl wrapping it........actually would wrapping a turntable in vinyl be some kind of cannibalism??

All these advices taken guys, today I am about to start sanding again. I hope tomorrow morning try again the painting. I also so a very interesting video when some guy pain, then sand and then apply lacquer to make a very good finish. Let's see go it goes for me... more soon.

Rodolfo,

Here's what the KAB USA Dampener looks like. Think of it as a shock absorber for the tonearm. Gets rid of tiny micro vibrations that interfere with the stylus tracking. Giving you better music focus. Paddle is attached to tonearm and moves through the silicone oil.

830186-9c0b115f-kab-fluid-damper.jpg

Thank you Steve for the foreground example. That looks like a pretty simple system, maybe I can make it to create a piece like this from wood or make it in metal by myself... but I guess the important part is the damping silicone oil.
Cheers,
Rodolfo.
 
I did some sanding today. I guess, there is no need to remove absolutely all the painting. Now I am wondering if I should apply primer or can I apply the painting directly here. As there are some parts where the aluminum is at sight, I guess will be better to apply a layer of primer as I did before. Tomorrow I will do some testing before painting to see what works best.

IMG_20210330_131951424.jpg

Cheers,
Rodolfo
 
All these advices taken guys, today I am about to start sanding again. I hope tomorrow morning try again the painting. I also so a very interesting video when some guy pain, then sand and then apply lacquer to make a very good finish. Let's see go it goes for me... more soon.


Thank you Steve for the foreground example. That looks like a pretty simple system, maybe I can make it to create a piece like this from wood or make it in metal by myself... but I guess the important part is the damping silicone oil.
Cheers,
Rodolfo.

Rodolfo, wood wouldn't be good with the fluid, metal much better.
 
Rodolfo, wood wouldn't be good with the fluid, metal much better.
I am very close to a family of Carpentiers and Luthiers. their father is 93 now and build and design guitars. Just for curiosity I am going to ask then for an special treatment or wood Wich can handle the job.. could be very interesting and easy to build in some kind of wood could work. But yes Steve, I understand the limitations generally speaking of wood in this kind of application.

On aluminum I always use a metal etching primer for best adherence to the metal. And give the part a good cleaning in acetone to remove any traces of skin oils.

BillWojo
I will follow your "sequence" Bill with what I have on hand. Specially a good cleaning to the surface with something to remove skins oils, was something I didn't take in count untill you mentioned. Thank you!

I am about to start some experiments to see what works best.
More soon,
Rodolfo
 
Well guys I am happy to announce I had success with the painting. I applied all the recommendations you gave to me, plus, one I didn't though necessary the first time: To sand the primer layer with 400 sanding paper, very gentle. Cleaning very well the surface after sanding, painting straight, not in arches, starting outside the surface (I painted from the outside to the center thinking the center was in need of more painting and the finish there was not important.) Small thin layers and more of a fast and steady movement. I painted first the edges as James suggested but not waiting until the edges dries, just applying painting on the edges first and then on the top. Finally, I decided to apply two thin layers of lacquer, in my testing I so that without lacquer the paint itself looks ok, but after applying lacquer it feels that painting alone looks like an unfinished finish.

This is what I did:
  • Three layers of Primer
  • Gentle sanding with 400 sanding paper
  • Two layers of aluminum painting
  • Two layers of lacquer
Still not perfect, some little dots end up there after the lacquer in the Start/stop corner, but overall I am pretty happy with the results.
Primer Applied:
P1140604.JPG

P1140605.JPG

First Layer of Aluminum paint and two little dots ruining the finishing. I let it dry and then apply gentle sanding, fortunately the dots disappear on the next layer:

P1140607.JPG

P1140609.JPG


This is after the lacquer:
P1140613.JPG

P1140614.JPG

P1140615.JPG

P1140616.JPG

Well guys I am pretty happy with the results. I can say this part is finished. Still a lot of work to do... Specially to make this thing spin. My sister is visiting us, she is arriving today, but the AN6675 shipping was delayed, supposedly arrived the past Saturday, but will be arriving tomorrow... I will have to wait until my sister returns to the states and that she send it to me... I guess some 4 weeks of waiting... I feel like the cookie monster! But we know what works best "Musical strategy".
.

Yesterday also some more things and toys arrived from the states. And again a mistake, I was very naive thinking a set of feet will cost only 35 USD, now I check, more or less this is the price for just one. So what I order was just 3D print copies :(

Now I Wonder if to buy new feet worth the money, talking about cost/benefit. Remember guys I am in Colombia, what you can get with 100 USD here, is maybe three times more of what you get in the states, so I become very sensitive when I feel something is too expensive but don't have a benefit that worth that money. In that way, I might be more interested in the KAB sonic dome which cost 29USD the set of four (if I understand well), Or to try to restore these and buy just one original:
P1140618.JPG


The arm wad (I am still not sure is this is the proper name) and the balance weight arrived, and they are well. Also, other things arrived, I got my fist Behringer DCX2496 I hope to get involved in speaker design soon, and maybe, to try my Canton CT-90 in an active try-amping setup. Also, a pair of diaphragms for two Altec compression drivers in pretty bad shape that I found around here some weeks ago.... cant wait to start playing with all this!!!

P1140617.JPG


Well this is all for today folks, next, probably will be to start cleaning and replace the start/stop button or to replace the bend arm wad with the new one. Still have to order the LED for the target light too.

Cheers,
Rodolfo

 
Well guys I am happy to announce I had success with the painting. I applied all the recommendations you gave to me, plus, one I didn't though necessary the first time: To sand the primer layer with 400 sanding paper, very gentle. Cleaning very well the surface after sanding, painting straight, not in arches, starting outside the surface (I painted from the outside to the center thinking the center was in need of more painting and the finish there was not important.) Small thin layers and more of a fast and steady movement. I painted first the edges as James suggested but not waiting until the edges dries, just applying painting on the edges first and then on the top. Finally, I decided to apply two thin layers of lacquer, in my testing I so that without lacquer the paint itself looks ok, but after applying lacquer it feels that painting alone looks like an unfinished finish.

This is what I did:
  • Three layers of Primer
  • Gentle sanding with 400 sanding paper
  • Two layers of aluminum painting
  • Two layers of lacquer
Still not perfect, some little dots end up there after the lacquer in the Start/stop corner, but overall I am pretty happy with the results.
Primer Applied:
View attachment 2180250

View attachment 2180251

First Layer of Aluminum paint and two little dots ruining the finishing. I let it dry and then apply gentle sanding, fortunately the dots disappear on the next layer:

View attachment 2180253

View attachment 2180256


This is after the lacquer:
View attachment 2180267

View attachment 2180268

View attachment 2180269

View attachment 2180270

Well guys I am pretty happy with the results. I can say this part is finished. Still a lot of work to do... Specially to make this thing spin. My sister is visiting us, she is arriving today, but the AN6675 shipping was delayed, supposedly arrived the past Saturday, but will be arriving tomorrow... I will have to wait until my sister returns to the states and that she send it to me... I guess some 4 weeks of waiting... I feel like the cookie monster! But we know what works best "Musical strategy".
.

Yesterday also some more things and toys arrived from the states. And again a mistake, I was very naive thinking a set of feet will cost only 35 USD, now I check, more or less this is the price for just one. So what I order was just 3D print copies :(

Now I Wonder if to buy new feet worth the money, talking about cost/benefit. Remember guys I am in Colombia, what you can get with 100 USD here, is maybe three times more of what you get in the states, so I become very sensitive when I feel something is too expensive but don't have a benefit that worth that money. In that way, I might be more interested in the KAB sonic dome which cost 29USD the set of four (if I understand well), Or to try to restore these and buy just one original:
View attachment 2180352


The arm wad (I am still not sure is this is the proper name) and the balance weight arrived, and they are well. Also, other things arrived, I got my fist Behringer DCX2496 I hope to get involved in speaker design soon, and maybe, to try my Canton CT-90 in an active try-amping setup. Also, a pair of diaphragms for two Altec compression drivers in pretty bad shape that I found around here some weeks ago.... cant wait to start playing with all this!!!

View attachment 2180316


Well this is all for today folks, next, probably will be to start cleaning and replace the start/stop button or to replace the bend arm wad with the new one. Still have to order the LED for the target light too.

Cheers,
Rodolfo

Rodolfo, your final spray paint job looks very nice! :thumbsup:
 
Looks great! As you found out, preparation is 90% of getting a good paint job. Nice to see something in that shape lovingly restored.

BillWojo
 
O
Can't wait to see the final result and you spinning your first record! :thumbsup:
Oh Steve, I guess you all already know this feeling... Feeling like a crazy working non stop to get something done. Today I miss luch (only a coffee ☕ wile paint dry)... After finish arrived at my girlfriends place starving and needing a good bath... And still feeling so active... I can't wait too! :)
Thank you for the company guys, nothing like to share with others the things we are passionate about.

Looks great! As you found out, preparation is 90% of getting a good paint job. Nice to see something in that shape lovingly restored.

BillWojo
Yes Bill, this is what mostly i understood, and take the proper time. (Btw, Love the arrangement of your Crossover -in your profile picture- it is from a project you posted here in AK, will love to check it).
Cheers.
 
Last edited:
Hello guys,
Today I had some time, so I did three simple tasks: To clean the rubber bottom base, to clean and change the start-stop button and the circuit around, and clean the target light.

The start stop button was a very simple and easy going task, I remember doing this 20 years ago to a very old SL-1200 that was given to me. In this one the button was not soft, didn't move after touch... it was all dirty.
P1140621.JPG

Can be removed pretty easy, just removing a block washer and the button is out and ready for cleaning. Remember 20 years ago being impressed by the intelligence of this mechanism, It is made to never broke the switch, no matter how hard you hit the start-stop button it.
P1140622.JPG

New button vs old one. I think this turntable is at least 40 years old (my age), and it was used on a radio station... how many times this button was hit to become like this?

P1140623.JPG


To be sure I checked the switch. It was doing his job properlly
P1140624.JPG

P1140625.JPG

P1140626.JPG


This is how the new button looks like. To motivate myself I went and try how it looks on the freshly painted top plate. :)
P1140631.JPG


Yes it will be very nice to change the power on-off button too, but I am limiting my budget now until I got the turntable fully working, mainly because I don't know if I am going to need to buy the other main IC, the AN6680.
P1140628.JPG

Just to compare and to see the progress here is how it was before :)
Sin nombre.jpg

Next, the target light...
 
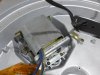
Today I just cleaned the target light, it was so dirty that I wasn't able to see what to do. The light is broken, I plan to buy a LED to replace it but so far I have only seen blue LED and I want it with or yellow like the original little bulb. I don't know if there is a LED that can emulate the "yellow" warm color of the old bulb, anyone knows about it or can recommend one to me? I don't know the power it should be neither, nor this kind of LEDs are all the same power and voltage?

Cleaning just make the mechanism to work again.
Before
P1140629.JPG

After
P1140630.JPG
think I am going to disassembly the entire target light for a deeper clean once I have the LED to replace the original.

Well this is all for now... just little steps.

Cheers,
Rodolfo
 
  • Like
Reactions: T68
Today I just cleaned the target light, it was so dirty that I wasn't able to see what to do. The light is broken, I plan to buy a LED to replace it but so far I have only seen blue LED and I want it with or yellow like the original little bulb. I don't know if there is a LED that can emulate the "yellow" warm color of the old bulb, anyone knows about it or can recommend one to me? I don't know the power it should be neither, nor this kind of LEDs are all the same power and voltage?

Cleaning just make the mechanism to work again.
Before
View attachment 2186706

After
View attachment 2186707
think I am going to disassembly the entire target light for a deeper clean once I have the LED to replace the original.

Well this is all for now... just little steps.

Cheers,
Rodolfo
Be very careful if you decide to replace lamp with led, this mod alone is responsible for more fried chips in sl1200 than anything else. If the led is connected wrong or shorted to ground you will kill a chip. Re bulbs, I have never ever used my target lamp, it works and I am happy in the knowledge it works but unless you are in a dark night club it serves no purpose IMO.
Chris
 
Thank you for the warning Chris. To be true I think like you, that it is nice that works, but is not a big need. Let's see, I think I am not going to put much effort to make the target light working, but in the case I found a proper bulb or LED I will be extra careful during installation.

Cheers,
Rodolfo.

I have several different yellow LEDs left over from restoring my M-70 power amp, all 20mA/5v. I will throw one of each in with the caps. We then just need to know the original bulb voltage and if the supply is DC. Then we can calculate what we need for a resistor and I'll toss one of those in too. Also a diode in case the supply voltage is AC.

https://www.mouser.de/ProductDetail/Cree-Inc/C566D-AFE-CV0X0251?qs=sGAEpiMZZMtmwHDZQCdlqVFlG8iQtBnfJZFkxsXEIyfk2tXptEqoTA==
https://www.mouser.de/ProductDetail/Cree-Inc/C566C-AFE-CU0W0252?qs=sGAEpiMZZMtmwHDZQCdlqbg3pWP5pDcoxmiffd2FAUQ=
https://www.mouser.de/ProductDetail/Broadcom-Avago/HLMP-EL30-PR400?qs=lQqkXH5tj5QHQIVaPdi/XA==
https://www.mouser.de/ProductDetail/ROHM-Semiconductor/SLI-560YT3F?qs=4kLU8WoGk0vNdt1HsJk8ww==

https://www.digikey.com/en/resource...ors/conversion-calculator-led-series-resistor
https://www.ledsupply.com/blog/wiring-leds-correctly-series-parallel-circuits-explained/
https://learn.adafruit.com/all-about-leds/forward-voltage-and-kvl

I have some in orange also if you want to try that.

Cheers,
James
 
Last edited:
Well folks, after a long 41 days period, the time It tokes for the box to travel from Munich to Medellín, finally all the parts to continue this restoration are in hand. In the box was a CD player fully restored and modded by our fellow @Bratwurst7s (you can check in this thread about it), and ALL the other things that I hope I need to finish this TT. Once I hear on a podcast that happiness is usually associated to round and colored figures, like confetti, but now I have to extend that idea... it seems happiness is more close to cylindrical and even some cubic forms :)

P1140727.JPG

I think I got, if not everything, almost everything to leave the TT main board as new!! Now days I haven't the full time to work, so the progress will be slow, but I hope soon to start working again... I will be back soon with more progress.

Cheers
Rodolfo
 
Hello friends!

Well has being a wile since my last post, there has been a lot of changing around here including moving with my girlfriend and this involves to move also my sound system to a new place and start to dealing with the difficulties of not have a sound as rich as I have it in my old basement, plus no space as a workshop in the new place yet.... and all this not counting the happy news that I am going to be a father soon :) ...yes! A lot of changing here.

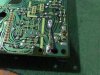
Any way, as life keep moving, I am back to report my latest state regarding this restoration. I have changed all the Electrolytic caps and the Driver IC AN6675, the start-stop button has been cleaned and changed, fuse older has been adapted to use a smaller one, I also cleaned the transformer and installed inside again (provisionally before I manage to fix all the other problems).
P1140741.JPG

P1140750.JPG

This is the adaptation I did to put an axial cap as the filter cap:
P1140739.JPG

Also change some ceramic caps that were suspicious:
P1140740.JPG

And here the fuse resize adaptation:
P1140742.JPG

P1140743.JPG

After all this I was ready to rebuild everything and give it a try. Unfortunately the plater didn't spinn. After some time trying to understand everything I realize some times the platter tryed to spinn forward and other try a little bit backwards... I set the break voltage to the manual value and tryed again... But not a significant change. After some time I realized the pushing the platter forward a little break like a magnetic hole... I feel some pressure holding the plater, but after braking this force manually the platter turn at visually accurareted speed. But hitting stop again make no stop but the platter spining faster. I have to stop it manually otherwise looks like if will turn faster each second.

Here is a video showing the problem. So far I have checked all the transistors and they seams ok. I am now afraid some of the may ICs are, again, not working properly. Any ideas on how to proceed? (Specially when I don't have an ocsiloscope :s)


Cheers!
Rodolfo
 

Attachments

  • P1140746.JPG
    P1140746.JPG
    104.9 KB · Views: 17
Hello.
It's been a while since my last post. After changing the Drive IC AN6675 the table started spinning but not entirely well. After some time checking, to find nothing obviously wrong, I decided to buy a new Control IC AN6680 but this didn't solve the problem.
IMG_20211013_114750463.jpg

IMG_20211013_113253088.jpg

IMG_20211013_113330254.jpg

Very puzzle after that, I checked voltages here and there but nothing was wrong, all the transistors seams working properly, all the capacitors where new as long as the ICs. Suddenly having my doubts about the little transistors Q2 and Q3 in the PS, I tried some generic similar transistors, this helped me to figure out something. Q1 was not original and changing these transistors changed the behavior of the platter also. Now after hit start the platter starts spinning but is not able to hold the right speed and goes to runaway.
This makes me think of a possible reason for the first wrong behavior: the runaway after stop. The PS is not able to give the amount of current needed to stop the platter, the platter does not stop and for some reason keep applying total drive to move forward.

My suspicion now is that the problem is these PS transistors, and it would be better to change all the other transistors to avoid future drawbacks. I am in the process of finding suitable substitutions for this original transistors:

PART: REFERENCE > REPLACEMENT*
Q1: 2SD389 > KSD526Y
Q1 in a different version (seams like a newer schematic): 2SD1265 > 2N6488 I don't know if I can use this instead of the original in my TT version.
Q201: 2SC1846R
Q2, 3, 101, 102, 202: 2SD637 > 2N3859A
Q102, 101: 2SD638
Q203: 2SC1328 > KSC1845FTA (I have this replacement)

*These are a few substitutions I have found but so far mainly obsolete, except for the KSC1845FTA which I have on hand.

Any help on finding proper subs will be appreciated.

Another thing that intrigued me is that the AC coming out from the transformer to the retifier is 60 VAC not 30VAC as one of the schematics states. Someone knows about a unit using a 60VAC transformer or could be that this one here is also not original?

Cheers,
Rodolfo
 
Back
Top Bottom