

You are using an out of date browser. It may not display this or other websites correctly.
You should upgrade or use an alternative browser.
You should upgrade or use an alternative browser.
Sansui 9090 case
- Thread starter tomefs
- Start date

Greyhawk17
Well-Known Member
case for 8080/9090..........
Hi Tom,
Did you use a small veneer router for the edge trimming, or one of those
ceramic blade knife trimmers?....Veneer looks spectacular, should really
pop in the finishing step!........Thanks, T:thmbsp:
Hi Tom,
Did you use a small veneer router for the edge trimming, or one of those
ceramic blade knife trimmers?....Veneer looks spectacular, should really
pop in the finishing step!........Thanks, T:thmbsp:
Hi Tom,
Did you use a small veneer router for the edge trimming, or one of those
ceramic blade knife trimmers?....Veneer looks spectacular, should really
pop in the finishing step!........Thanks, T:thmbsp:
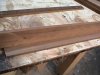
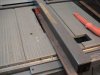
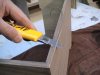
You can see the lam trimmer is one of the photos. I treat the veneer like a peice of plastic laminate. I do however trim the front edge by hand with an olfa knife. Then I file all the edges, then sanding with a air powered sander and by hand. Stay tuned.

bottom peice
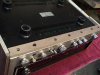
Here is the solid Walnut bottom I made the bottom 8080 style the 9090 style is just too much work for nothing. The difference between the two is a 8080 has a little notch on the end and a 9090 is without the notch so you have to put a notch in the case instead, As long as they both match who cares this is custom woodwork and I do not have a boss to bitch at me.
Here is the solid Walnut bottom I made the bottom 8080 style the 9090 style is just too much work for nothing. The difference between the two is a 8080 has a little notch on the end and a 9090 is without the notch so you have to put a notch in the case instead, As long as they both match who cares this is custom woodwork and I do not have a boss to bitch at me.
Attachments


sanding& filing
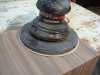
It is time to file the edges, I use a knife to get close. Most of it was routered, but the front beveled edge has tombe done by hand, then filed then sanded with an airpowered sanded, this is what gives the very smooth and flat finish, hard to get this flat by hand. The case has been test fitted and now is ready for stain, I have a stain that matches the original Sansui very close.I have a stain that I like better it is a cherry stain when you put it over walnut to looks fantastic but it is not colse to the original ,which would you use.
It is time to file the edges, I use a knife to get close. Most of it was routered, but the front beveled edge has tombe done by hand, then filed then sanded with an airpowered sanded, this is what gives the very smooth and flat finish, hard to get this flat by hand. The case has been test fitted and now is ready for stain, I have a stain that matches the original Sansui very close.I have a stain that I like better it is a cherry stain when you put it over walnut to looks fantastic but it is not colse to the original ,which would you use.
Attachments


For what it's worth a 4x8 sheet of 1/2" walnut plywood with a MDF core is $124.32 plus a $15 per order freight charge. I had no idea it would be that expensive. You can buy a lot of veneer for that money.
- Pete
Thats about what it is up here too. Thanks
Greyhawk17
Well-Known Member
9090 case.........
Would agree, like the redder tones, and have used various mixtures of both
cherry, and red oak to give a warmer tone to walnut....Both veneer, and
solid wood....What you have created is "custom", so do what you like! My
Cornwall cabs I'm restoring, are a much warmer tonality than the 'blah'
med. walnut veneer of the originals, and they look good.....Regards, T:thmbsp:
Hi T,It is time to file the edges, I use a knife to get close. Most of it was routered, but the front beveled edge has tombe done by hand, then filed then sanded with an airpowered sanded, this is what gives the very smooth and flat finish, hard to get this flat by hand. The case has been test fitted and now is ready for stain, I have a stain that matches the original Sansui very close.I have a stain that I like better it is a cherry stain when you put it over walnut to looks fantastic but it is not colse to the original ,which would you use.
Would agree, like the redder tones, and have used various mixtures of both
cherry, and red oak to give a warmer tone to walnut....Both veneer, and
solid wood....What you have created is "custom", so do what you like! My
Cornwall cabs I'm restoring, are a much warmer tonality than the 'blah'
med. walnut veneer of the originals, and they look good.....Regards, T:thmbsp:
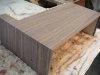
Ready for stain
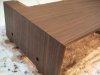
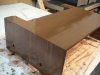
Here are some photos of the stain before and after wiping, the inside will be finished as well, I put little nails on the bottom sides to keep the case from touching anything while the first coat of no. 60 sheen lacquer is aplyed, the case is put on a home made rotating base to quickly spray the hole case, while next to a large filtered exhaust fan to suck all the overspray and fumes outside, having a setup like this is critical for a high quality finish, when dry I will very carfuly sand with 320 gritt paper by hand, then more coats of lacquer untill it looks right.
Here are some photos of the stain before and after wiping, the inside will be finished as well, I put little nails on the bottom sides to keep the case from touching anything while the first coat of no. 60 sheen lacquer is aplyed, the case is put on a home made rotating base to quickly spray the hole case, while next to a large filtered exhaust fan to suck all the overspray and fumes outside, having a setup like this is critical for a high quality finish, when dry I will very carfuly sand with 320 gritt paper by hand, then more coats of lacquer untill it looks right.
Attachments
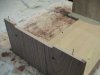
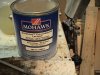
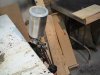
more photos of the finishing equipment the spray gun is a HVLP, and the lacquer is very forgiving if you are lucky.Meaning if you spray it on and it is mixed too thick it will still look pretty good.
Attachments

Greyhawk17
Well-Known Member
9090 case.........
Hi Tom,
Well, looking great, did you 'redden' the stain, it appears a nicer tonality
than the standard?...When you finish the lacquer work, sanding, do you
apply a wax, or is that finished at that point? Hope you will post the
completed case on the receiver, and give an idea on pricing, Looks great,
Thanks, T:thmbsp:
Hi Tom,
Well, looking great, did you 'redden' the stain, it appears a nicer tonality
than the standard?...When you finish the lacquer work, sanding, do you
apply a wax, or is that finished at that point? Hope you will post the
completed case on the receiver, and give an idea on pricing, Looks great,
Thanks, T:thmbsp:
I left the lacquer the stock color.I do not use wax but you could, also wax will smuge and leave fingerprints so I do not use it on new wood . stay tuned for the finished case as it will look different than it does now.Hi Tom,
Well, looking great, did you 'redden' the stain, it appears a nicer tonality
than the standard?...When you finish the lacquer work, sanding, do you
apply a wax, or is that finished at that point? Hope you will post the
completed case on the receiver, and give an idea on pricing, Looks great,
Thanks, T:thmbsp:

pjanders
New Member
Your case looks fantastic! What type of adhesive are you using to attach the veneer to the plywood? What type of precautions, if any, do you have to take to prevent the finish from attacking the adhesive? Or is this taken care of by the paper backed veneer that you are using? You do great work and this may be the inspiration I need to tackle the case of my Sansui 7000 receiver.
Thanks for sharing this with us.
Thanks for sharing this with us.
Looking good. Lacquer is a great finish. I like it much better than any kind of poly. The trick with the nails to hold the work up is a great idea too. Do you pre drill holes for them?
- Pete
No the ply can take the small holes.Yes lacquer rules if you have spray equip.
Your case looks fantastic! What type of adhesive are you using to attach the veneer to the plywood? What type of precautions, if any, do you have to take to prevent the finish from attacking the adhesive? Or is this taken care of by the paper backed veneer that you are using? You do great work and this may be the inspiration I need to tackle the case of my Sansui 7000 receiver.
Thanks for sharing this with us.
I was waiting for someone to ask these excellent questions.The adhesive used is a high quality water base contact cement.You really have to know how to use it to preform properly.You can or should only use any type of contact cement on paperbacked veneers, the paper blocks the solvents from the lacquer from lifting the veneer if everything is done right, all of this takes time to learn ,being a cabinet maker has helped me. A lot of the mistakes made were done years ago. My point being that this method works for me but it may not work for a novice.Also not all the steps are documented in this how I make a Sansui case forurm.
prep for second coat
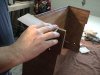
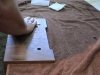
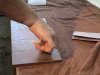
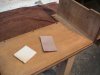
Sanding carefuly with 320 ,the white sanding pad helps for edges.lots of places where you could sand into the stain.If I do I restain that part with a small paintbrush and it is OK.The bottom peice is allready finished.
Sanding carefuly with 320 ,the white sanding pad helps for edges.lots of places where you could sand into the stain.If I do I restain that part with a small paintbrush and it is OK.The bottom peice is allready finished.
Attachments

pjanders
New Member
One more question about the veneering process if I may. I have used contact cement before (in other circumstances) and I know that once the two pieces come together they really stick. It's nearly impossible to pull them apart.
When you veneered your case did you use any additional clamping or pressure to help the veneer stick to the case? Do you set a heavy weight on top on the veneer for a period of time until you were sure the two pieces would not de-bond?
Your skill as a cabinet maker really shows on this project and the results you are getting are so good that I really want to try this myself. That's what inspiration is all about.
Thanks again for all the time you are taking to share this with us.
--Paul
When you veneered your case did you use any additional clamping or pressure to help the veneer stick to the case? Do you set a heavy weight on top on the veneer for a period of time until you were sure the two pieces would not de-bond?
Your skill as a cabinet maker really shows on this project and the results you are getting are so good that I really want to try this myself. That's what inspiration is all about.
Thanks again for all the time you are taking to share this with us.
--Paul

Nickleride
Seeker of Moments
Lookin very good, dude. I agree with the laquer, painters around here use that cheap 'poly' and it isn't hard enough for a true furniture grade finish. I like what you're doing! :thmbsp:
Don
Don


