• The move to the new server is done. There are some software and database maintenance updates in process. This has us passing the hat around to help out. We appreciate any donations. Seriously, even a dollar helps. The payment page may be found here - https://www.audiokarma.org/support.html

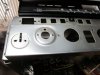
SX-5590 tragedy

For stuff like that I'll sandwich with wood blocks then clamp in a bench vise good and tight. Let it sit overnight. Pressure and time will ease the bend back with less damage than beating it. If it's still out of true, it's small, and can be beat out with a wood block for a dolly and a wood or plastic faced hammer. The wood/plastic faced hammer doesn't leave the impact marks a steel hammer does, and if the head is fairly small, you can concentrate the blow better where needed.

The Front face on my FISHER TA-600 was bent up in the corner. Thin brass type front panel. I took some 1/2 round and shaped it to the edge of the faceplate(inner and outer). Then sandwiched the bent corner one side at a time in the vise overnight. 90% of the bend was gone from overnight. Finished it out with the backside block and a plastic headed mallet, very carefully. You can see it if you are closer than a foot away, casually looking. Any further you'd have to know it was bent to notice it.

I had a dent like that(on the5590 face) on my S-10 on the Right QTR Panel behind the wheel. It's got compound curves as it's actually an ISUZU Bed (this is a quad cab S-10). Used a Hair Dryer and a 13" car inner tube to push it back out. Heat up the dented area with the hair dryer and placed the inner tube between the outer skin and the bed. When the skin is hot, inflate the tube enough to push on the skin. Remove heat and let cool down naturally. When cool deflate innertube and remove. It's close enough for the casual eye. Had to replace the Wheel well flare as it cracked and was hanging by 1 screw. No Bondo and the paint is intact.
 
I was thinking the same thing, larry. Bench vise and wood blocks + time.

Sure hope this story has a happy ending. Best of luck.
 
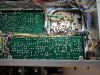
Finally made some more progress. Got the tone board out and the PCB itself appears to be intact. The second bass pot is seized, but I am pretty sure I have a replacement. The damage to the chassis is pretty clear from here, even back side of the power switch looks funny.

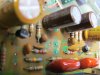
Of course, the bottom cover was nasty because all the caps had leaked, one of them so badly I had to use vise grips because the negative screw was a mush head instead of a phillips head.

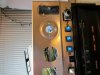
The next adventure is figuring out how to straighten the chassis. I think a hammer and some dowels will be a good start.
 

Attachments

  • IMG_2780.jpg
    IMG_2780.jpg
    122.9 KB · Views: 75
  • IMG_2782.jpg
    IMG_2782.jpg
    90.3 KB · Views: 71
  • IMG_2783.jpg
    IMG_2783.jpg
    64.1 KB · Views: 77
  • IMG_2781.jpg
    IMG_2781.jpg
    78.6 KB · Views: 74
  • IMG_2777.jpg
    IMG_2777.jpg
    108.1 KB · Views: 80
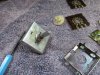
I've got the seized tone control out and apart and it's still seized. And I will be damned if these tone controls aren't really stepped attenuators! For some reason I thought they were just clicky pots, but the pictures don't lie. Cool.

Even disassembled, the shaft on the damaged control requires enormous effort to turn. There must be a bushing or bearing at the front that is very cranky. I should be able to sub any old control with the same package, now that I know how they go together. Assuming the carbon isn't damaged.
 

Attachments

  • IMG_2793.jpg
    IMG_2793.jpg
    111.6 KB · Views: 59
  • IMG_2792.jpg
    IMG_2792.jpg
    132.5 KB · Views: 49
  • IMG_2791.jpg
    IMG_2791.jpg
    161 KB · Views: 54
  • IMG_2790.jpg
    IMG_2790.jpg
    132 KB · Views: 52
  • IMG_2789.jpg
    IMG_2789.jpg
    80.8 KB · Views: 55
Darn shame. I feel your pain, but as a couple of fellas have said.....'that thar tractor is a'fixable'....!
I too have had worse..............good job on the straightening out!
Funny thing is......WHEN you have fully fixed such a damaged beast.....pride of ownership goes through the roof! Enjoy!
 
FYI: I have a 1250 chassis (so does Mark) and tone board parts as well. and other misc 1250 parts. Just in case.

John M
 
I've got the seized tone control out and apart and it's still seized. And I will be damned if these tone controls aren't really stepped attenuators! For some reason I thought they were just clicky pots, but the pictures don't lie. Cool.

Even disassembled, the shaft on the damaged control requires enormous effort to turn. There must be a bushing or bearing at the front that is very cranky. I should be able to sub any old control with the same package, now that I know how they go together. Assuming the carbon isn't damaged.

I have had a Kenwood and a Sony with stepped attenuators that almost felt "welded". I speculate its just dried lubricant remnants.

I drop them in my ultrasonic cleaner. (Yes. that's cheating)

Or, dissasemmble, and use a light oil soak overnight. I used a touch of deoxit once cleaned, and synthetic oil for the bearing. I stand the attenuator shaft, "up" and drop one drop of oil at the shaft and bushing junction. I let capillary action pull it in, and wipe off the excess.

I have resurrected every one.
 
A few tips:

Stuck pot...

I made this little procedure to fix a set of stuck pots on a Realistic STA-180. It may work for this..

Bent parts...

I had a really bad streak of receiving things in shipping that came up bent or damaged. On one part the face plate was really messed up. A guy at work had some body work tools. Using a dead blow hammer, a wooden block and a sand bag he was able to straighten it out to the point where you could hardly detect it.
 
Last edited:
Sand bag for backup of the plate, wood block for the striking side and dead blow hammer for the energy input.

Sand bag is critical. Metal rebounds, so onto a flat - non yielding surface won't bend far enough to rebound TO flat.
 
Last edited:
Thanks for the chassis offers. I believe I can get this one straightened well enough. I'm hesitant also because a full swap looks like a giant PITA!

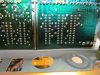
Found some more damage tonight. The second PS on the bottom, PCB is cracked. I could fix it with a couple jumpers and epoxy but I would never be happy about it, not on this machine anyway, so I will be looking for a board. I can't imagine this is a popular board so most parts units should have one?

I will have to pull the transformer as well, at least enough to get the cover off so I can repaint it. Fair amount of corrosion. I don't think I have ever been that deep inside an SX-1250, but oh well, in for a penny.

It's funny how a disassembled monster like this manages to take over every available flat surface. :)
 

Attachments

  • IMG_2795.jpg
    IMG_2795.jpg
    120.5 KB · Views: 75
  • IMG_2796.jpg
    IMG_2796.jpg
    62 KB · Views: 73
  • IMG_2798.jpg
    IMG_2798.jpg
    72.4 KB · Views: 75
I took some random whacks at the chassis with a dead blow and a few different pieces of wood and finally a screwdriver in the fold. It's closer but not quite there yet. I am pretty sure it can be salvaged now, though.

I found that headphone connector took it pretty hard in "the event", I may just swap that out rather than try to straighten it.
 

Attachments

  • IMG_2799.jpg
    IMG_2799.jpg
    74.3 KB · Views: 53
  • IMG_2805.jpg
    IMG_2805.jpg
    50.6 KB · Views: 46
  • IMG_2802.jpg
    IMG_2802.jpg
    46.8 KB · Views: 39
  • IMG_2803.jpg
    IMG_2803.jpg
    58 KB · Views: 50
As recommended I tried lubricating the siezed bass control and it has started to improve. I grabbed something out of my toolbox, Hoppes 9, because it has a needle applicator which made it easy and clean to apply. I added a bead around the top of the bushing, basically right below the spline, and worked it in five or six times so far with a definite reduction in turning force.

It looks like this is gun oil though, and I can't remember when or where I got it. Could this be a problem? Some kind of chemical incompatibility or something? I'm going to DeOxit the gold contacts on the wafers and the fingers with a cotton swab separately while it's apart, but I wonder if this oil could muck things up.

Intersting, I just realized that DeOxit Gold is the correct application here, not FederLube, because these are actually stepped attenuators with no carbon wipers.
 
I'd be trying PB Blaster, but if the Hoppes is making progress, perhaps you're doing well enough.
 
Reassembled and reinstalled the siezed control. It can now turn by hand but still needs a lot more force than the others. Not sure I how I feel about that, but it's in there and working (tested with DMM) for now. Can always go the PB Blaster route later, if I can find my can of it...

On to the flat amp. I was just about done, replacing the two 2SA725s when I found a crack in the board right below them. Super!! It's not a bad crack but it's in a terrible spot with high part density and the +/-25V plus audio out wires right there in the way on the back side. It's hard to tell visually if the traces are actually broken. My plan is to put some epoxy down on the component side and redrill the holes after it dries, then jumper any potentially impacted traces on the back.
 

Attachments

  • IMG_2811 - Copy.jpg
    IMG_2811 - Copy.jpg
    91.6 KB · Views: 57
Last edited:
That wasn't too bad. Once I mapped the cracked onto the traces, it shows no traces interrupted. The extra lead length of the replacement transistors can jumper the cracks to ensure a solid connection, but this crack could have presented no symptoms at all until perhaps some day it worsened.
 

Attachments

  • IMG_2814.jpg
    IMG_2814.jpg
    63.8 KB · Views: 50
  • IMG_2815.jpg
    IMG_2815.jpg
    64.2 KB · Views: 49
  • IMG_2816.jpg
    IMG_2816.jpg
    67.4 KB · Views: 53
  • IMG_2818.jpg
    IMG_2818.jpg
    97.6 KB · Views: 47
So. Much. Painting.

This one had the worst electrolytic leak I have yet seen. The bottom panel was badly corroded so I had to paint the inside as well as the outside. It also needed some hammer work to make the flat parts flat again, like everything else on this receiver...
 

Attachments

  • 20150902_000233.jpg
    20150902_000233.jpg
    47.9 KB · Views: 60
  • 20150902_000227.jpg
    20150902_000227.jpg
    40 KB · Views: 63
  • 20150902_000222.jpg
    20150902_000222.jpg
    58.8 KB · Views: 65
  • 20150902_000219.jpg
    20150902_000219.jpg
    51.6 KB · Views: 62
  • 20150901_215307.jpg
    20150901_215307.jpg
    57.4 KB · Views: 60
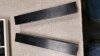
Prep more for painting, sigh... I filed the sharp edges off the end blocks and intend to reinstall them flipped to expose the "good" side.
 

Attachments

  • 20150902_001106.jpg
    20150902_001106.jpg
    49 KB · Views: 53
  • 20150902_002257.jpg
    20150902_002257.jpg
    54 KB · Views: 51
  • 20150902_004354.jpg
    20150902_004354.jpg
    48.1 KB · Views: 49
  • 20150902_004401.jpg
    20150902_004401.jpg
    53.4 KB · Views: 62
Back
Top Bottom