Follow along with the video below to see how to install our site as a web app on your home screen.
Note: This feature may not be available in some browsers.
The move to the new server is done. There are some software and database maintenance updates in process. This has us passing the hat around to help out. We appreciate any donations. Seriously, even a dollar helps. The payment page may be found here - https://www.audiokarma.org/support.html
Your only likely option would be to find a donor unit that has that switch. I believe it was used in several models.
Panasonic part number esa2682
Some discussion: http://www.elektroda.pl/rtvforum/topic2458012.html
I am going to attempt a repair I have a strip of .004" inch thick stainless steel shim stock that I've cut to .080" inch wide. This matches the inside strip of steel that rotates on the sprocket on the input selector switch. This will be drilled with a small diameter drill to match the cut outs in the original inside band that the teeth of the sprocket engage into. If this works then I just need to join this new section to the old section. I am not going to try to run the internal strip within the outside band. I may just cut small slots in the pvc outer jacket and use this as a guide. I will report in as I move along. I was thinking of soldering a 3 pole 5 Way function switch on the inut selector switch where the sprocket wheel is...then I would have to hardwire over to the circuit board.
Alps used to manufacture heaps of bowden cable operated switches. How many positions on the input rotary selector and how long is it? I may have one you can use.
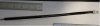
made up new inner band with appropriate openings for sprocket teeth in selector switch to engage in to. Well my main man Rick in the model shop fab'd it up. Pretty precise work with ø.046" holes on .093" centers. Only have .017" left of material on either side of the .046" holes. the new section has been assembled in to the selector switch and it operates correctly.
just need to join the old section with the new section.
Attachments
new section of actuator cable shrunk.jpg
56.7 KB
· Views: 128
new section of cable in input selector switch shrunk.jpg
The input selector remote cable repair works. I did not slide the inner band inside the outer band. I am just using the flat PVC jacket. The jacket was about 1/2" short which allowed the inner band to move so I used a piece of shrink tubing to create a continuous outer jacket and the switch operates correctly.
I tested the amp with headphones and have sound.
I checked the transistor rail voltages and measured 55VDC.
But am not getting any sound....no sound...not even a hiss.
So I am going to check if the speaker relay Panasonic SSY99-1 Relay is allowing the output to pass to the speakers.
If I wanted to replace this relay with a new one any suggestions on alternative?
If I remove it off the board can the cover be removed and the contacts cleaned?
soldered speaker selection relay back on to the speaker impedance board. The amp is now operating. Sounds good cant wait to get a decent set of speakers on it. Really excited about this amp...considering it was a freebie.
I am going to attempt a repair I have a strip of .004" inch thick stainless steel shim stock that I've cut to .080" inch wide. This matches the inside strip of steel that rotates on the sprocket on the input selector switch. This will be drilled with a small diameter drill to match the cut outs in the original inside band that the teeth of the sprocket engage into. If this works then I just need to join this new section to the old section. I am not going to try to run the internal strip within the outside band. I may just cut small slots in the pvc outer jacket and use this as a guide. I will report in as I move along. I was thinking of soldering a 3 pole 5 Way function switch on the inut selector switch where the sprocket wheel is...then I would have to hardwire over to the circuit board.