• The move to the new server is done. There are some software and database maintenance updates in process. This has us passing the hat around to help out. We appreciate any donations. Seriously, even a dollar helps. The payment page may be found here - https://www.audiokarma.org/support.html

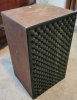
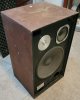
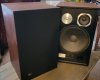
That JBL Walnut finish

A palm sander works fine.

If you are taking the aggressive step to strip them entirely, you will need at least three coats of Danish oil.

Not sure about stripping. Wood-guys can offer a better answer. If the original finish is just oil, it's not like you need to strip varnish. I can't see yours in the flesh but I think I'd be tempted to just start with the worst panel (top) before getting that aggressive with the sides. If you're ready to strip them, why not see what you can do without that step. You can always strip them later.
:dunno:

JBL black paint can best be duplicated using KRYLON® 1613 Industrial ACRYLI-QUIK™ Semi-Flat Black Acrylic Lacquer Paint. You used to be able to buy this anywhere but it is no longer available through normal consumer outlets. I ordered a dozen cans when I found several sources for KRYLON® 1613 Industrial ACRYLI-QUIK™ Semi-Flat Black Acrylic Lacquer Paint. It dries quickly, blends nicely, and can be recoated within minutes. When I was restoring m L100s, the available consumer equivalent—once I ran out of my old cans—took forever (days) to dry and the finish wasn't up to par. I won't use anything else.

Good luck and let us know how it goes.
 
Thanks again for advice, guys -

Yeah, definately can't undo stripping so think I'll take your advice on that to avoid potential damage. Also, thanks for tip on JBL Black. Guess I lucked out as think I found on Amazon. Ironically, I've also got a pair of L100s I'm eventually going to restore but they are in very rough shape with water damage + will require re-coning so having to save up as will cost a touch more than some paint and oil :(.

Can't wait to start and will definately post before & after pics once finished. Once done, will have to address the grills (one is busted and considering custom solution)

Final question - Should the Natural, Medium Walnut, or other Watco Oil be used?

Thanks again!
 
I do this stuff for a living. A palm sander will leave swirl marks no matter what. Avoid!

Using stripper is the only way to get off whatever the original finishing product was, which includes oil products, in addition to whatever else has found it's way onto the cabinets. Removing any finish/crud is important because oxalic acid is not effective otherwise.
 
Last edited:
I do this stuff for a living. A palm sander will leave swirl marks no matter what. Avoid!
That may very well be the case . . . if you stop at 150-grit paper! And yes, we know sanding with the grain is the proper method.

Can't help with the stripper discussion because never have I ever had to strip a JBL, and I have over a dozen pair dating back to 1957. I will repeat that if you obtain decent results NOT stripping and you still aren't happy, then you can strip knowing the alternative. These processes cannot be done in reverse order.
 
After 40+ years in business I'm very comfortable stating powered sanders should never be used on anything you value no matter what grit you use. I have fixed too many of those issues.

Decent results? Maybe if there were no black marks, which is not the case here.

Really not sure what your issue is with using stripper other than you've never used it and seem to be under the impression it will somehow cause damage, which is utter nonsense.
 
Thanks guys -

At the risk of potentially damaging the veneer beyond repair, I'm going to attempt not using stripper at first and only go down that path based on initial results. I'll definately post full steps with pics once done for others to reference in the future. Hoping to have supplies in by the weekend, but haven't ordered the oil yet as not yet sure if which color would best replicate original finish. Leaning towards Light Walnut as would prefer a slightly darker finish.
 
You CANNOT damage the veneer by using stripper, especially not that citrus stuff.

I'm really left wondering why I bother to help provide professional advice here, so I believe I will no longer do so.
 
I'm more than happy to strip first and not trying to invalidate your experience. Honestly I've been burnt before when asking for advice on such things so was just trying to take the safer approach - especially since reversible. I want to do it correctly, though; so will happily strip first. I've researched people recommending leaving Citristrip on anywhere from 10 minutes to 24 hours covered in Saranwrap then removing it using every tool imaginable. What would you recommendation be for stripping the veneer using this product?

Thanks
 
Hey Guys -

Just finished this afternoon. While I know it's no professional job, it's definately an improvement in my opinion. Before & afters below followed by procedure performed if it helps anyone in the future. Thanks to all for the advice! Hope to do my L100's once I save up a ton of money :)
166-3.jpg 166-4.jpg 166-1.jpg 166-2.jpg
166-5.jpg

Procedure
  1. Removed all components
  2. Removed stuffing
  3. Cleaned inside with oxyclean + water mixture with immediate drying - didn't soak it and dried with cloth immediately afterwards (smelled like old mildewed boat)
  4. Installed new caps + tested and cleaned all drivers - Even 3D printing custom adapter to put tweeter on makeshift lathe to regrind silver which was tarnished
  5. 3D printed (resin) & painted new JBL badges (was missing one and other was in poor shape
  6. Removed foil badges with heat gun & scraper - cleaned
  7. Filled in holes and such in front / back
  8. Stripped veneer using Klean Strip Stripper. Let it sit about 45 minutes
  9. Bleached wood using Oxalic Acid + water mix. Had to scrub troublesome areas with 0000 steel wool. Rinsed thoroughly then dried with towel then let dry overnight.
  10. Drilled 10mm holes and installed 2 10mmx3mm (6mm depth total) magnets into each (They stick out of front 3mm) using mixed epoxy
  11. Sanded starting with 150 followed by 220 with grain + front and rear by hand (no block)
  12. Masked then painted front / rear with K01613A07 Acryli-Quik Lacquer Semi-Flat Black - 4 light coats
  13. Removed masking and applied 3 coats of Light Walnut Watco Danish Oil (65551)
  14. Fought to keep 2 dogs, 3 year old boy and 5 year old girl away from them
  15. Filled each cabinet with 16oz of Fairfield Poly Fil Premium Fiber Fill
  16. Reassembled
  17. Removed old grills from frame (One was half missing the other in rough shape
  18. Drilled holes and installed the same 2 10mmx3mm (6mm depth total) magnets into each which also stick out 3mm each (triple checking that polarity was correct) using mixed epoxy
  19. Glued premium grill cloth onto frame using 3M Super 77
  20. Made hole in grill cloth with soldering iron then installed 3D printed badges
Result is better than what I started with so I'm happy with it. Thanks again for everyone's help - I learned a ton!
 
Back
Top Bottom