• The move to the new server is done. There are some software and database maintenance updates in process. This has us passing the hat around to help out. We appreciate any donations. Seriously, even a dollar helps. The payment page may be found here - https://www.audiokarma.org/support.html

To Veneer or Not to Veneer - Impact on Value?

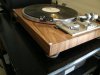
I recently restored a Pioneer P-518 for a friend and out of curiosity I checked he sold he listings on Ebay for these tables. The ones that had been veneered sold for about $200 more than those with the stock vinyl. Some of that value increase was certainly due to the restoration that had been done on the veneered tables, but clearly the veneer adds value.

If you need help just ask, I've veneered about a hundred or so.

Jon
 
I've wood veneered 2 x PL-518s, 1 x PL-518x (black hardware), and a PL-A45d. The A45d was the most difficult of course but they all looked fantastic and benefited from the reveneer. Next up is my Denon DP-1200 which has some slight peeling going on.

If you can do it right, there's no reason not too...if the table is worth it.
 
I agree with most everything said so far. I would only add this cautionary tale from my own experience - you say you're a competent woodworker, but have you ever veneered before? I had not. I have built many projects from scratch (dressers, end tables, benches, plinths, etc.) but had never veneered and decided to try my hand at it on my home-built plinth for my TD124. I was less than pleased with the results, and after a few months of looking at the monstrosity, I ended up planing the veneer off and refinishing. Apparently proper veneering requires a significant investment in the proper tools (who knew? o_O ). The veneering supply places I found on the 'net give you the option of using some short-cuts such as heat-activated glue, etc. Don't buy in to the temptation to save a few bucks. Go big or don't go at all.
 
I agree with most everything said so far. I would only add this cautionary tale from my own experience - you say you're a competent woodworker, but have you ever veneered before? I had not. I have built many projects from scratch (dressers, end tables, benches, plinths, etc.) but had never veneered and decided to try my hand at it on my home-built plinth for my TD124. I was less than pleased with the results, and after a few months of looking at the monstrosity, I ended up planing the veneer off and refinishing. Apparently proper veneering requires a significant investment in the proper tools (who knew? o_O ). The veneering supply places I found on the 'net give you the option of using some short-cuts such as heat-activated glue, etc. Don't buy in to the temptation to save a few bucks. Go big or don't go at all.
Good points. I have a pair of Celestion speakers with no veneer at all, thought I'd practice on them before taking on a more complicated project.
 
I agree with most everything said so far. I would only add this cautionary tale from my own experience - you say you're a competent woodworker, but have you ever veneered before? I had not. I have built many projects from scratch (dressers, end tables, benches, plinths, etc.) but had never veneered and decided to try my hand at it on my home-built plinth for my TD124. I was less than pleased with the results, and after a few months of looking at the monstrosity, I ended up planing the veneer off and refinishing. Apparently proper veneering requires a significant investment in the proper tools (who knew? o_O ). The veneering supply places I found on the 'net give you the option of using some short-cuts such as heat-activated glue, etc. Don't buy in to the temptation to save a few bucks. Go big or don't go at all.

I had never done veneering until about a year ago when I decided to restore some JBL's that were trashed. I went to a local hardwood supplier and they gave me 3 options

1) traditional veneering which requires elaborate clamping or hydraulic press

2) paper backed veneer that is applied with contact cement

3) heat applied veneer

Since I had some experience with plastic laminates (Formica), I decided to try option 2. So I bought a sheet of walnut (which came in a roll) and a gallon of water-based contact cement by Wilsonart.

As with plastic laminate, the pieces are cut 1/2" larger than the substrate they will be adhered to, that leaves 1/4" extra on all sides to be trimmed. The nice thing about the paper backed veneer is it can be cut with a utility knife unlike plastic laminate which needs either a handsaw or circular saw.

Tools required:

paint brush or small roller
tape measure
utility knife
straight edge (preferably metal)
sanding block


The next step is to plan which sides get veneered first. For a turntable, I would do the following:

1) back
2) sides
3) front
4) top, this will be the hardest because the corners will need to be mitered

The contact cement can be applied with a brush or roller, just make sure it's applied evenly. Both the substrate (plinth) and the veneer get a coat of cement and must dry completely before they are adhered to each other. Once applied, there is no turning back. If you screwed up and have to remove it, the only thing that will remove water based contact cement is lacquer thinner.

Do one side at a time, do not apply cement to the entire plinth. You don't want finger prints, dust , etc sticking to the cement before the next piece is applied.

Once the piece of veneer is applied to the plinth, burnish it in with the palm of your hand to ensure proper adhesion. Pay special attention to the edges, use a block of wood or small roller to make sure the edges are completely adhered. On large surfaces like a speaker cabinet, use a rubber roller.

After it is burnished in, trim the veneer with a utility knife, flush with the edges. Then use a sanding block (not power sander) with 100 grit sandpaper to make sure that the edges are perfectly flat.

Proceed to the next side.

Try it on some wood scraps first, doing adjoining sides so that you can see how it will come together. This can be done by anyone who is meticulous and detail oriented, you don't have to be a woodworker to master it. Most carpenters, especially the ham-fisted ones will have a hard time with the intricacies of the process...:)
 
Last edited:
Thanks! Just got back from woodworking store with a sheet of paper-backed walnut, contact cement and finishing tools, basically taking your approach, Malden. Noticed self adhesive veneer was twice the cost. going to tackle my speakers this weekend to get some practice in before going after a turntable plinth.
 
If you take a methodical approach, and don't rush, it should work out fine. Post some photos of your progress.

Did you get water-based or solvent-based contact cement?
 
The wood glue/iron on method is easier and you can align pieces better. Lots of info on the net. Been using this method for years on turntables, speakers, cases, etc.

Contact cement is old school, it will work, but...
 
The wood glue/iron on method is easier and you can align pieces better. Lots of info on the net. Been using this method for years on turntables, speakers, cases, etc.

Contact cement is old school, it will work, but...


but what?
 
Last edited:
but what?
Not trying to start another pissing contest with you Malden. I appreciate the time you took to explain.

As you indicated, once you place a piece down on contact cement you are screwed if it's not aligned properly. If you use the method I suggest, you can align the piece before you iron it on. If you want book-matched sides, where the grain flows over from top to match the side, that is very hard to do with contact cement and impossible if you apply the sides before you apply the top. If you want the sides to match the top you do: back, top, sides, front. Most people prefer that look.

I can't provide pictures of what that looks like because my computer is in the shop for repair, but many TT's I have veneered that way can be viewed here with a simple search. Of course, if you prefer the unmatched sides look, then that's moot.

Also, with the wood glue/iron on method it is easier to remove a piece if you screw up. Just heat again and it will come off with a scraper.

Yes, contact cement will work and I started that way and did many veneer jobs that way. IMO, the WG/IO method works better and is easier for a novice to master.

Jon
 
Like I said, paper-backed veneer and contact cement is not for the ham-fisted. You practice on a scrap, plan it out intelligently and you are good to go.

A well known fact, to those of us in the construction industry regarding heat applied veneer is that unless it is applied in a controlled, high pressure process, then sooner or later, it will fail. That is just a fact of life. You are trading durability for convenience.

Contact cement is "old school" ? Yes it is, and that is a very good thing. I have renovated numerous homes built in the 1950's and just about everyone of them had kitchens with Formica counter-tops adhered with contact cement. I have never seen contact cement that had failed, this includes the areas around the sinks where moisture gets in.

If you want long-term durability, go with contact cement. Heat applied veneer may seem more convenient at first, but once you get a hang of it, contact cement is just as easy to use.

The contact cement method is also much cheaper. A gallon of water based contact cement will be enough for probably 100 turntable plinths. Paper backed veneer also costs much less than heat applied veneer.
 
Last edited:
No rights no wrongs. Good old contact cement is for sure the best way to laminate. How do i know you ask, I was a finish carpenter for the union for 13 yrs. Have done many many high end offices and elevators. Have used every product out there. 9/10 times your piece does not have to be the correct size,allow for overhang, Practice is the only difference.
 
Not trying to start another pissing contest with you Malden. I appreciate the time you took to explain.

As you indicated, once you place a piece down on contact cement you are screwed if it's not aligned properly. If you use the method I suggest, you can align the piece before you iron it on. If you want book-matched sides, where the grain flows over from top to match the side, that is very hard to do with contact cement and impossible if you apply the sides before you apply the top. If you want the sides to match the top you do: back, top, sides, front. Most people prefer that look.

I can't provide pictures of what that looks like because my computer is in the shop for repair, but many TT's I have veneered that way can be viewed here with a simple search. Of course, if you prefer the unmatched sides look, then that's moot.

Also, with the wood glue/iron on method it is easier to remove a piece if you screw up. Just heat again and it will come off with a scraper.

Yes, contact cement will work and I started that way and did many veneer jobs that way. IMO, the WG/IO method works better and is easier for a novice to master.

Jon

Pissing contests are such fun! Can I play too?

What you describe isn't book matching. I don't know if it has a name but it's just good aesthetics to have the grain continuous on all surfaces.

Book matching is taking successive slices of veneer and then flipping one over so that, when applied side by side one appears as the mirror image of the other and produces a symmetrical pattern. This is usually done on cabinet doors and drawers and the pattern is typically repeated from drawer front to drawer front. It's also mist commonly done with veneer obtained from galls or crotch grain where the grain figure is unusual and ornate. Pictures below.

John

ScanImage03-300x223.jpg
laurel,%20california%20(myrtle)%20burl%20veneer%205%20s25%20plh.jpg
4-bubinga-qlt.jpg
 
OK, so I stand corrected on the terminology.

It's about matching the grain as you said and I meant and you understood what I meant. Perhaps call it waterfall grain matching. Aesthetically it looks better IMO.

Jon
 
Like this, and as long as we're still pissing here, nearly impossible to achieve on both sides if you follow the advice to do back, sides, top, front, in that order as was recommended by Malden.

You understand that Boreas, don't you?

Jon
 

Attachments

  • P1050481.JPG
    P1050481.JPG
    153 KB · Views: 43
Last edited:
Like this, and as long as we're still pissing here, nearly impossible to achieve on both sides if you follow the advice to do back, sides, top, front, in that order as was recommended by Malden.

You understand that Boreas, don't you?

Jon

Of course I understand perfectly, as the attached photo will show. It shows the grain wrapped around the ends and the front and back so that there is no break in the grain pattern at all. I just did this one yesterday. It's in vinyl so that I can see whether it's worth the candle to do it in real wood. I think it is so I will - but I won't tell you how I plan to do it. ;)

As to technique, it wasn't my intention, nor did I, question your choice of method. Rather it was to perhaps provide you with some new information regarding veneering, specifically book matching.

JohnPioneer PL-514 Vinyl.JPG
 
Of course I understand perfectly, as the attached photo will show. It shows the grain wrapped around the ends and the front and back so that there is no break in the grain pattern at all. I just did this one yesterday. It's in vinyl so that I can see whether it's worth the candle to do it in real wood. I think it is so I will - but I won't tell you how I plan to do it. ;)

As to technique, it wasn't my intention, nor did I, question your choice of method. Rather it was to perhaps provide you with some new information regarding veneering, specifically book matching.

JohnView attachment 925344

Sorry if I came off as snarky. That looks very good, is it a Pioneer? I really like the grain pattern of that vinyl, what brand is it? I have a pair of Paradigm mini monitors I need to recover.
I have used the Vvivid vinyl to cover some speakers. Sometimes I think a good vinyl is good enough. The vinyl wraps have gotten better and better.

Jon
 
Back
Top Bottom